CE-351
Microcontrollers, 2022 Spring IoT Temperature
Monitor
Name: Mychael Garcia Email:
mhgarcia@fortlewis.edu
Materials:
ESP-32
OLED screen
One Wire
temperature probe (DS18B20)
Rotary Encoder
3.3V / 5V power
supply
Product design and GUI features
In this project, we were to design a simple temperature device that could send
data over the internet to a webpage. In addition, we need to have the
capability to change/edit the current network connection (network and
password). This will be done by using a simple interface menu.
Task 1:
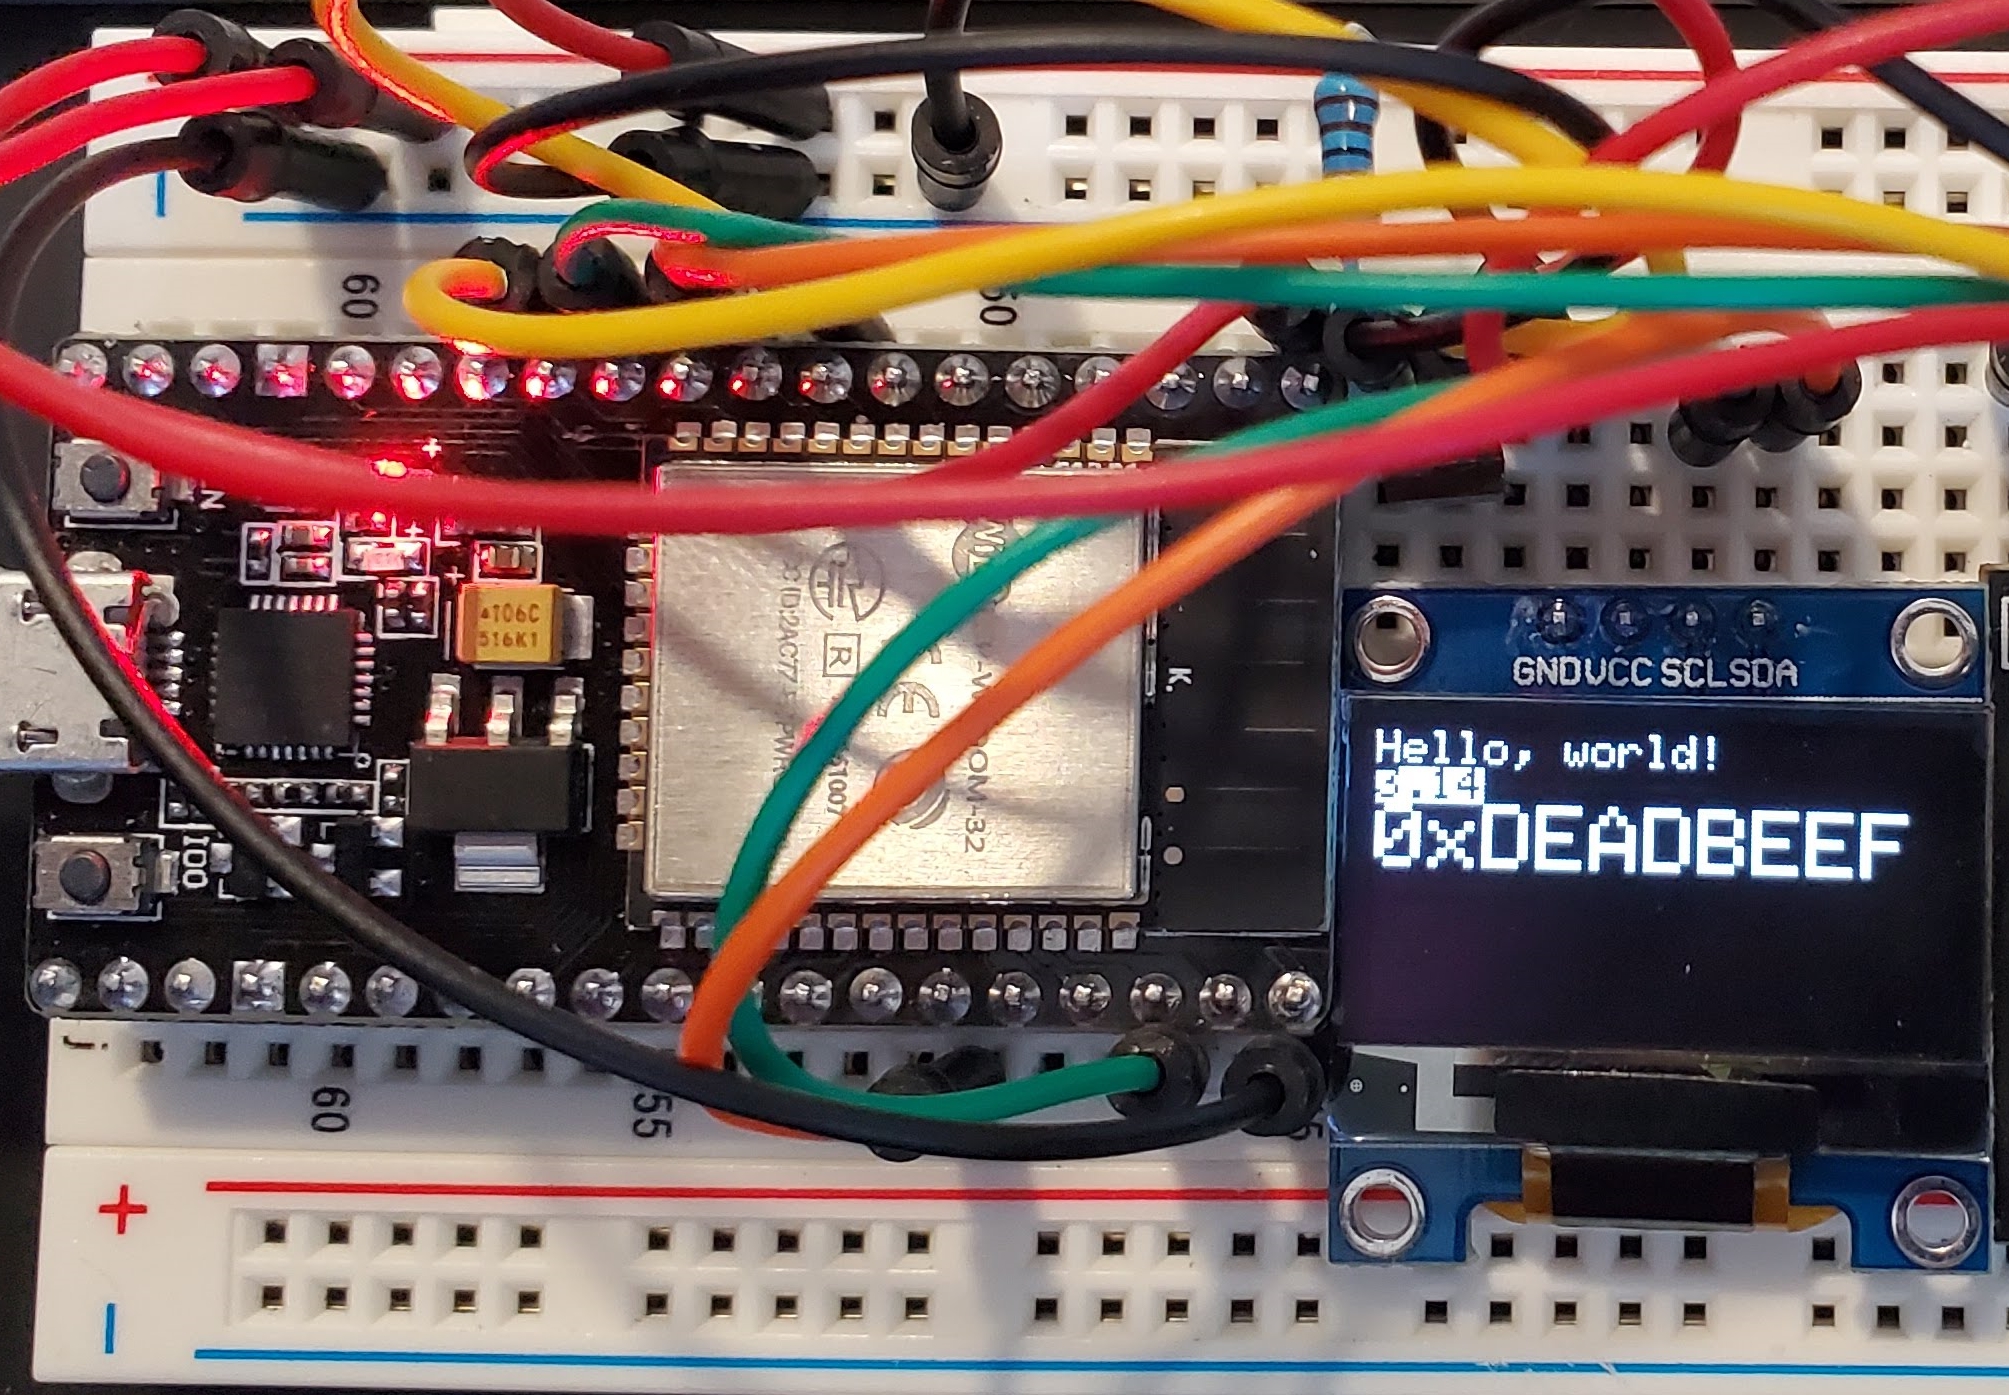
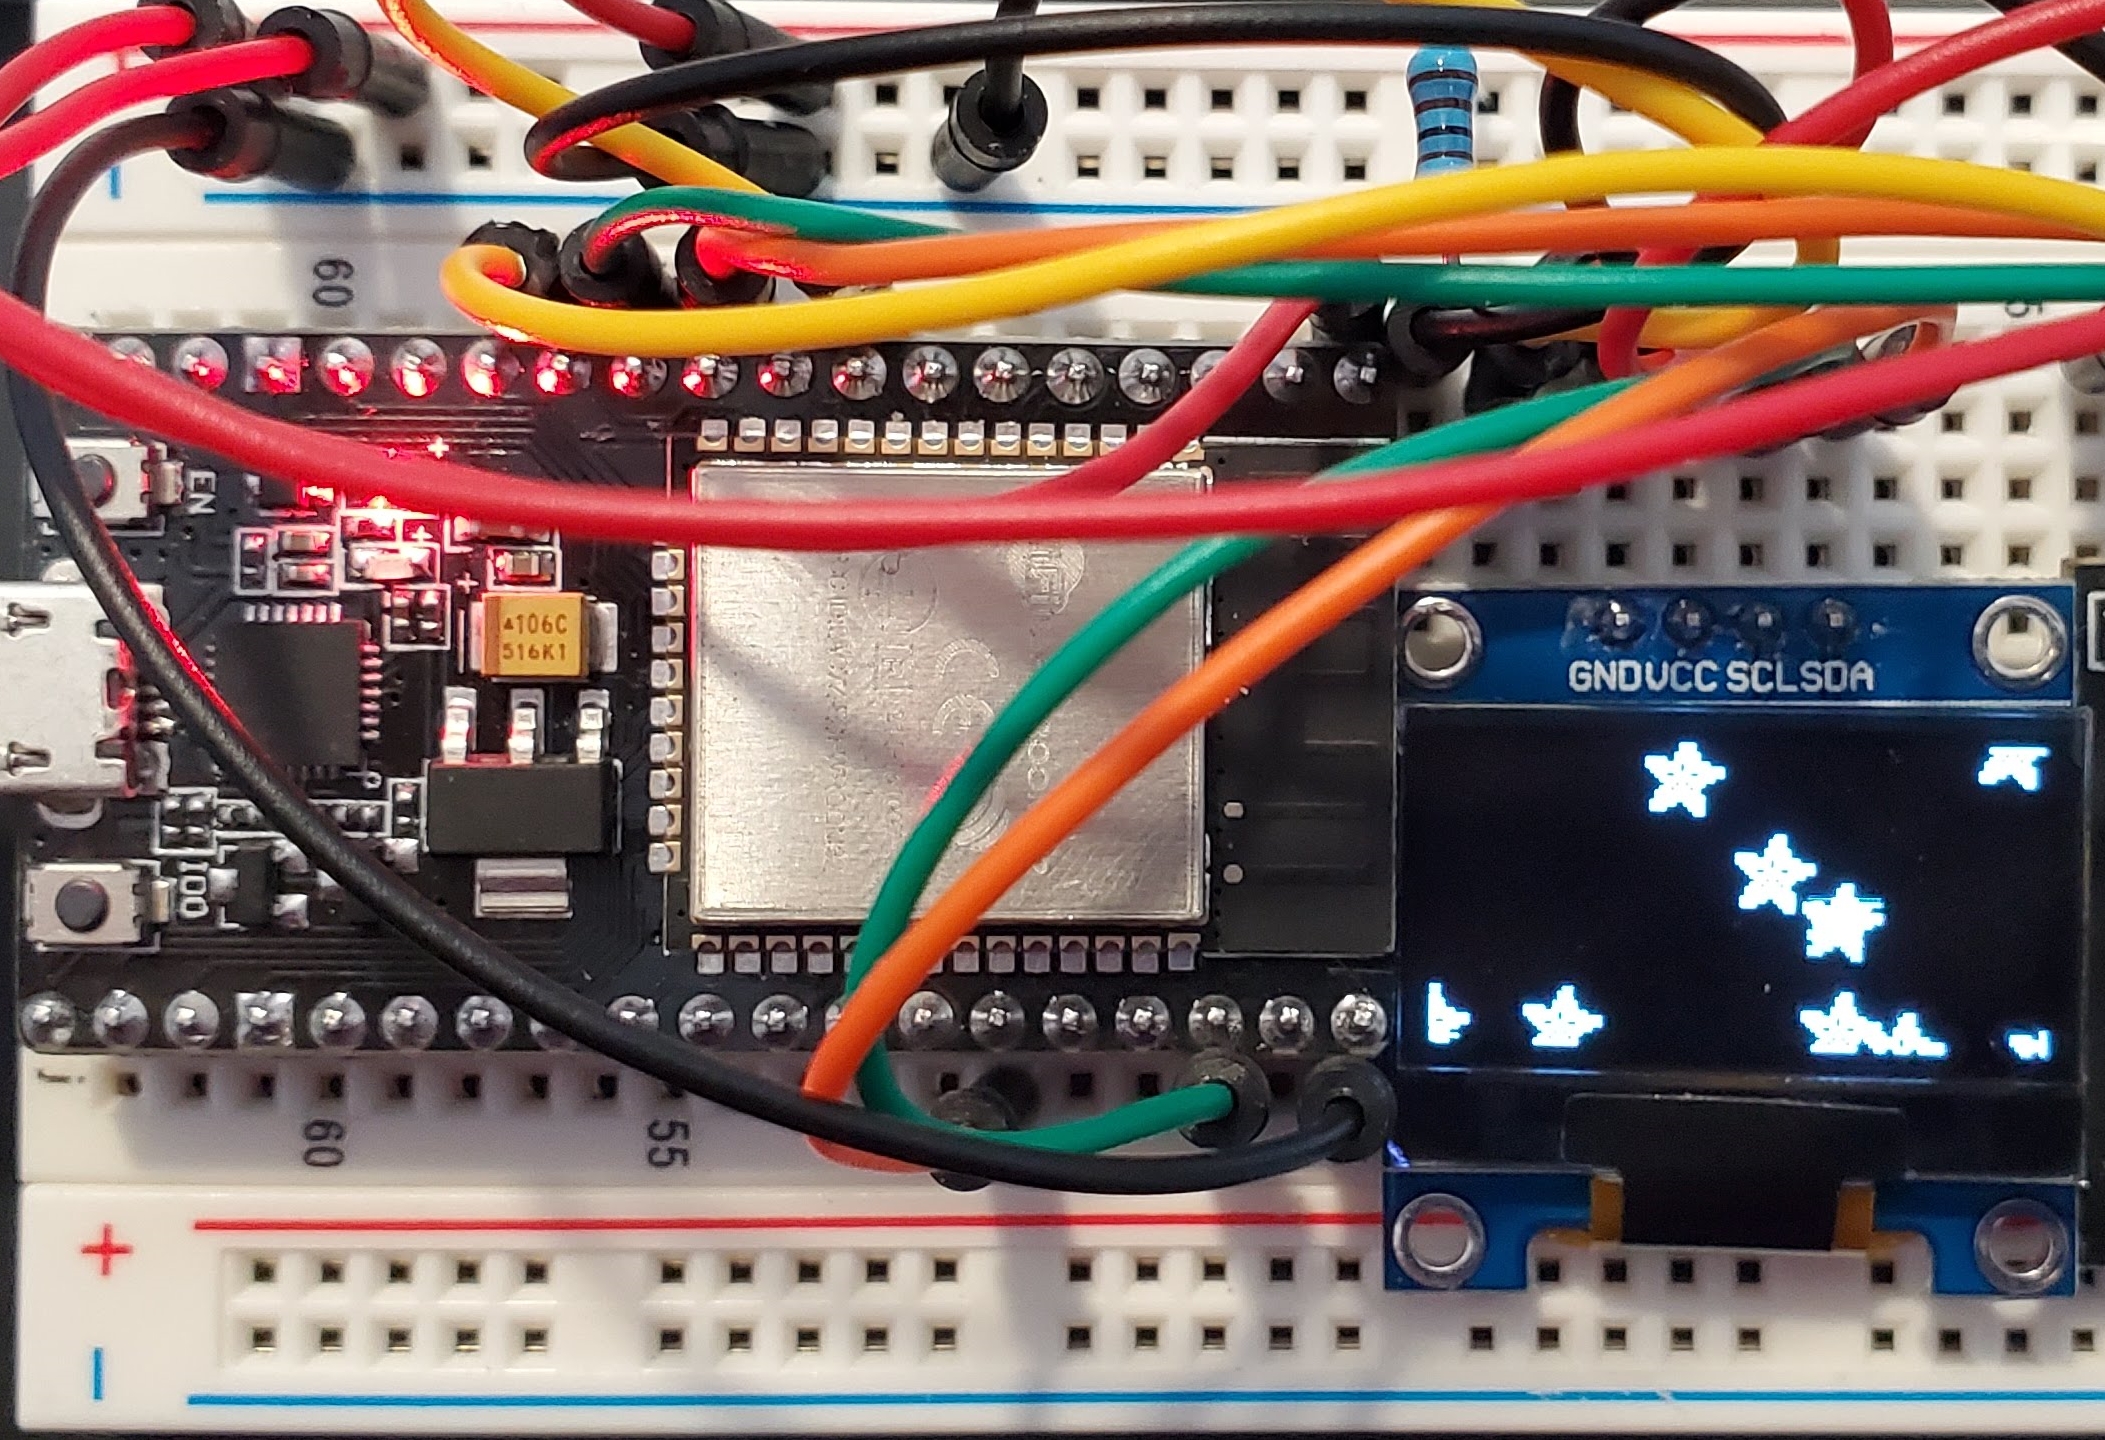
For the first task, we needed to test the OLED screen and its functionality.
Connecting the screen, we sent a simple program that would display fonts and
the sizes, some images, and a simple snowflake falling animation.
Task 2:
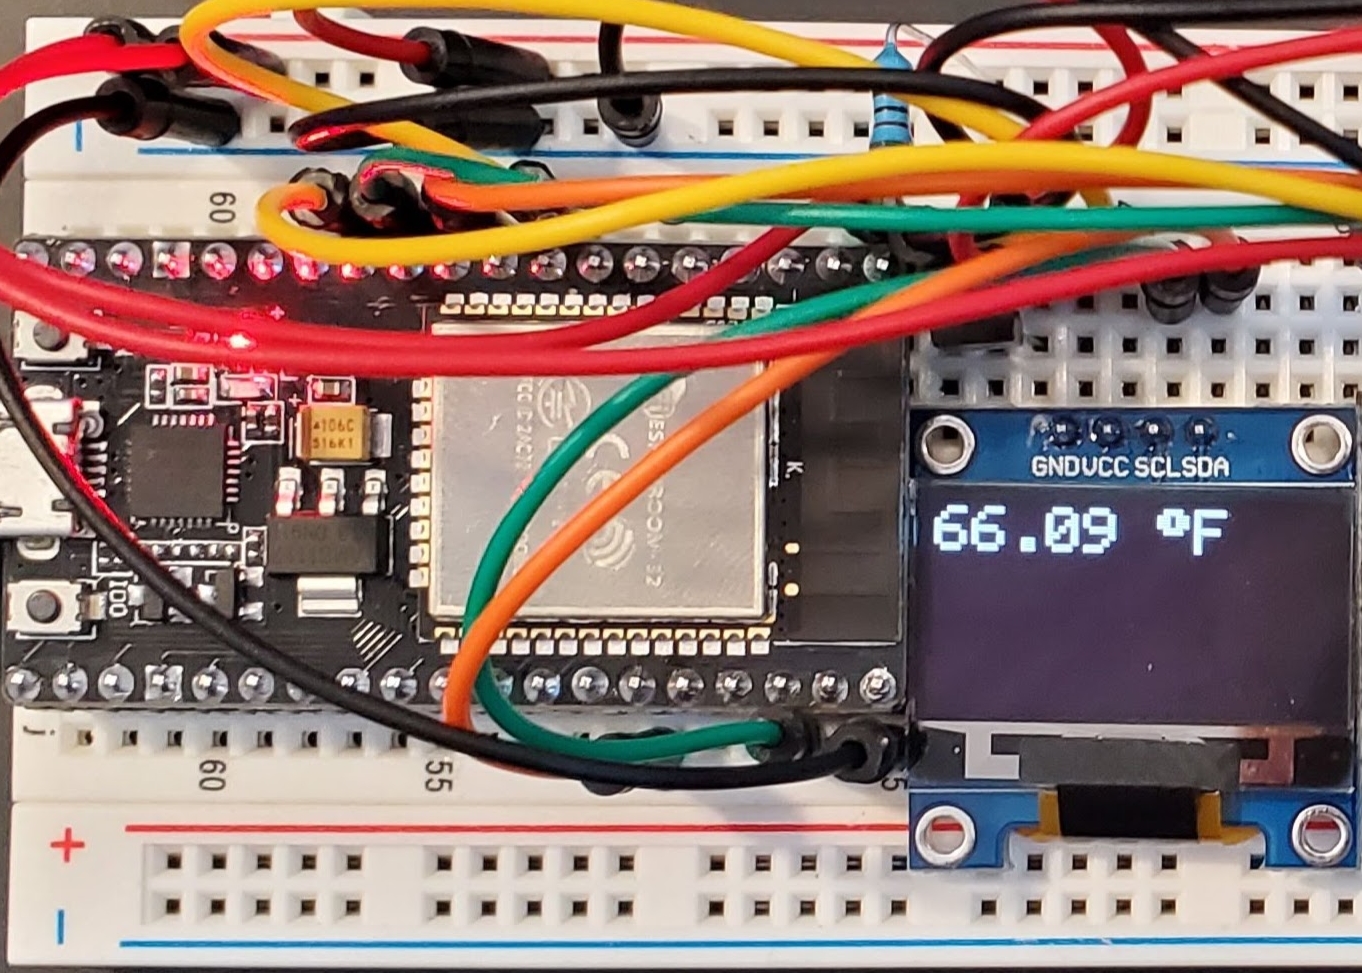
After the screen functionality was confirmed, we add the temperature probe.
This probe uses the One Wire protocol to communicate temperature readingsto
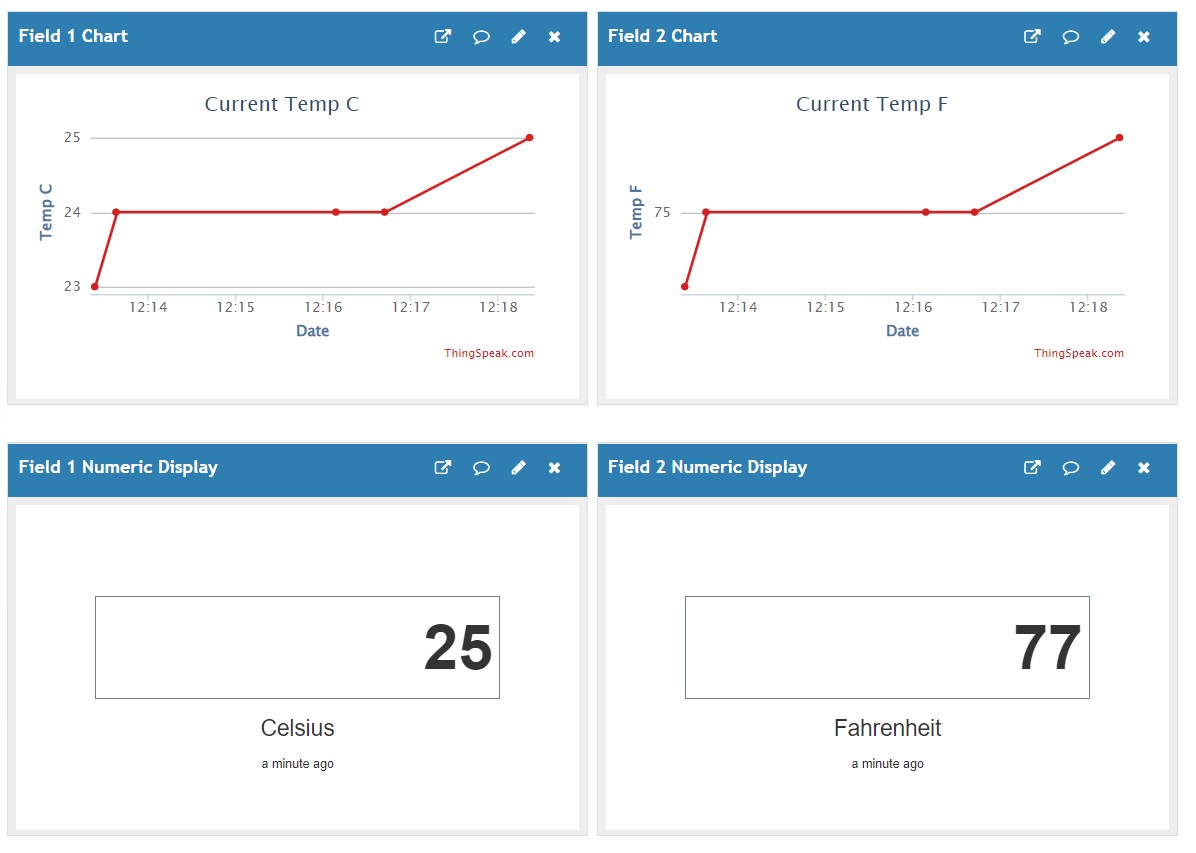
the ESP. The current temp was then sent to the OLED screen to be displayed. Task 3: Using the
temperature probe and the display we wanted to add an additional way to log and
visualize the data. The display would print real time but to monitor
changes/trends we added Wi-Fi functionality to the device so it would send the
current reading to the display and Thing Speak. This is a simple website that
is used to graph data using wireless communication. Task 4: After
the
whole system was working, we wanted to make it more user friendly. This
was
done by creating a simple interface with multiple menus to chose from.
They
could change the Wi-Fi password if needed, same with the current access
point. This was done by creading multiple if statements where the
arduino would be constantly looking for rotary encoder updates and if
it got one would display thoes chonges. after getting to each subset
menu the cursor (box outline) was placed at an initial location and
would move a single place if a rotation was noticed. This idea was
continued for each sub menue. The hardest to get running was the
password edit one. I had to build an imaginary grid for the curser to
move on but not having options to move up and down between rows was an
issue. This was solved by usng and overflow value where if the scrol
position was attemting to move off the scread it would reset
either up or down from the previous row. One unique feature i added was
current displays of user input. As you type the pasword you can see in
real time the characters you are currently selecting. Additionaly once
you leave the main temperature display screen the current wi-fi
connection will be displayed above the menue options. A link to my code
can be found here.
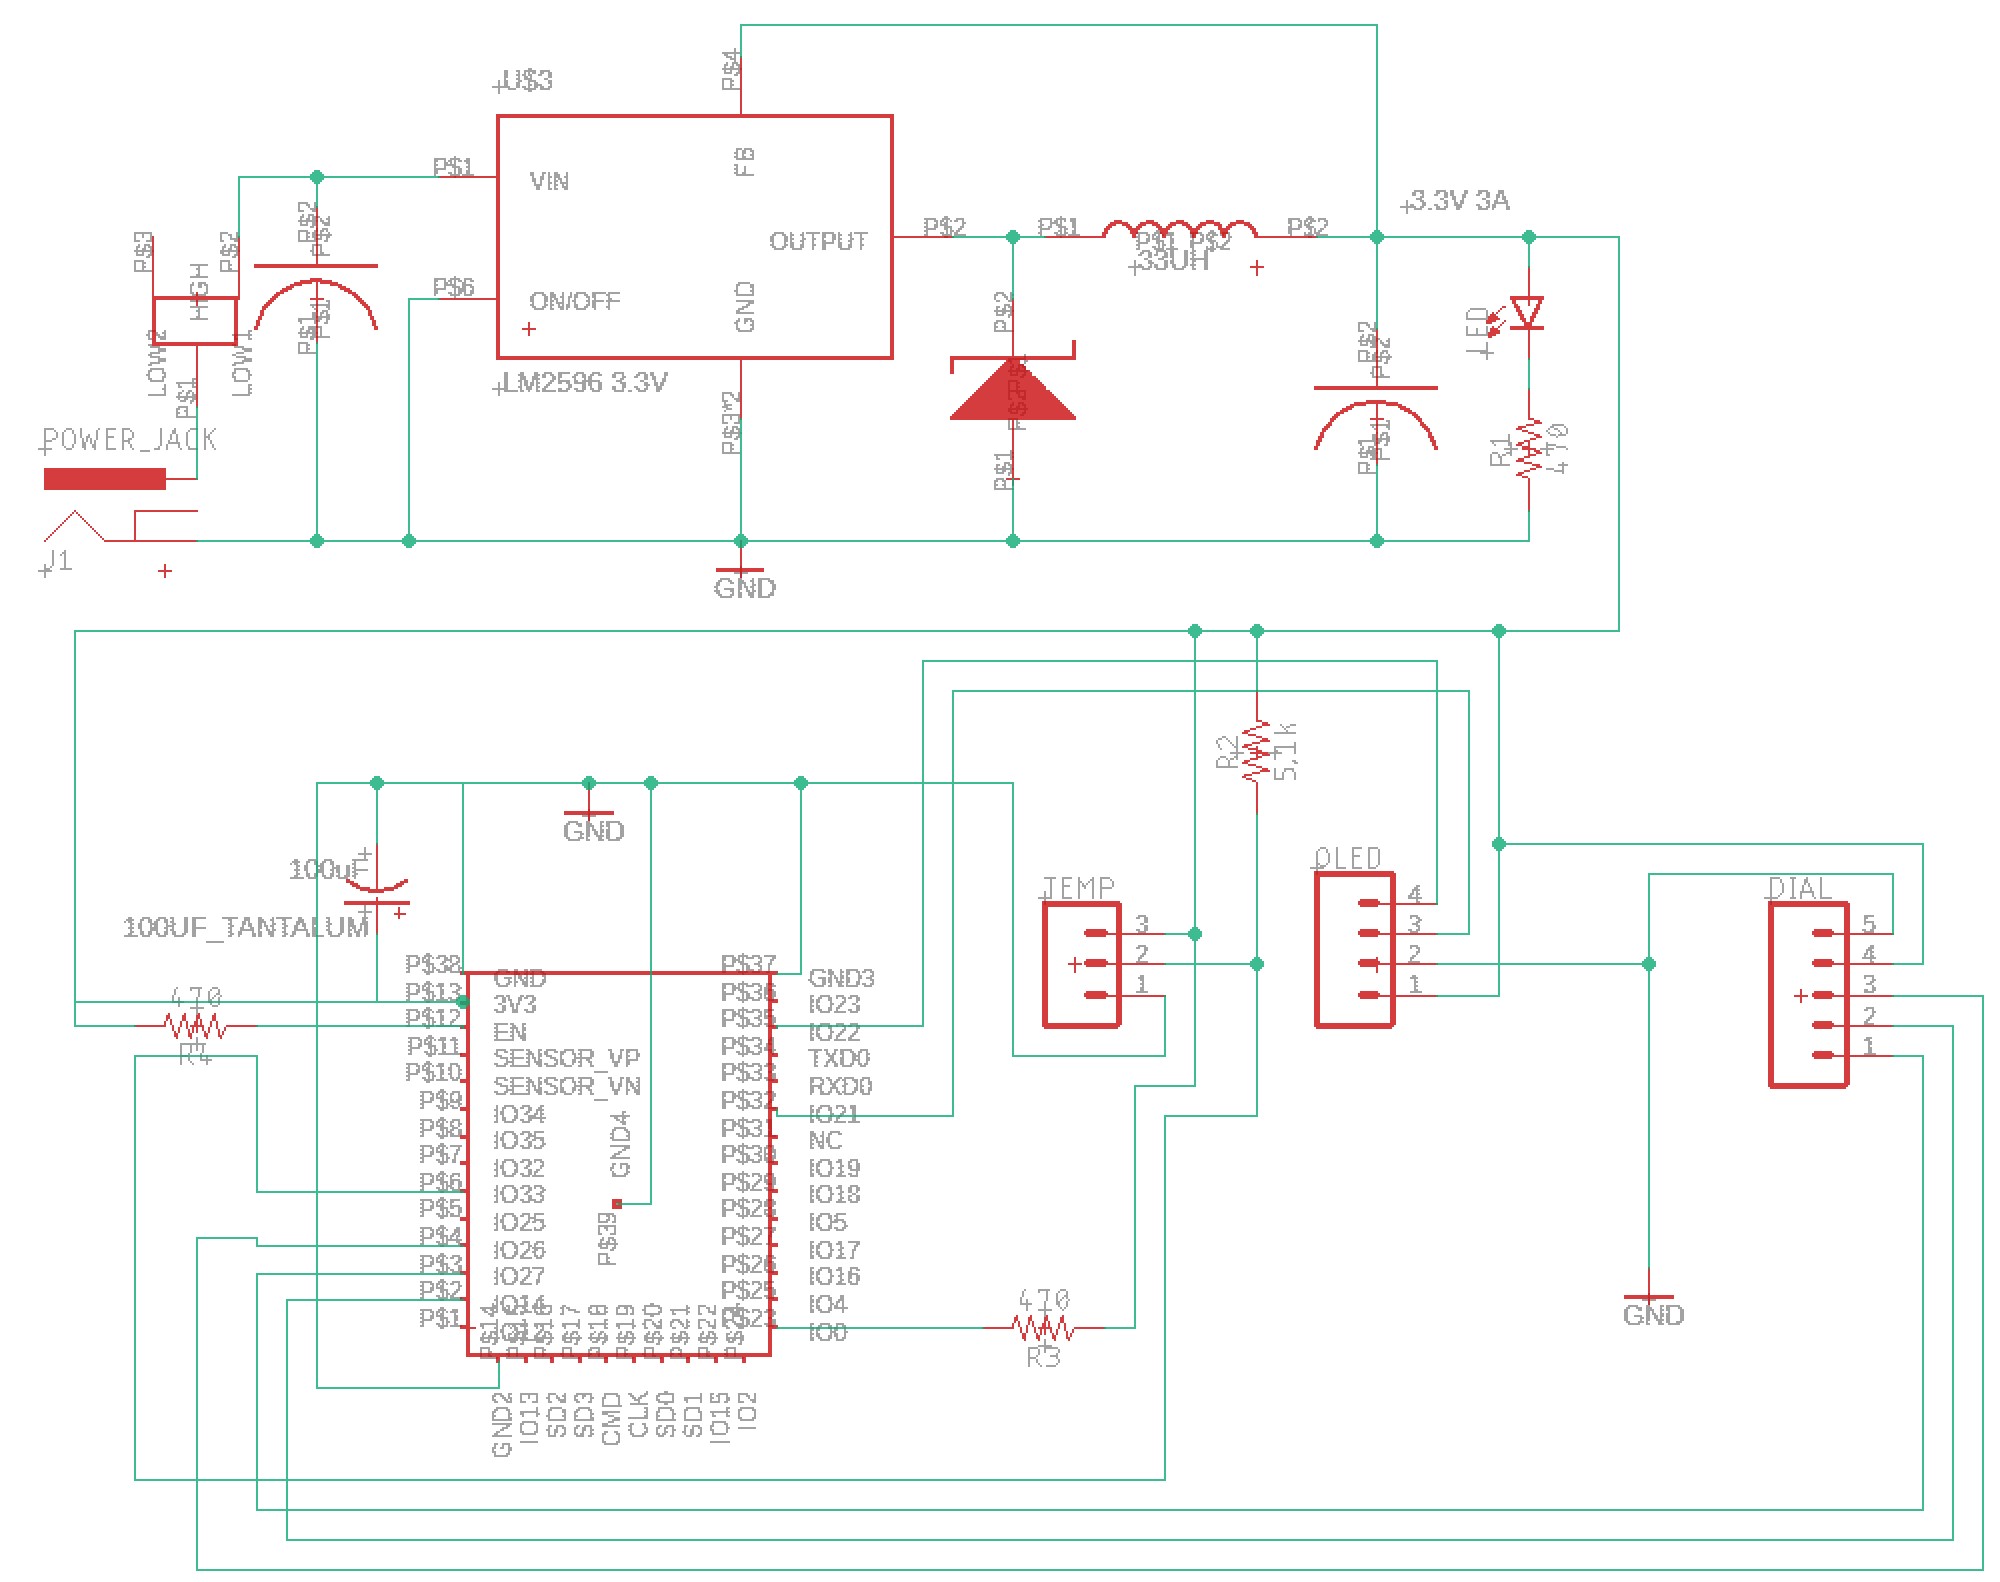
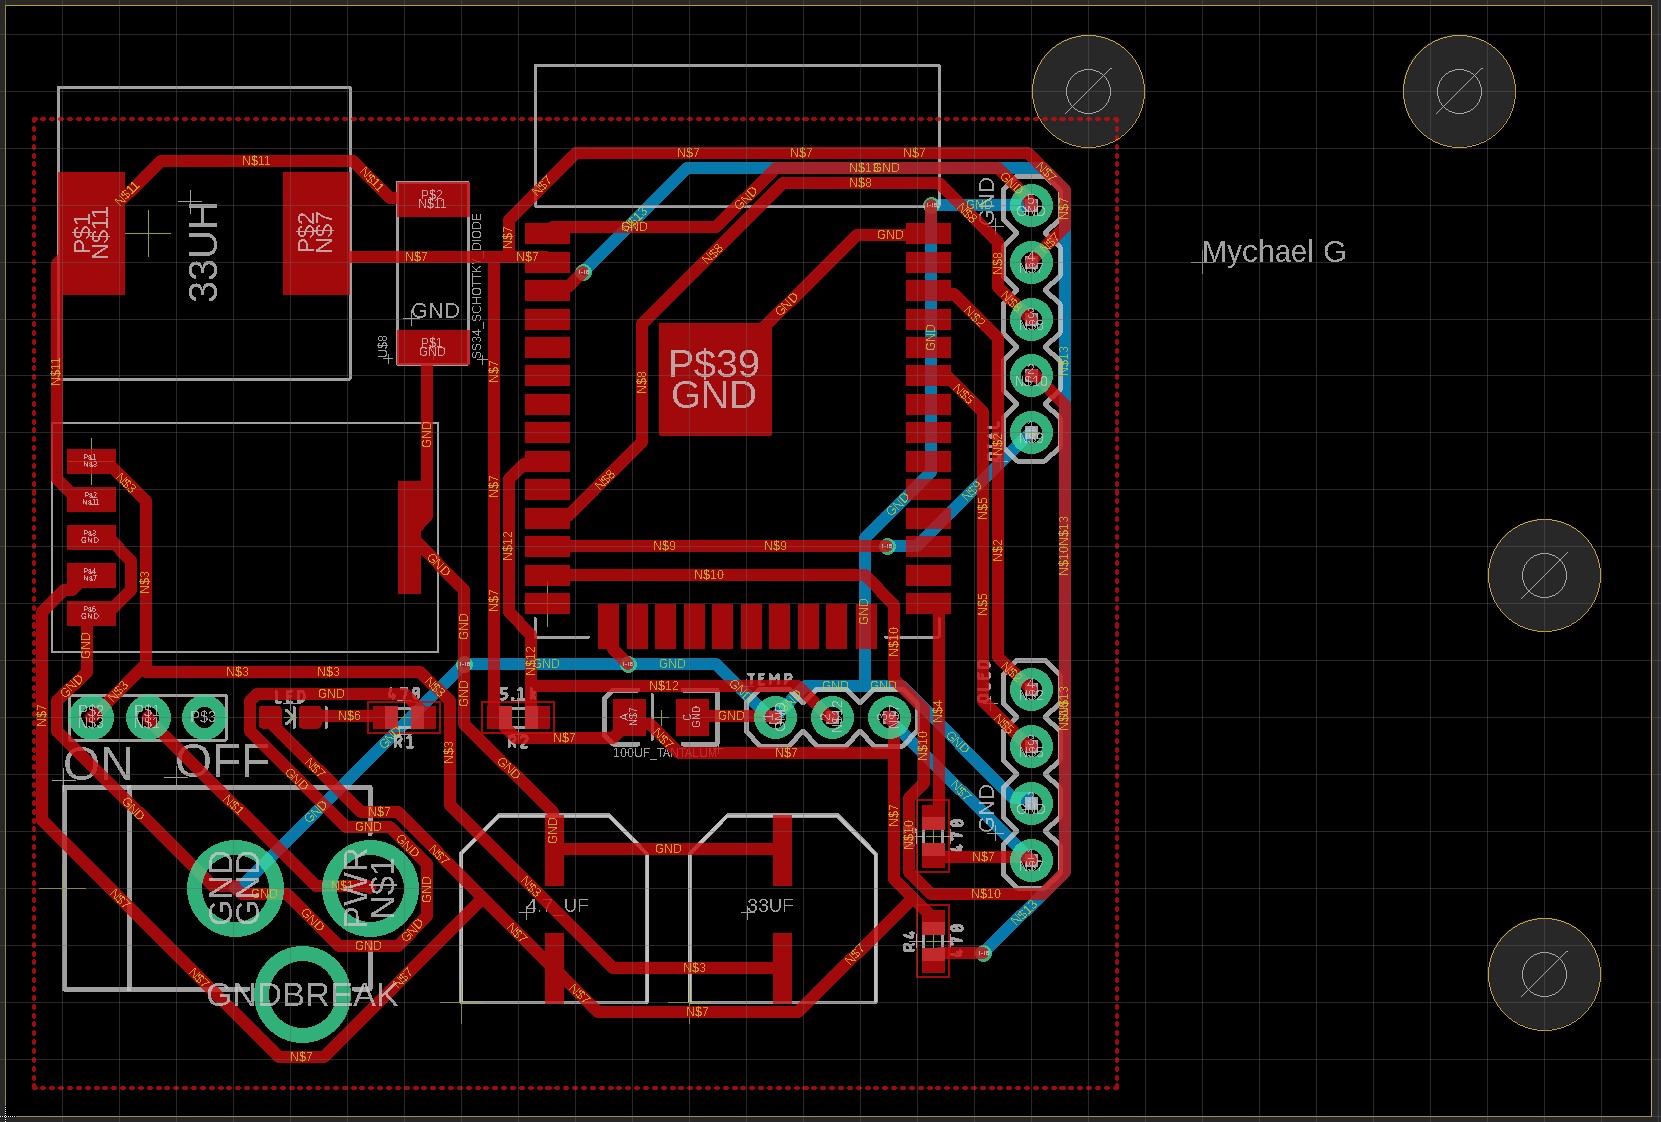
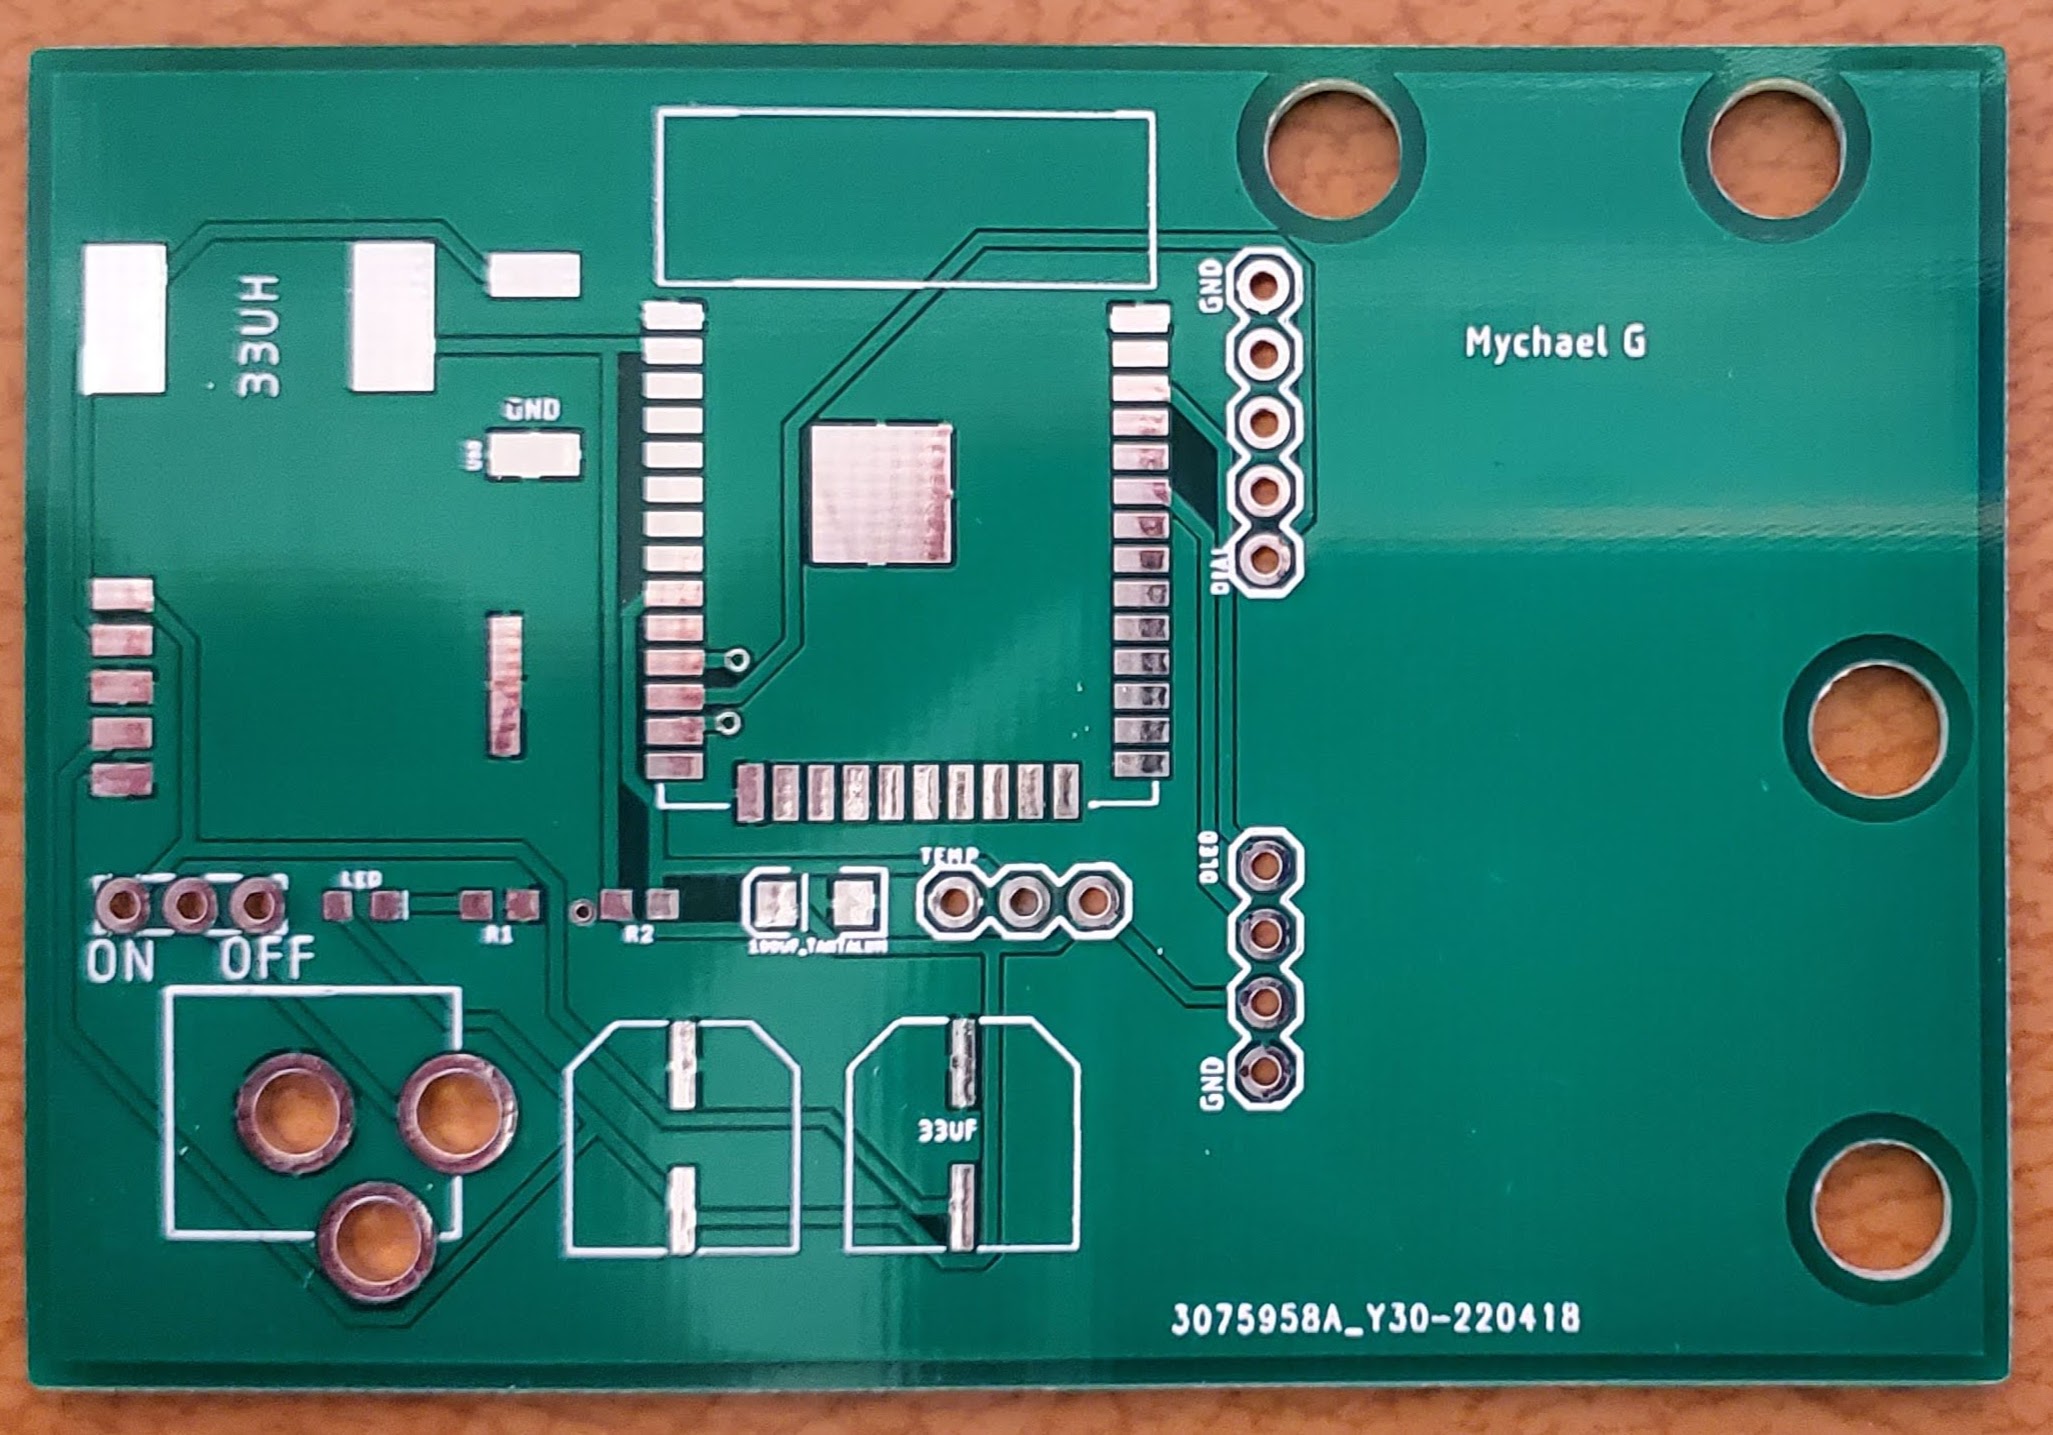
PCB: After
the full system was running on the bread board We were tasked with
making a final product on a PCB. As the ESP-32 already has the build in
oscilator and power management we just need to add headers for the 3
devices (temp sensor, OLED screen, aand rotary encoder). To power the
system I used the same schematic from the power supply lab but only the
3.3V 3A connection as thats what each device uses. The link to my PCB
file can be found here.
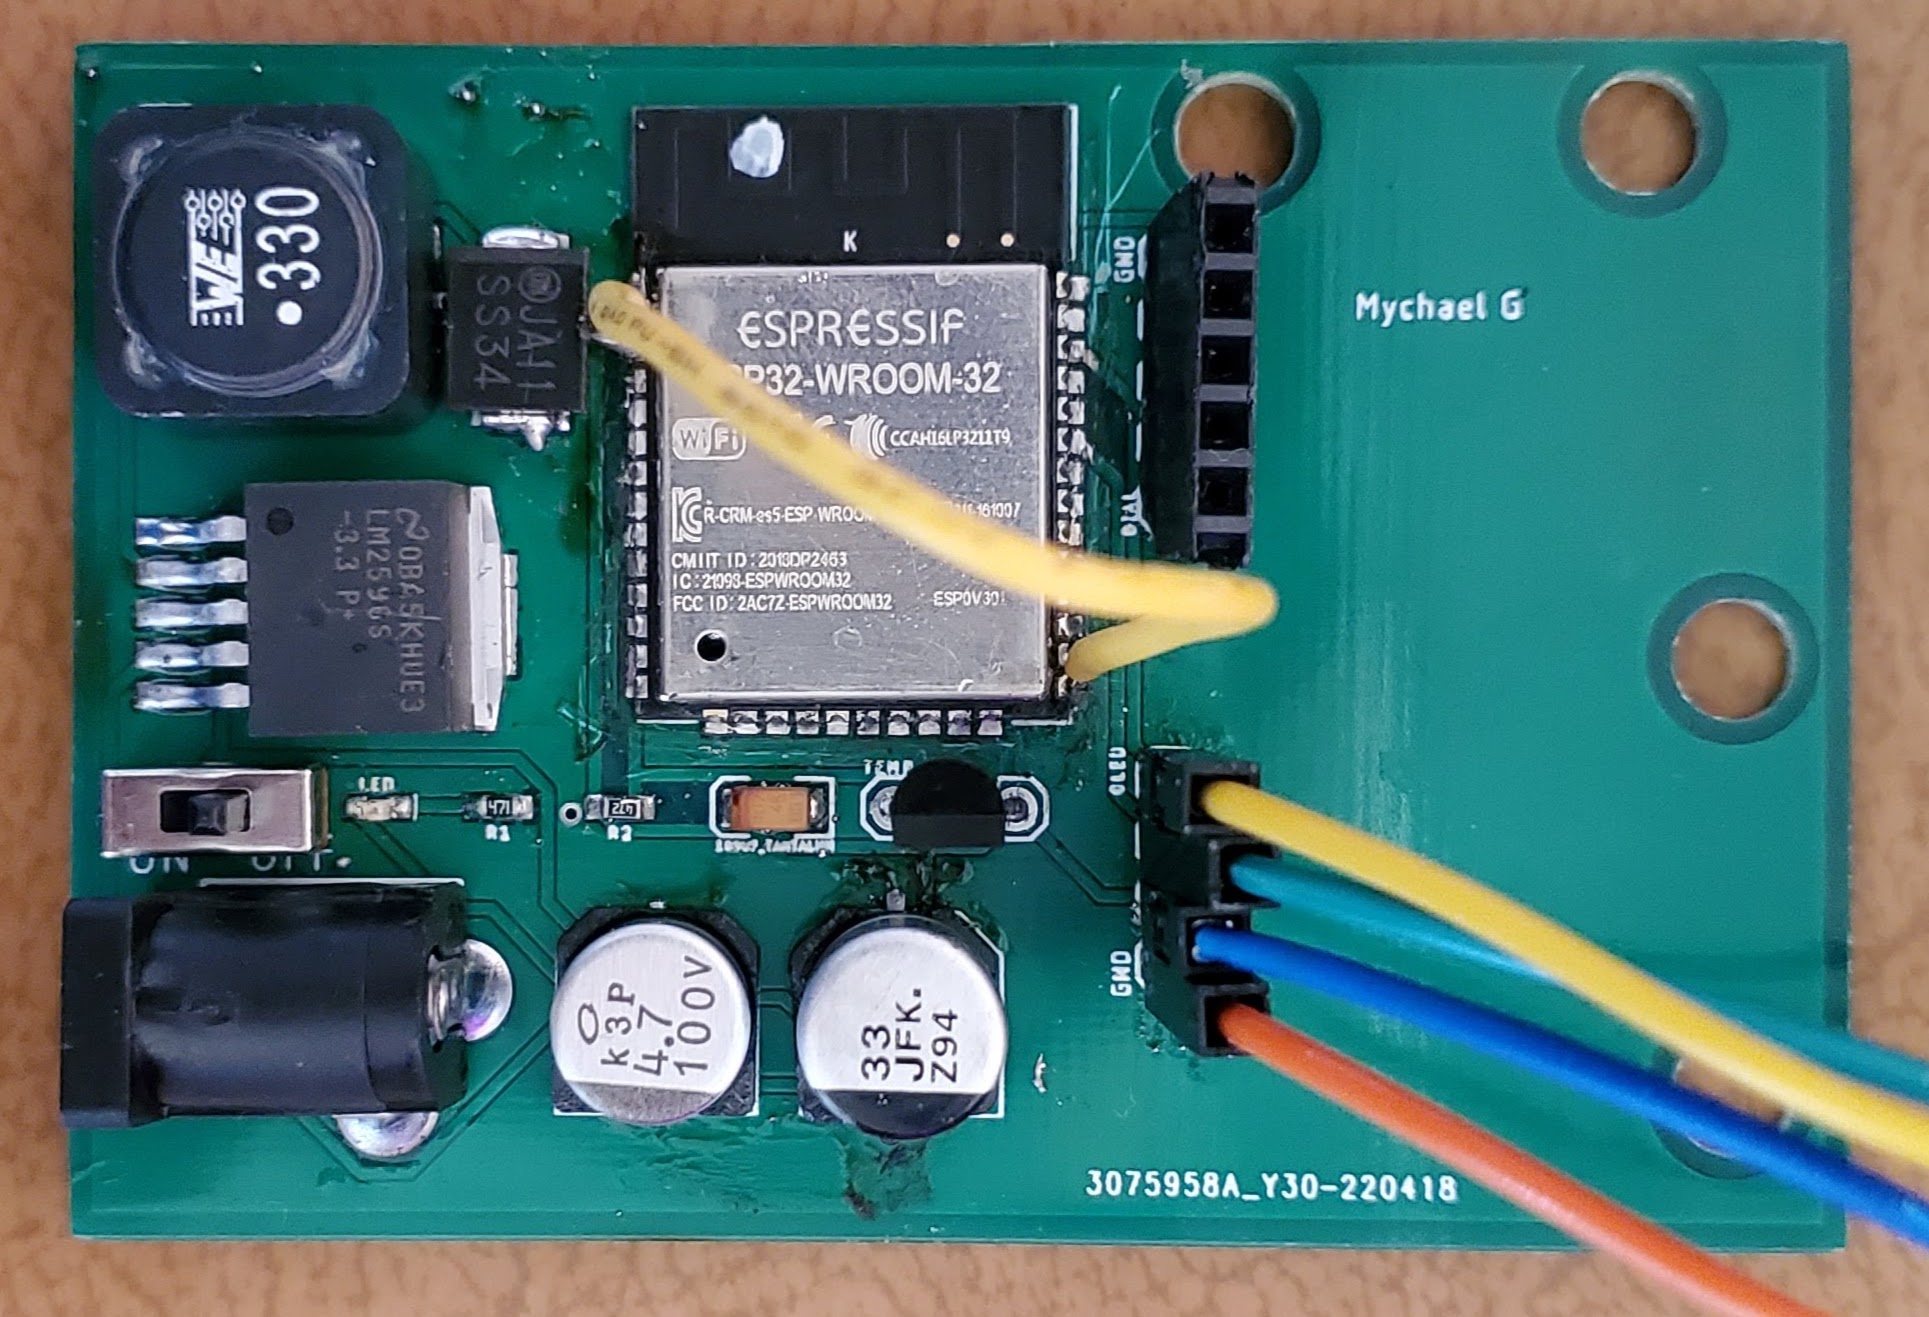
PCB Testing: Once
we got the PCB back, we wanted to make sure they functioned as intended,
just like our testing using the breadboards. One issue that I found
was that the En pin (3rd from the top on the left column) and IO0 pin (bottom on
the right column) were not connected as they should have been. With this
fix as seen below using the yellow wire the system performed as
intended.
Conclusion: Overall
this was a very useful and interesting project. It was good to lear
about how we can send data using wi-fi and have it displayed so people
can visualize it in real time, also trends. Knowing that we can send
data we could easily change this design to send more than just
temperatures, any sensor we want could be attached and processed the
same way. ----------------------------------------------------------------------------------------------------
END