CE433 2022 Spring
Week 1
John Hitti
jdhitti@fortlewis.edu
Week 1
Introduction
In this week's project we will be learning the basics of Verilog using
gvim as well as Vivado to sun simulations of the Verilog files.
Task 1
In this task we will be using
gvim and Vivado to simulate the examples in sections 2.1, 2.2, and 3.3
that use structural modeling, dataflow modeling, and behavioral
modeling to model the below example in Verilog.
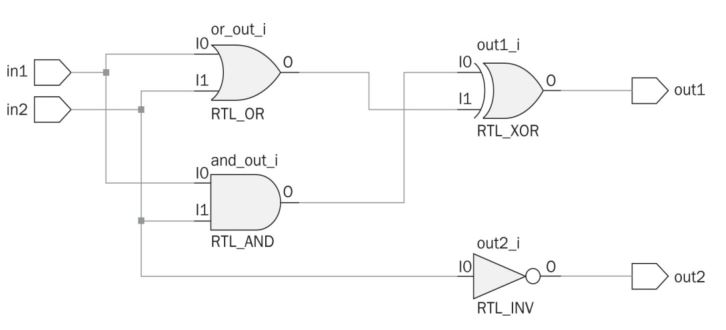
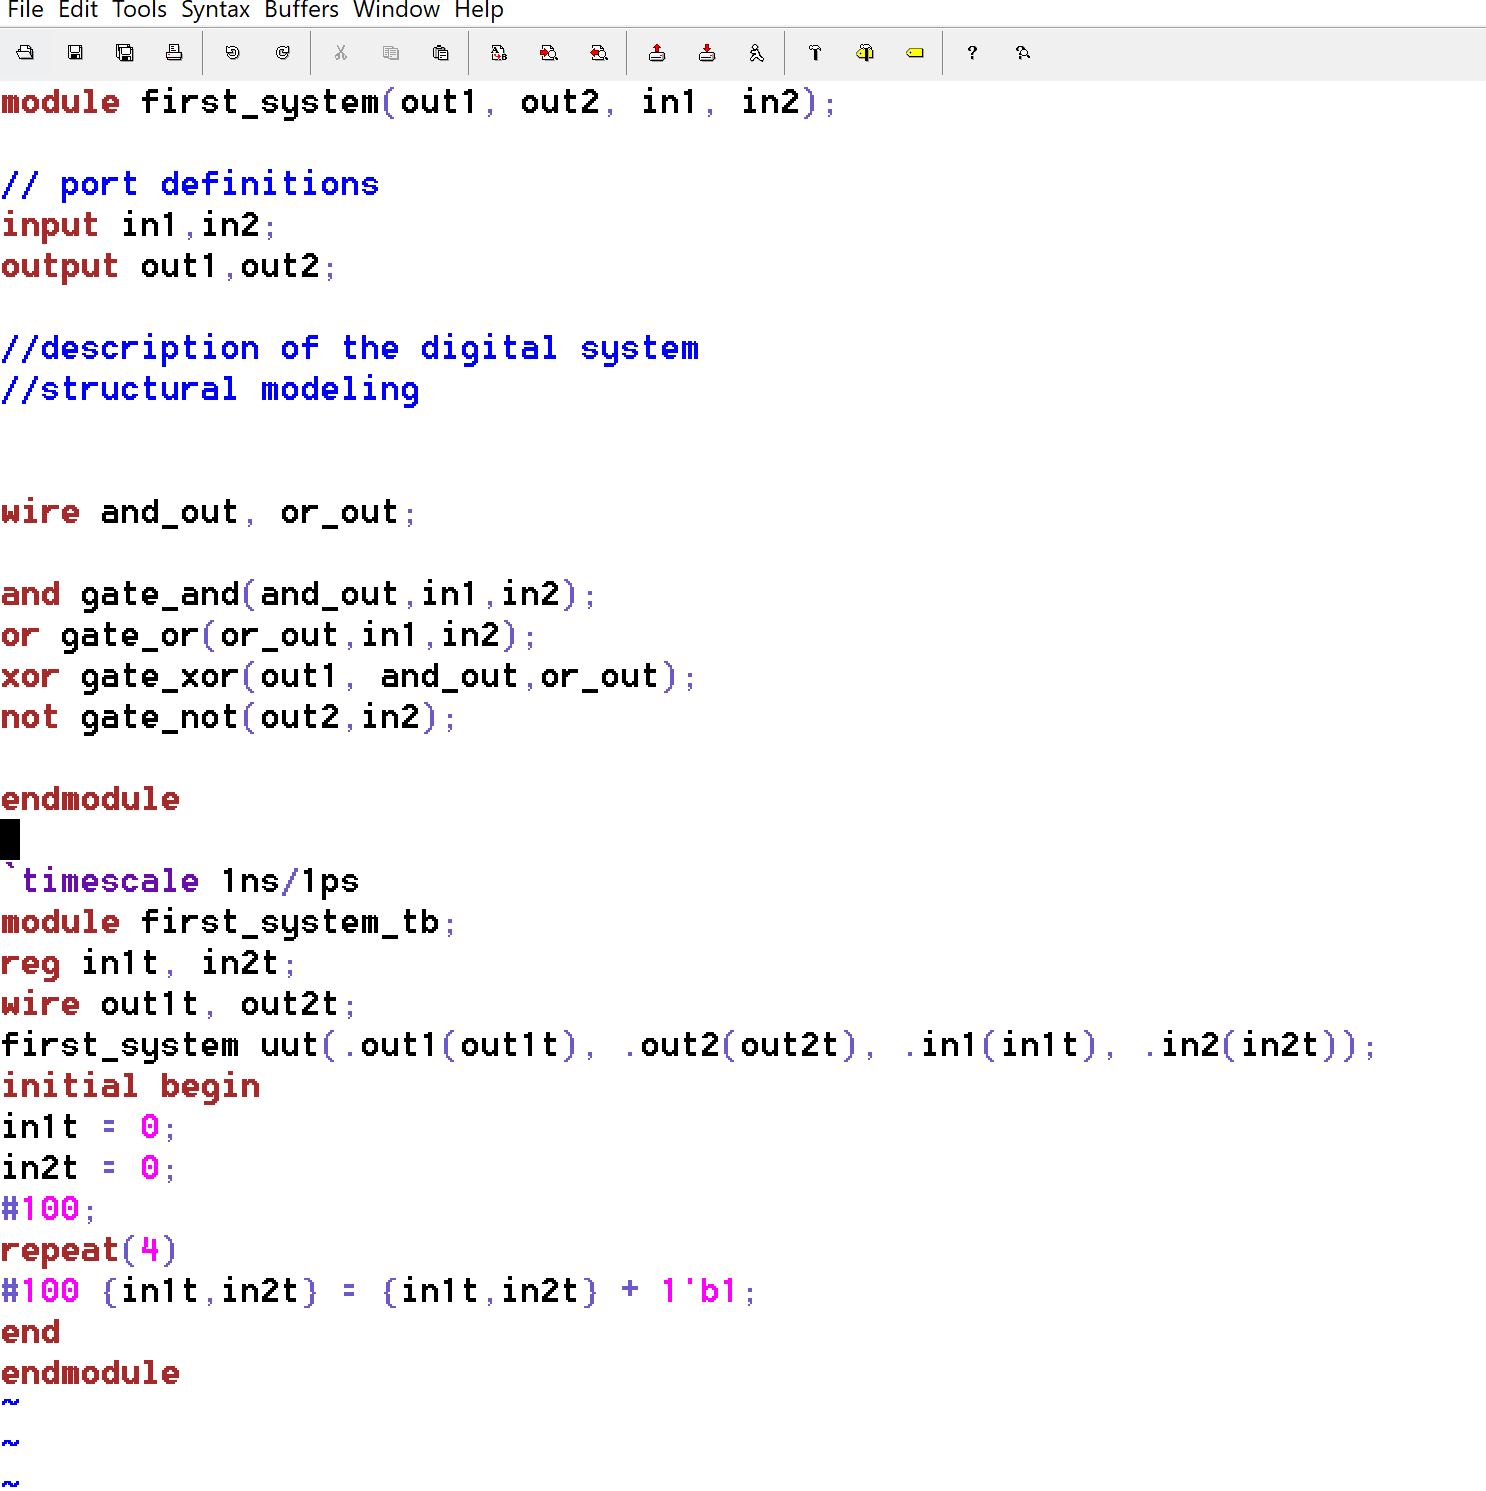
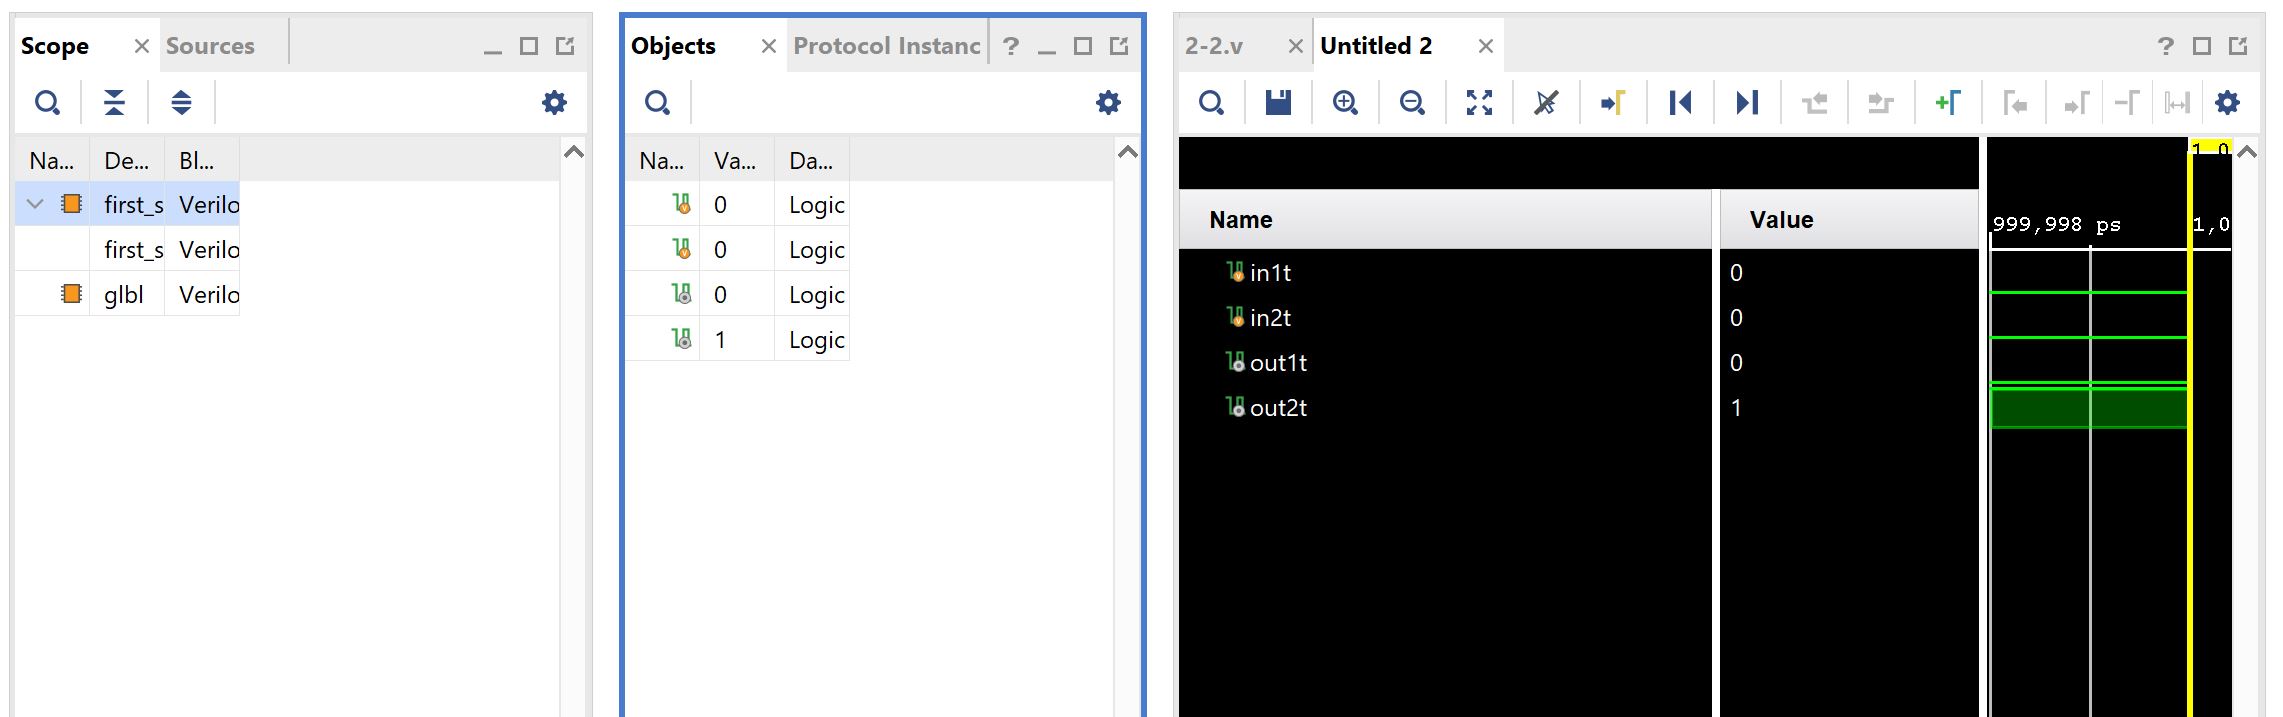
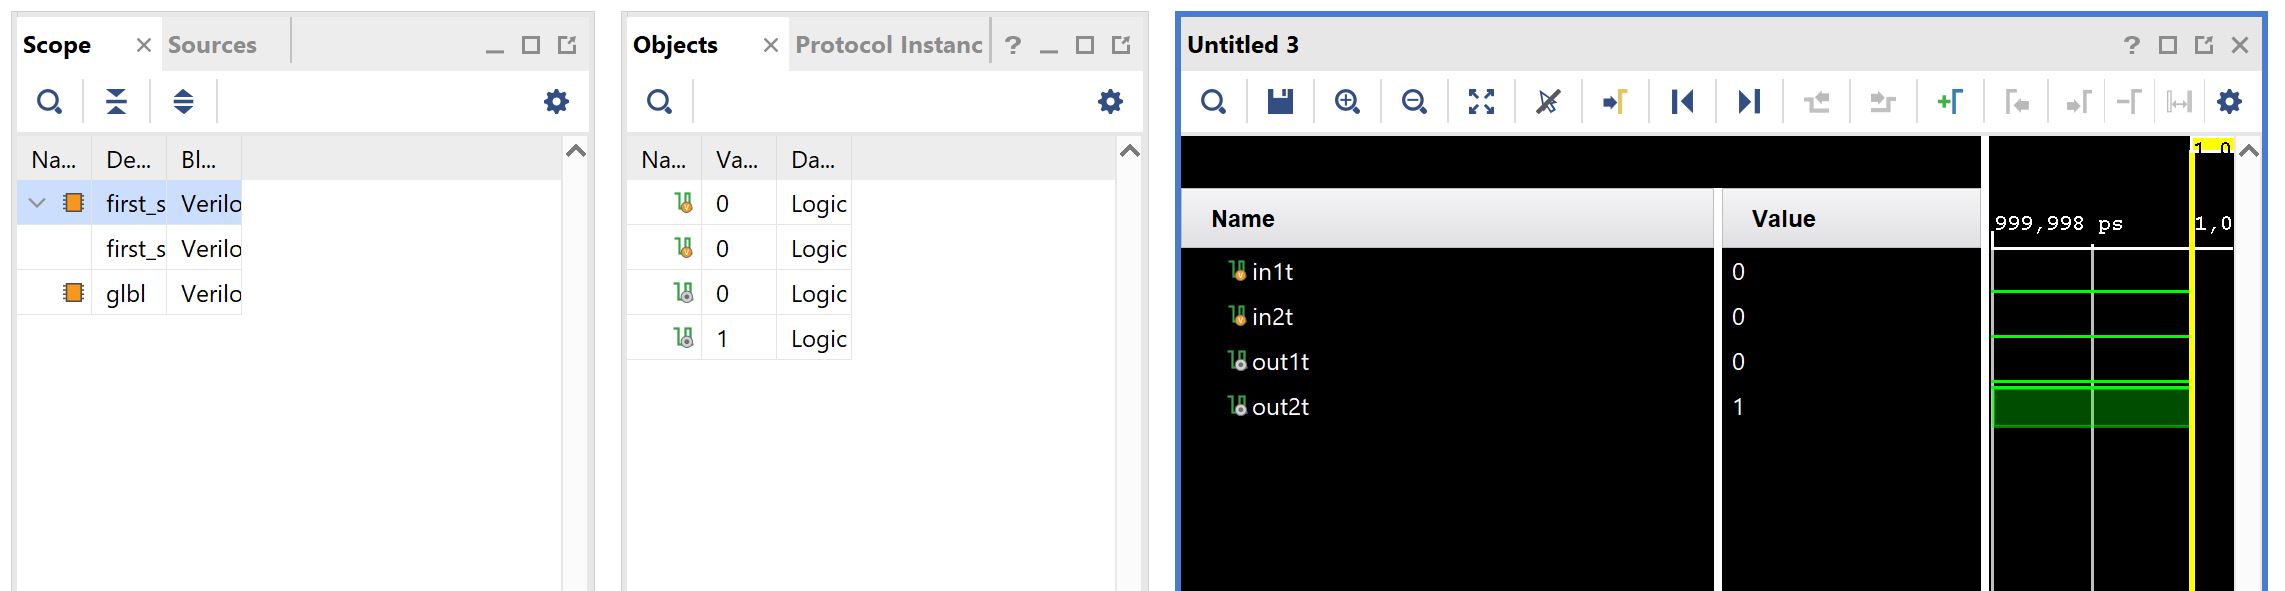
2.1
The example, and a testbench to simulate the example, are coded in gvim.
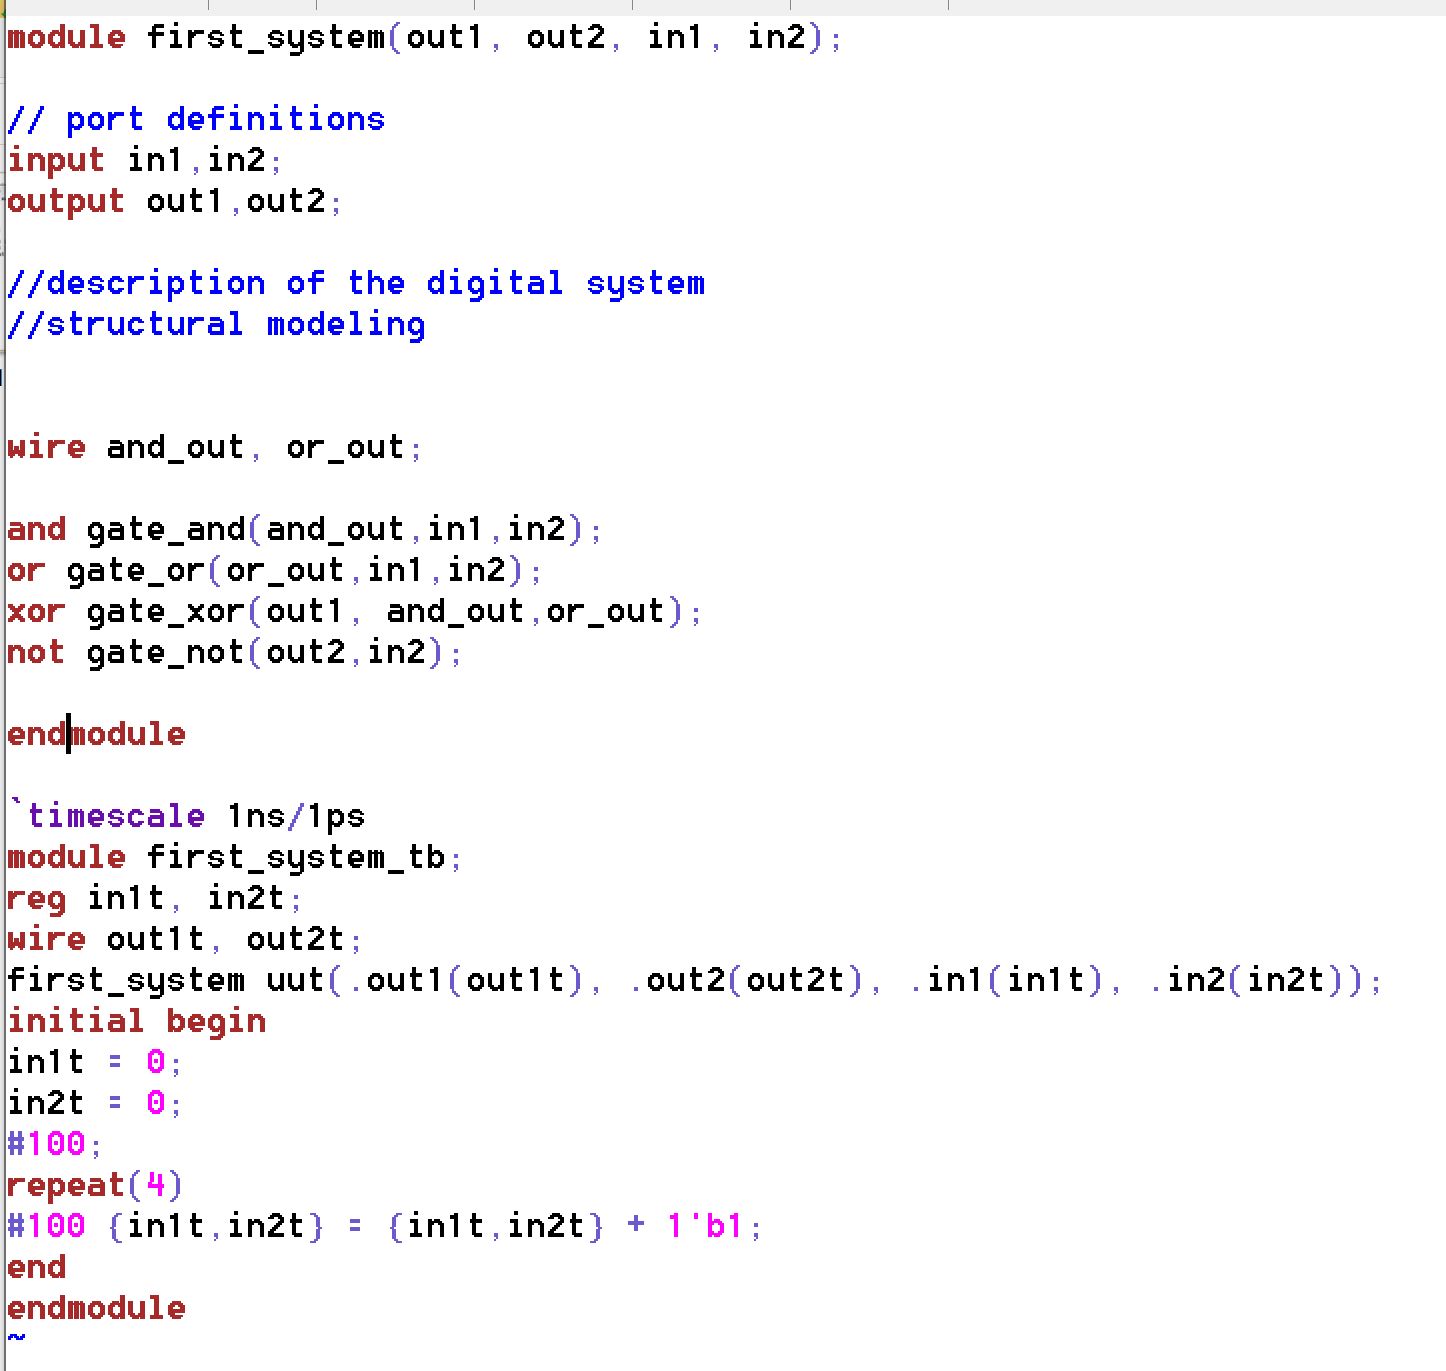
The file is loaded into Vivado and a simulation is ran.

2.2
The example, and a testbench to simulate the example, are coded in gvim.
The file is loaded into Vivado and a simulation is ran.
2.3
The example, and a testbench to simulate the example, are coded in gvim.
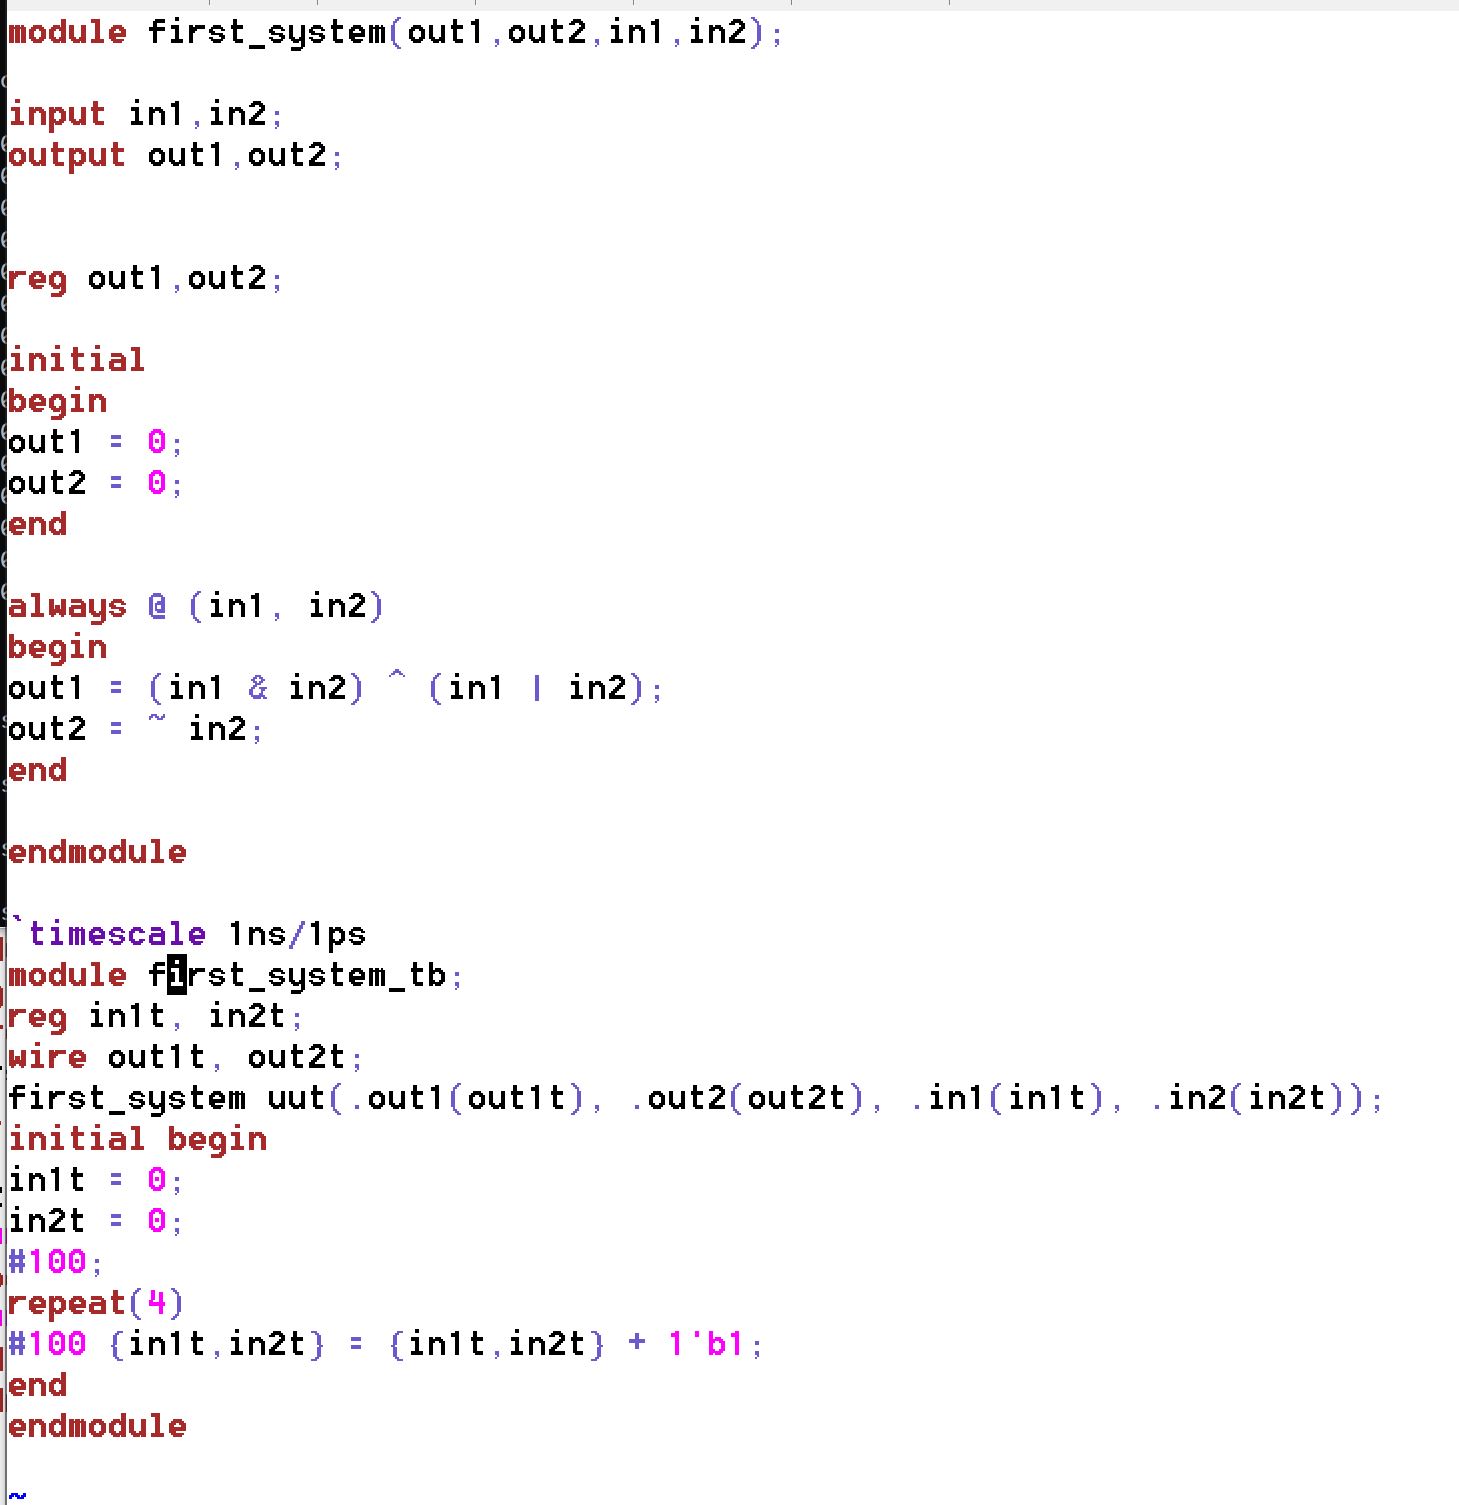
The file is loaded into Vivado and a simulation is ran.
Task 2
In this task we were to
simulate the difference between blocking (sequential) and non-blocking
(concurrent) in behavioral modeling. A file demonstrating the
difference between these behaviors is created and displayed below.
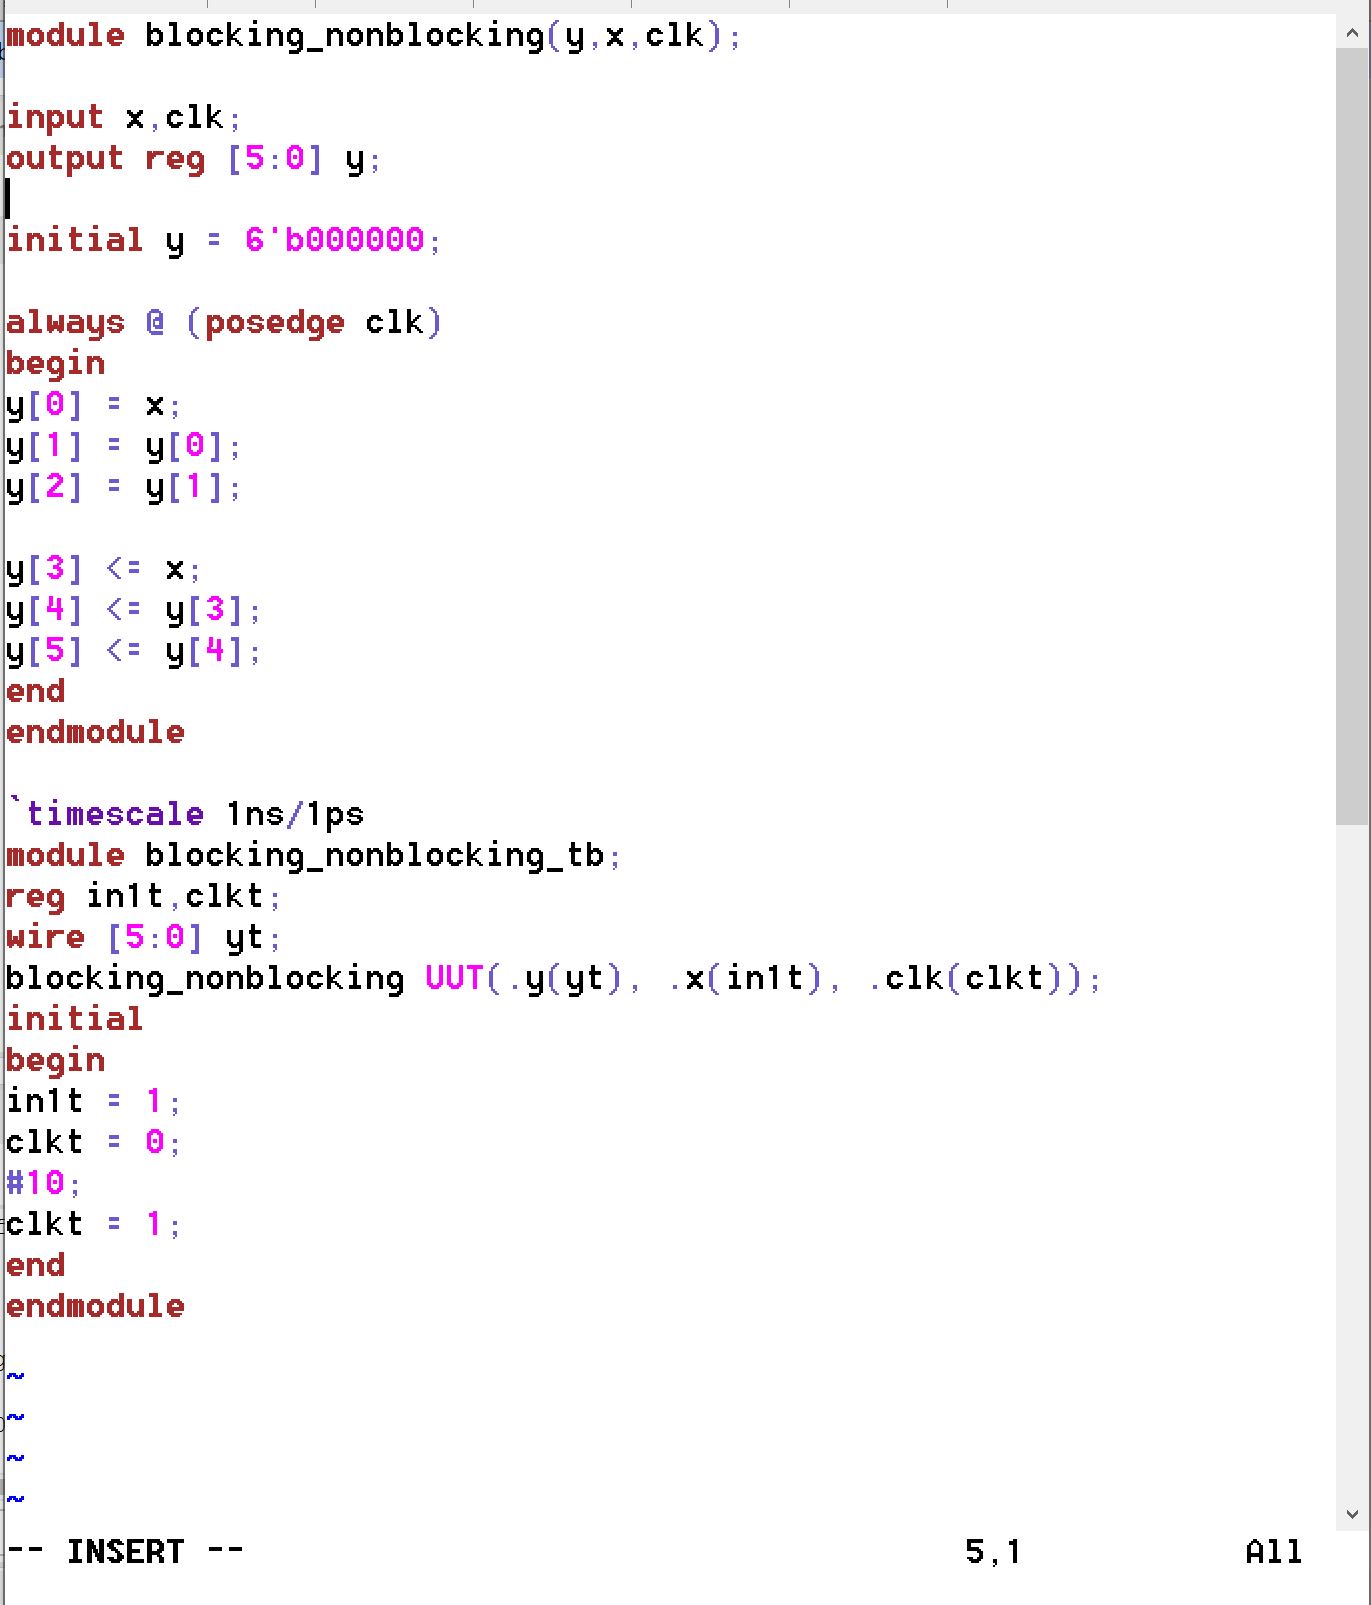
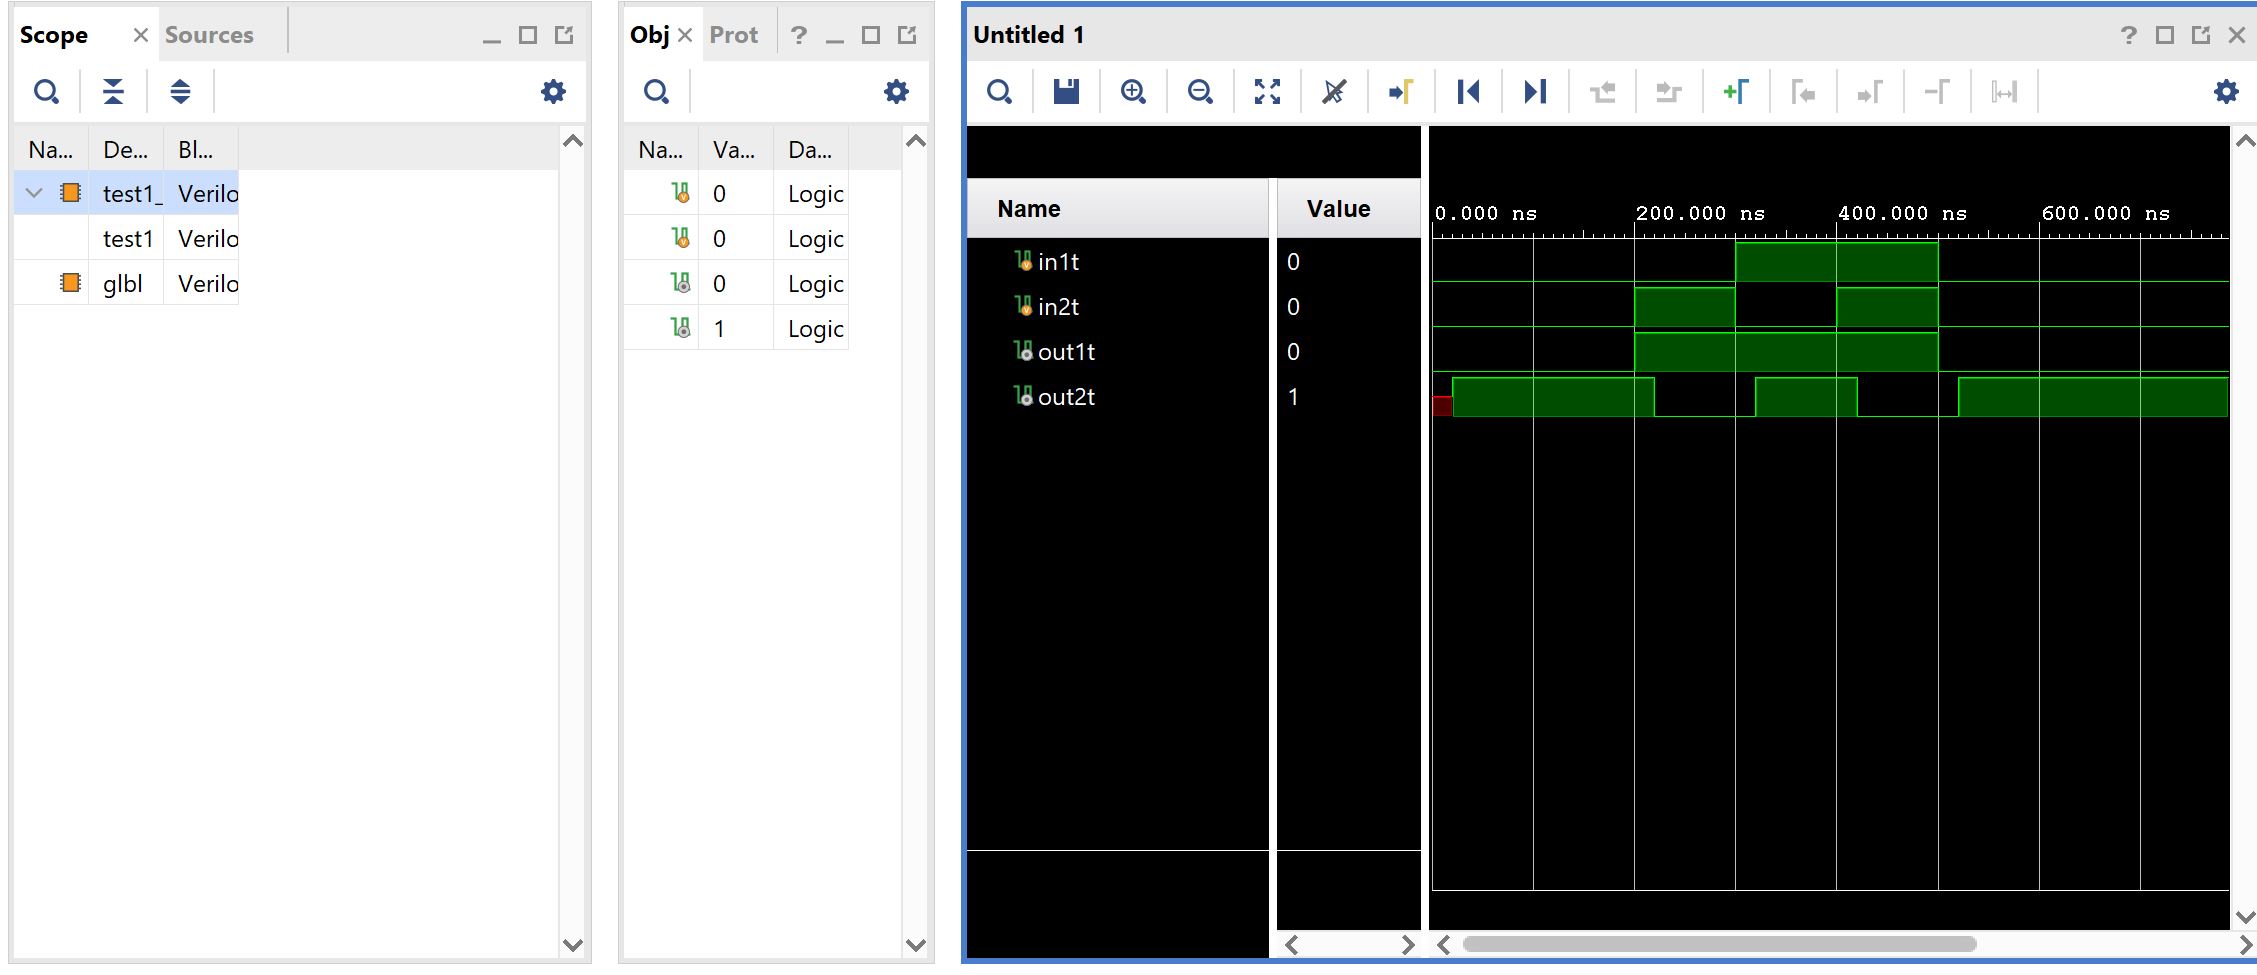
A simulation is then run in Vivado to show the results of the blocking and non-blocking operators.
Task 3
In this task we ran a
simulation to show how timing and delay are used. A 20 ns delay is
added using "#20" to one of our assign statements in the test 1 module.
Our example and test bench are created in gvim.

They are then loaded into Vivado and a simulation was ran to verify the timings.
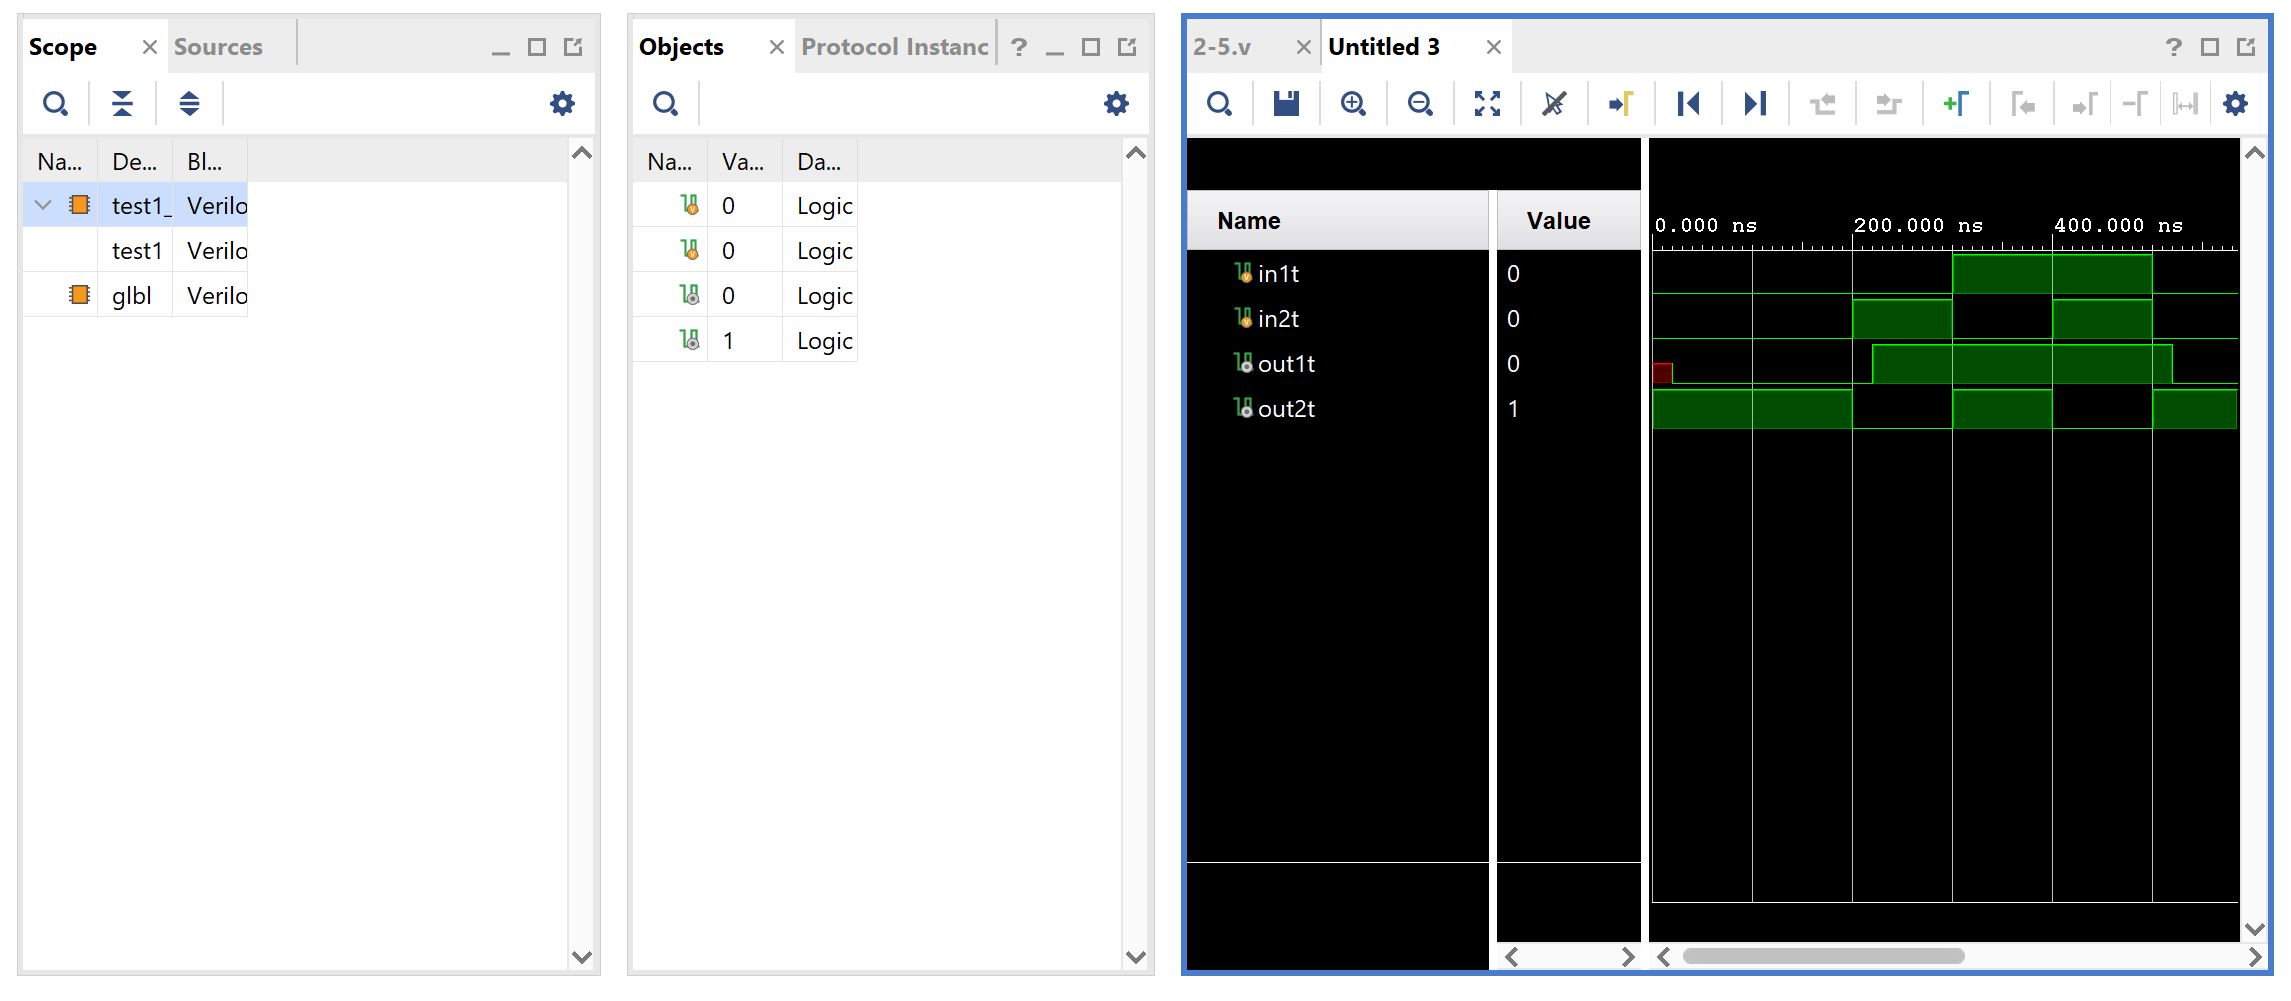
Task 4
In this task we took the same
example from the last task but moved the 20 ns delay to the other
assign statement. This is reflected in the simulation results and can
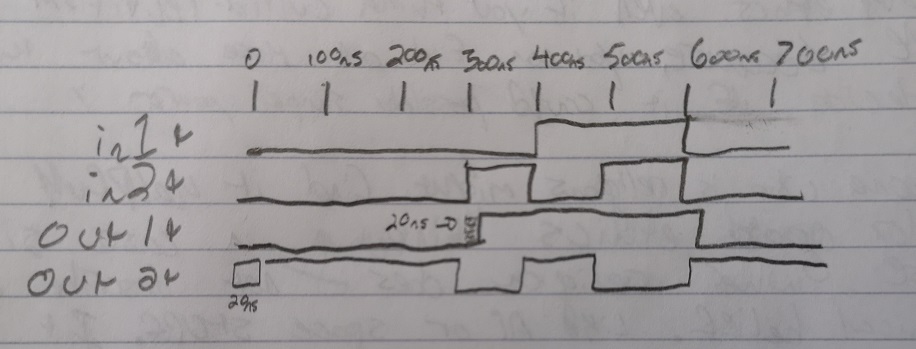
be seen below where out1t is now shifted 20ns instead of out2t.
A hand drawn version of the simulation output is below.
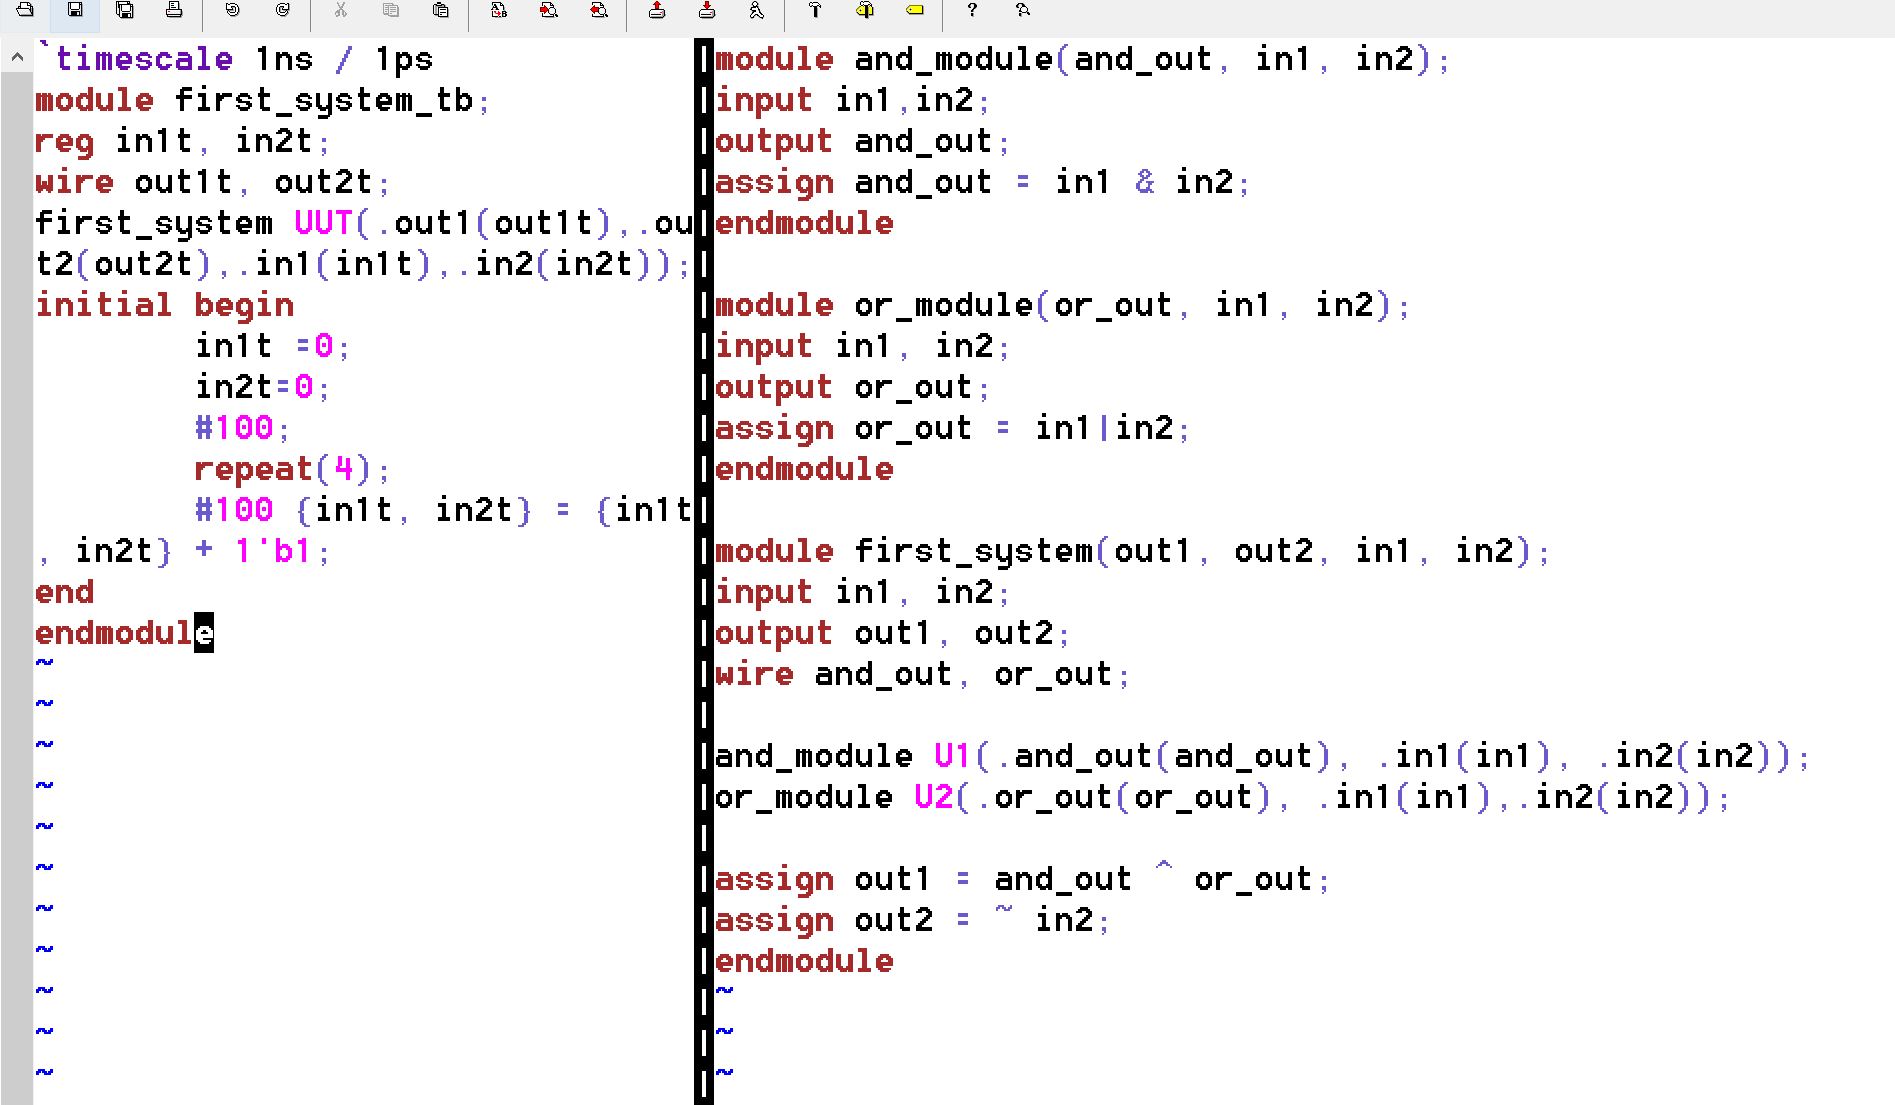
Task 5
In this task we will use
multiple modules at different hierarchies all inside one ".v" file to
create one system from multiple modules. This is first coded in gvim as
seen below. The test bench is on the left and the multiple modules
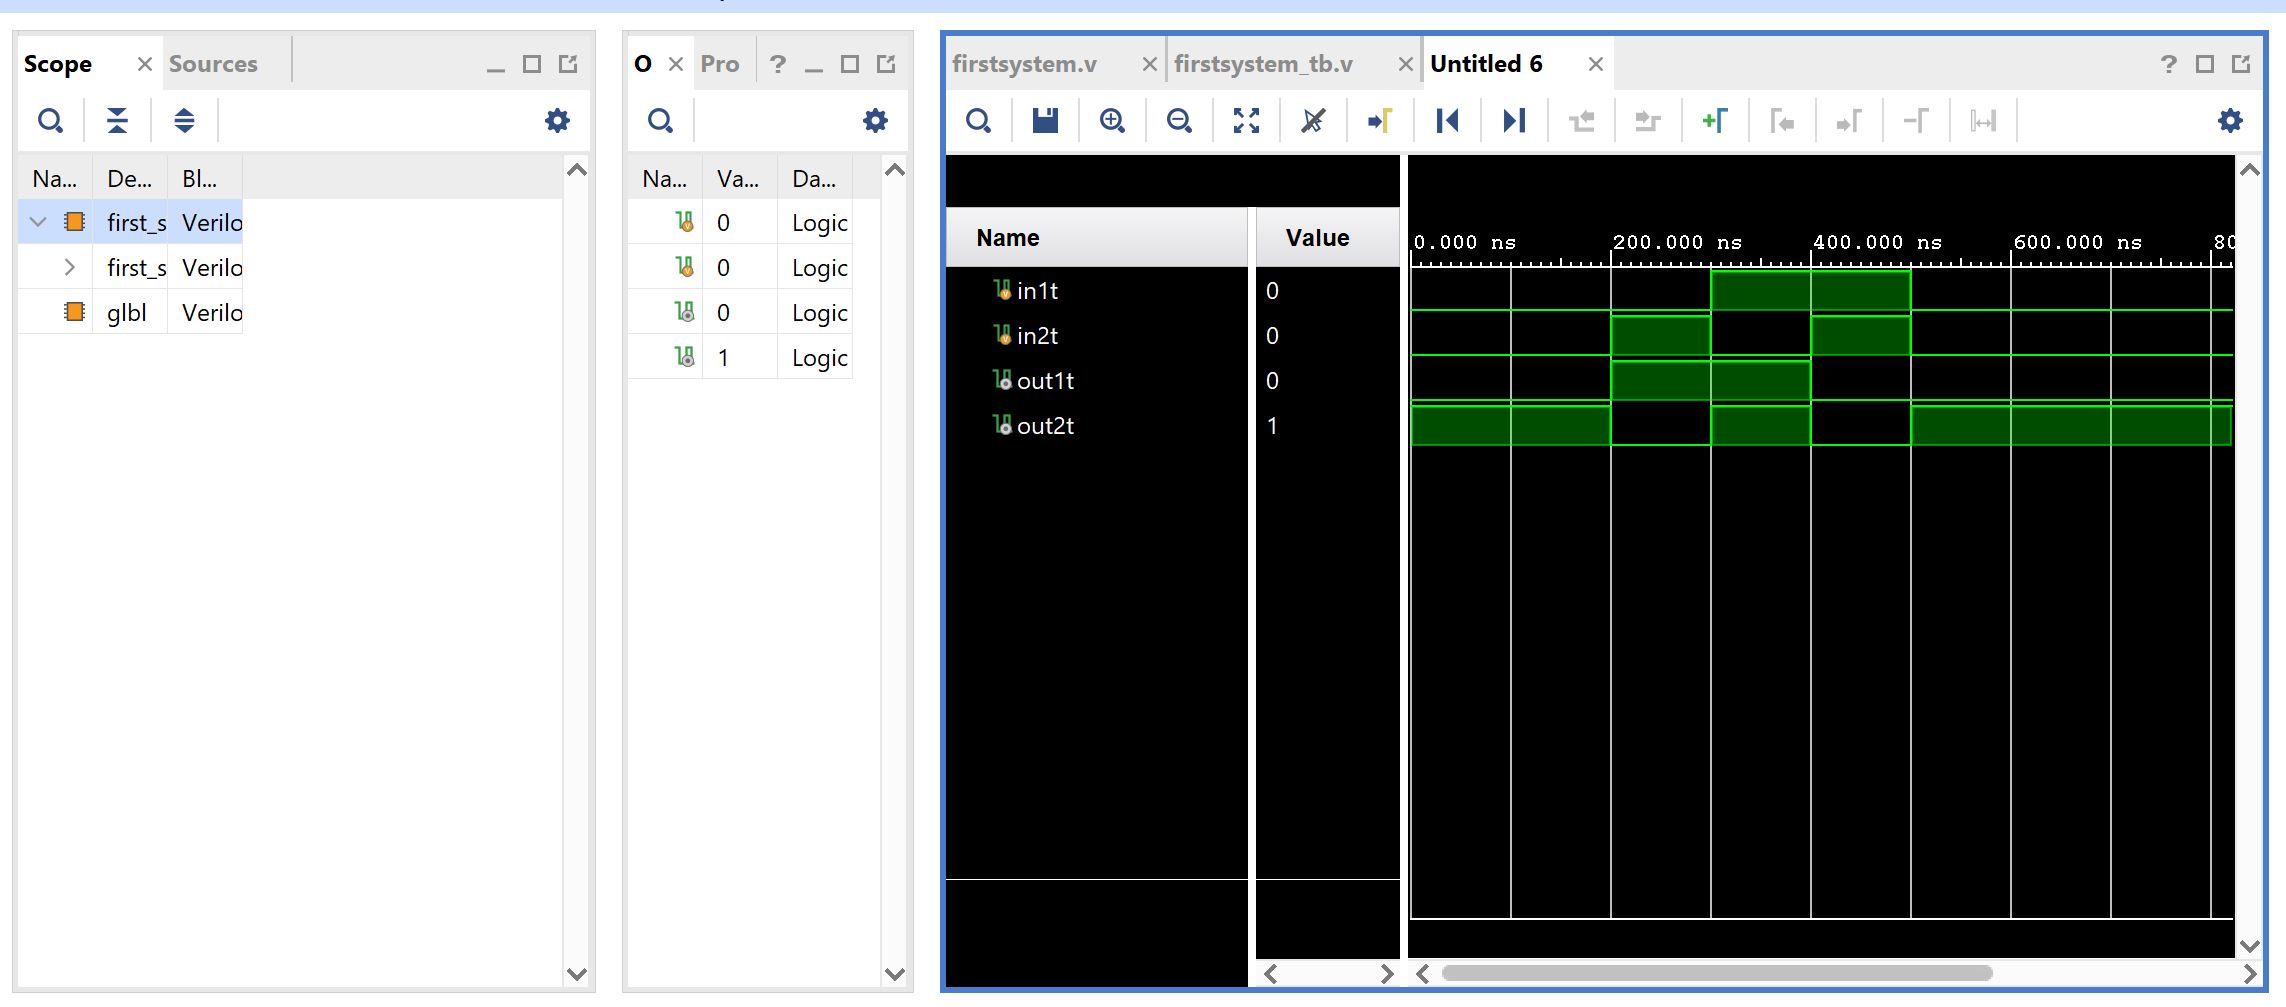
using different hierarchies are on the right.
The files are then loaded into Vivado, and a simulation is ran, verifying the functionality of the modules.
Discussion
This
project was an excellent introduction to Vivado and highlighted a lot
of its functionalities while laying down some good groundwork for
coding in this language. This project was also a great introduction to
Vivado’s capabilities as a simulation program with the Vivado language.