CE 497 Quartus 2
Name: David Lee and Calvin Reese Email:
djlee1@fortlewis.edu, cjreese@fortlewis.edu Quartus2
and ModelSim Tutorial
Introduction:
This tutorial demonstrates how to use Quartus 2 to simulate logic gates
using ModelSim and how to upload and simulate on FPGA Cyclone V DEO-CV.
If you have used vivado then this software is very similar.
Materials and Methods:
Quartus Prime Lite Edition, ModelSim, FPGA Cyclone V DEO-CV
Task 1:Download Quartus
Prime and ModelSim
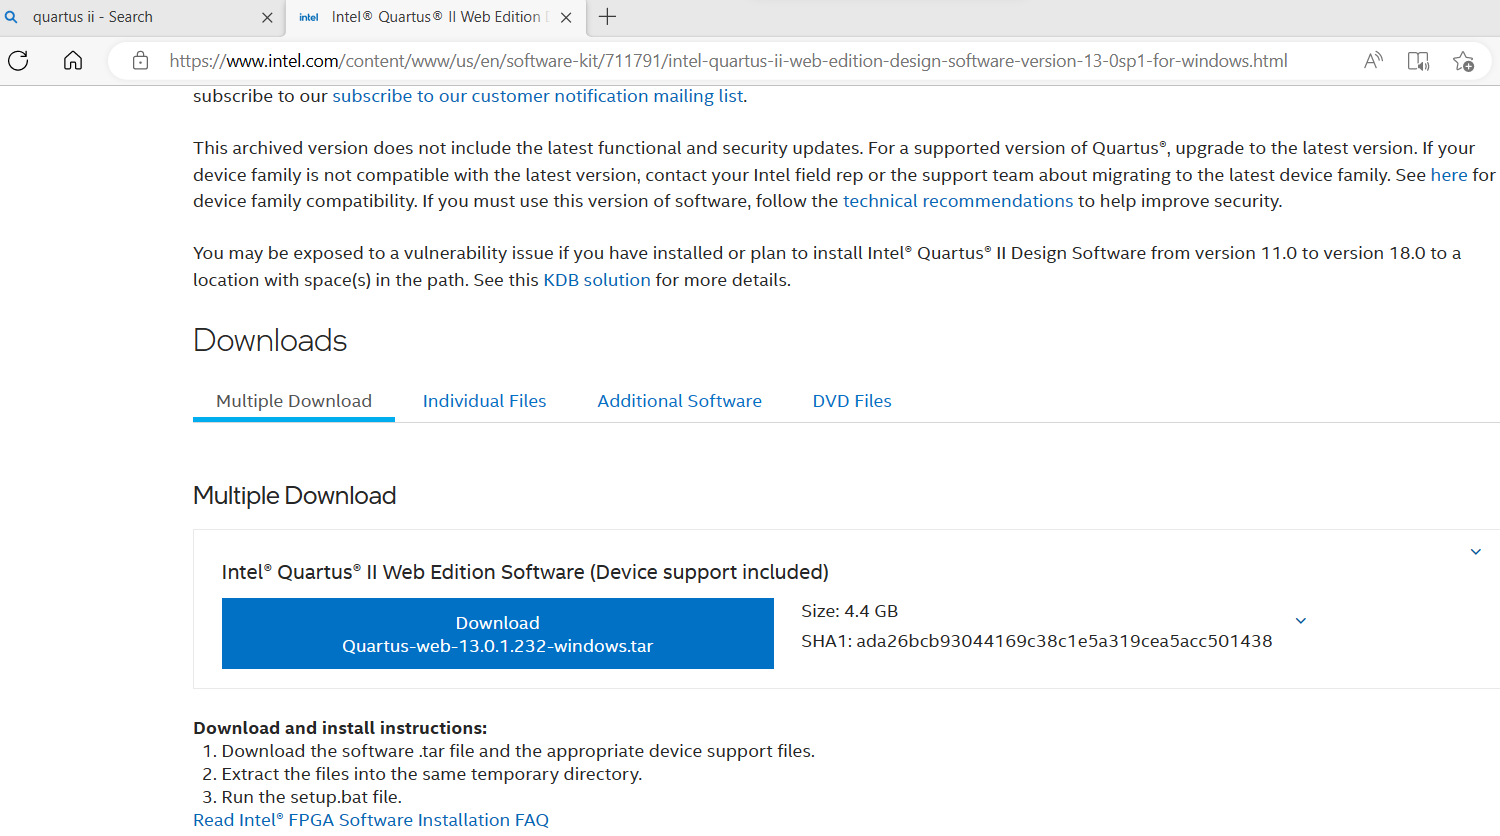
To download Quartus just search quartus ii and navigate to the intel
website seen in figure 1. This is a .tar file to extract this you can
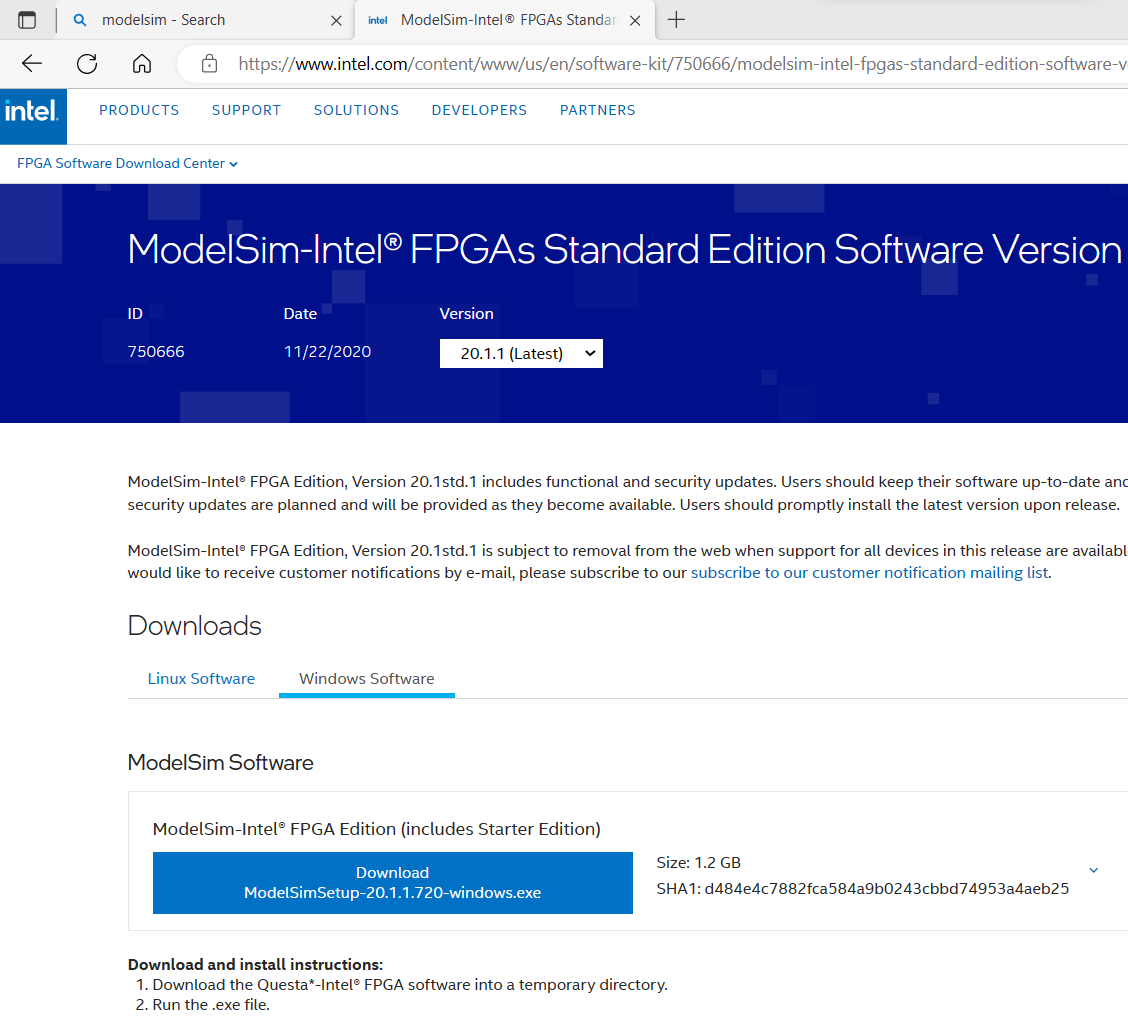
use 9zip which is free on windows. ModelSim is the software that is
used to see the simulation of the gates. To download this search
modelsim and go to the intel website seen in figure 2. Figure 1: Shows the
downloaded needed
Figure 2: Shows download needed for
modelsim
Task
2: Setup for Quartus and modelsim to
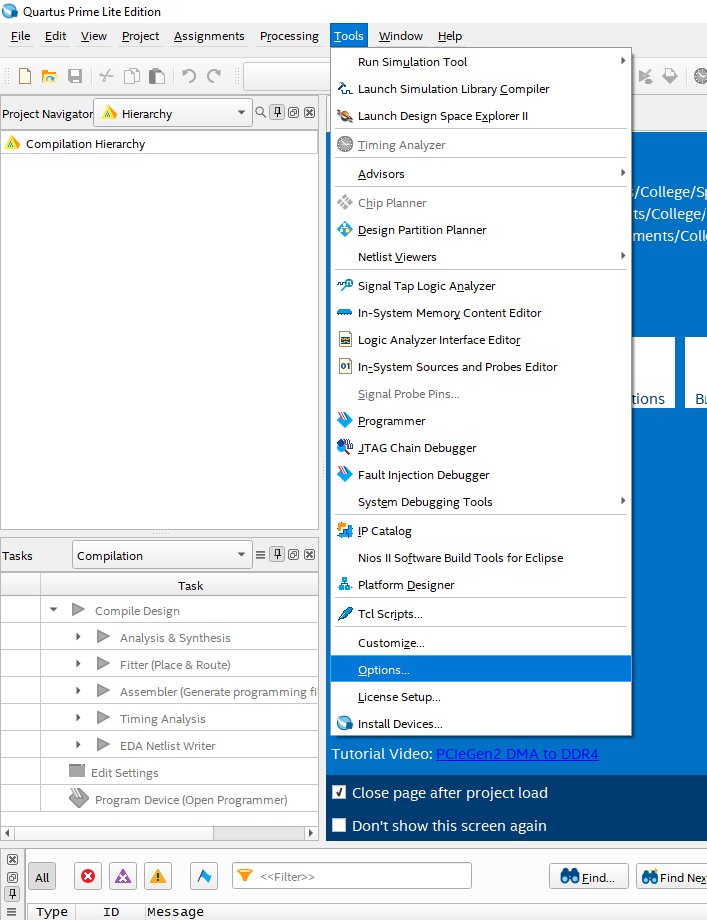
work together. From the home page of Quartus
you need to use the tool bar and select "Tools" select "Options"
(towards the bottom of the menu) then a window will pop up similar to
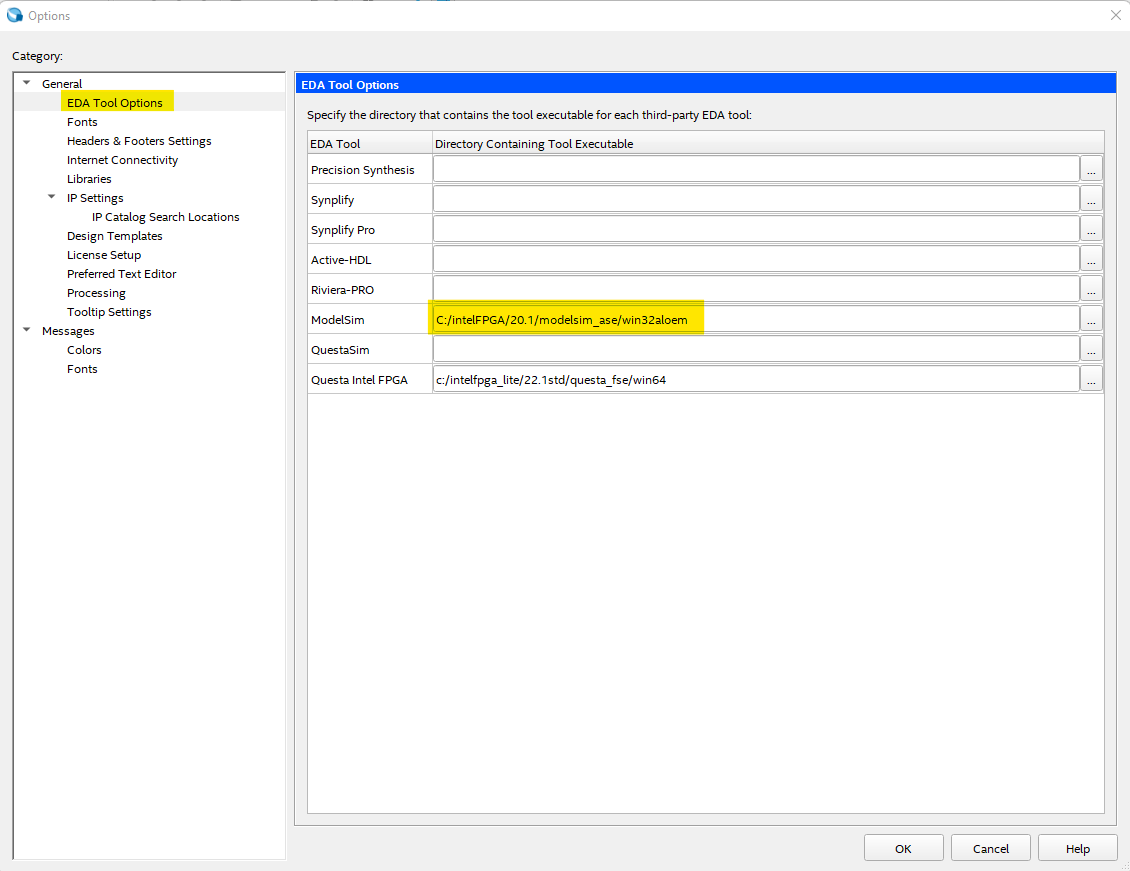
what is seen in Figure 3. In
the Modelsim section you need to make sure the path for the executeable
application is in the line. As highlighted in Figure 4. Hopefully yours will not
be different. If it is you will just need to find where the path is the
to model sim executable and have that path there instead.
Figure 3: Shows the menu drop down Figure 4: Shows the file path to
the model sim Executable
After completing all these steps you should be able to start the
simulation. Continue to Task 3
Task
3: Create a simulation This task will go over on
simulation of an OR gate
Figure 5: Video of the OR gate simulation setup and results
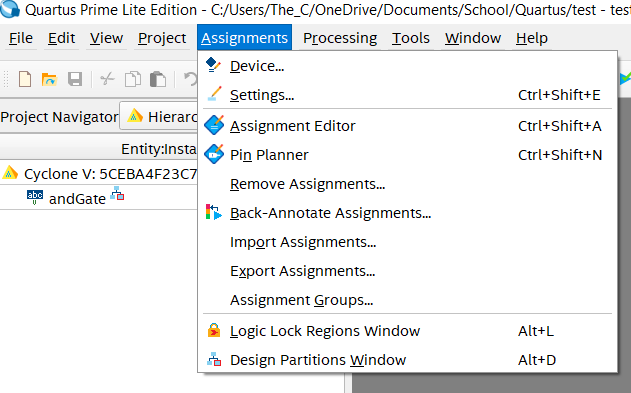
Task 4: Program the FPGA Figure 6: Under assignments select "device..."
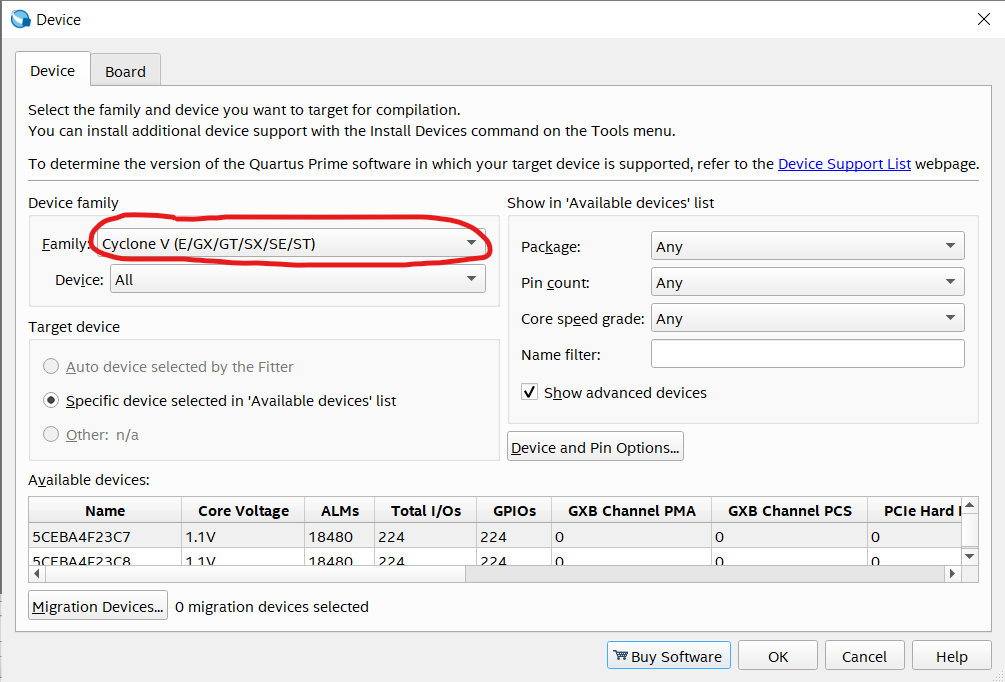
Figure 7: Select the Cyclone V or whatever device you are using from the dropbox.
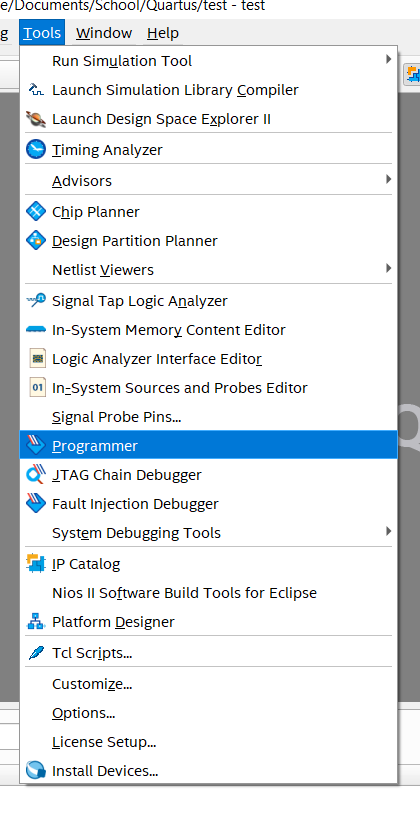
Figure 8: With the code compiled and ready to upload, select the programmer tool.
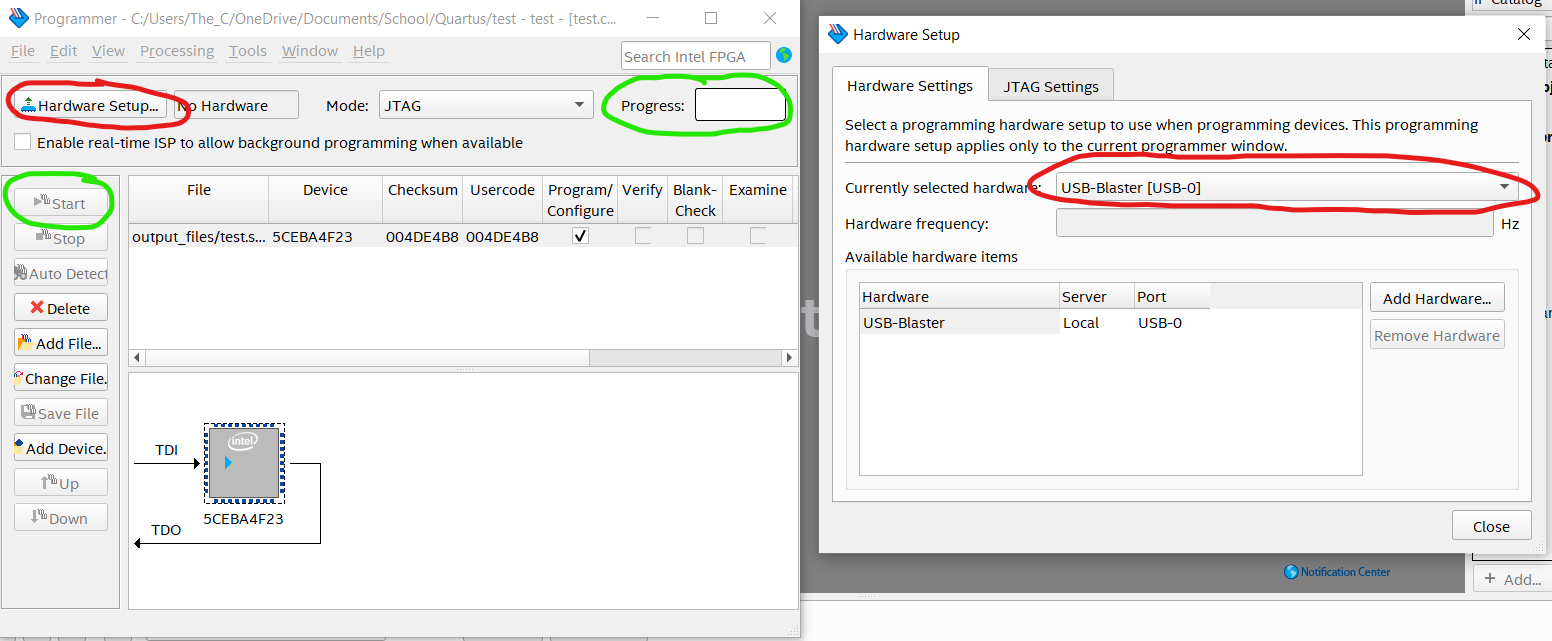
Figure 9: Select the USB-Blaster with the FPGA pluged in to prepare for upload. If the USB-Blaster does not show up, update the driver using this link: https://www.youtube.com/watch?v=6RZxsvNNGEY&ab_channel=AskarzadehEngineering. Once the USB-Blaster is selected, hit the start button. The progress bar will turn green once it is uploaded. If the progress bar instead says "Failed", make sure the FPGA is set to run instead of prog using the switch on the left side. (I know it seems off, but trust me)