ENGR351 Micro Controllers
Lab 3: LEDs and SSDs
Name: Aaron K. Toledo Email: aktoledo@fortlewis.edu
1. Lab 3: LEDs and SSDs
2. Introduction This lab gave students hands on experience
with Arduino UNO. By having students follow tutorials and explain what
each code does.
3. Materials and Methods (Do not simply list everything there, put them
in a table if needed).
- Computer with Arduino program installed
- Arduino UNO
- Wire
- 1K resistors
4. Results
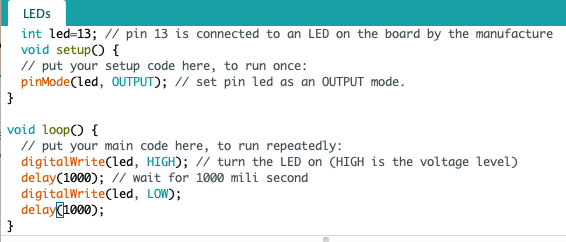
LEDs
1.1
Figure 1: Code used to turn on LED on board.
1.2
Video 1: Blinking external LED
1.3
Video 2: Running LED
2.1
Figure 4: Adding button to control LED
2.2
Figure 5: Adding button to control LED
2.3
Figure 6: Pressing button makes LED blink.
2.4
Figure 7: Initially the LED is blinking 4 times a second. when button is pressed it now blinks 1 time a second.
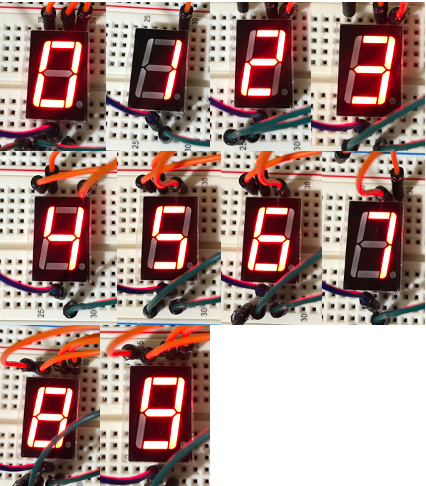
SSD
3.1
Figure 8: SSD changed individually.
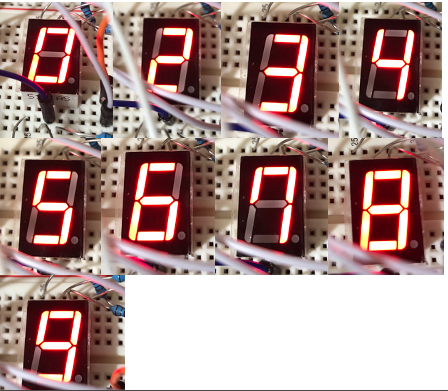
3.2
Figure 9: adding a decoder to circuit allowing us to change display using only 4 inputs instead of 7.
5. Discussion
In conclusion Lab 3 was a success we were able to incorperate LEDs and SSD.