LEDs
Goal:
In this tutorial, you will learn how to program your UNO R3
controller board to control LED lights.
1. Blink an LED
1.1 Blink the on-board LED
A light-emitting diode (LED) is a semiconductor light source that emits
light when current flows through it.
Start
your Arduino IDE, create a new sketch and save it as 'LEDs' on Desktop.
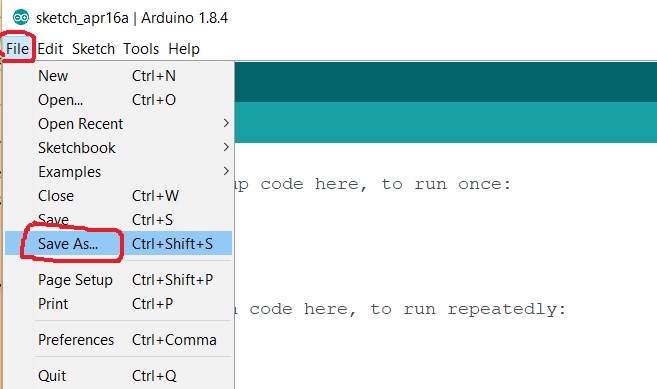
Type up the following code in your new file:
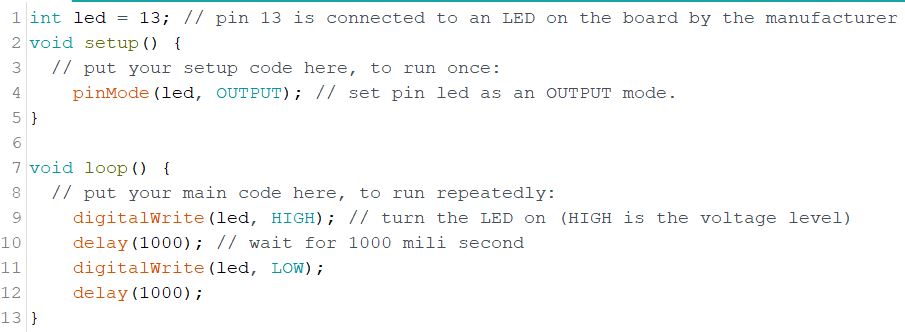
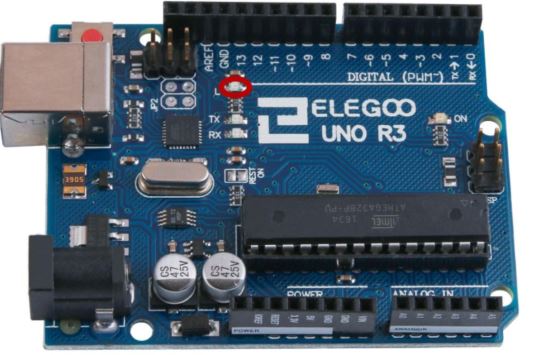
After run this code, the LED light on the board, as shown in the
following figure will blink.
**
Think about this: 1) How can you blink the LED faster? 2) Can you just
turn on the LED without turning it off? 3) Can you keep the LED on for
longer time than off?
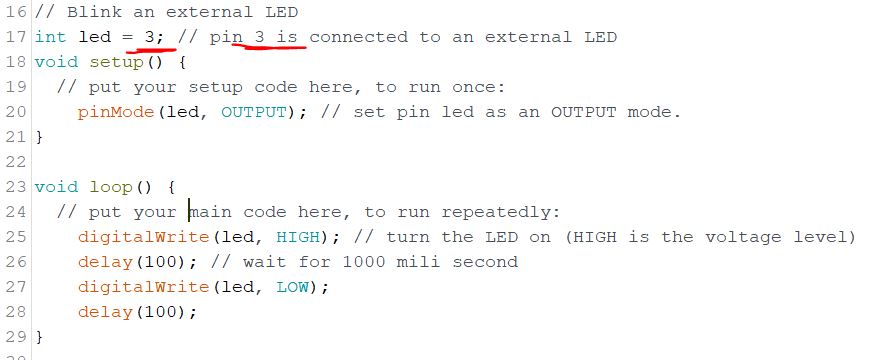
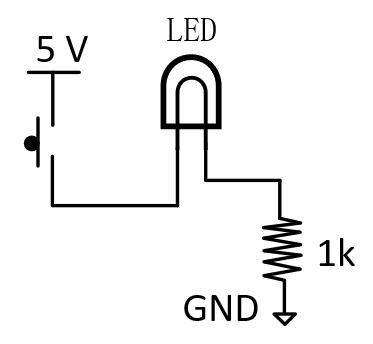
1.2 Blink an external LED
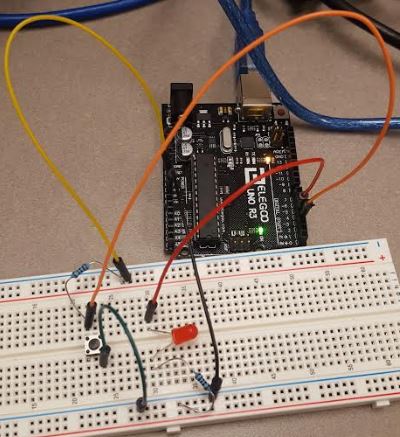
Now, use a breadboad, an LED, a 1 kohm resistor to make the following
circuit:
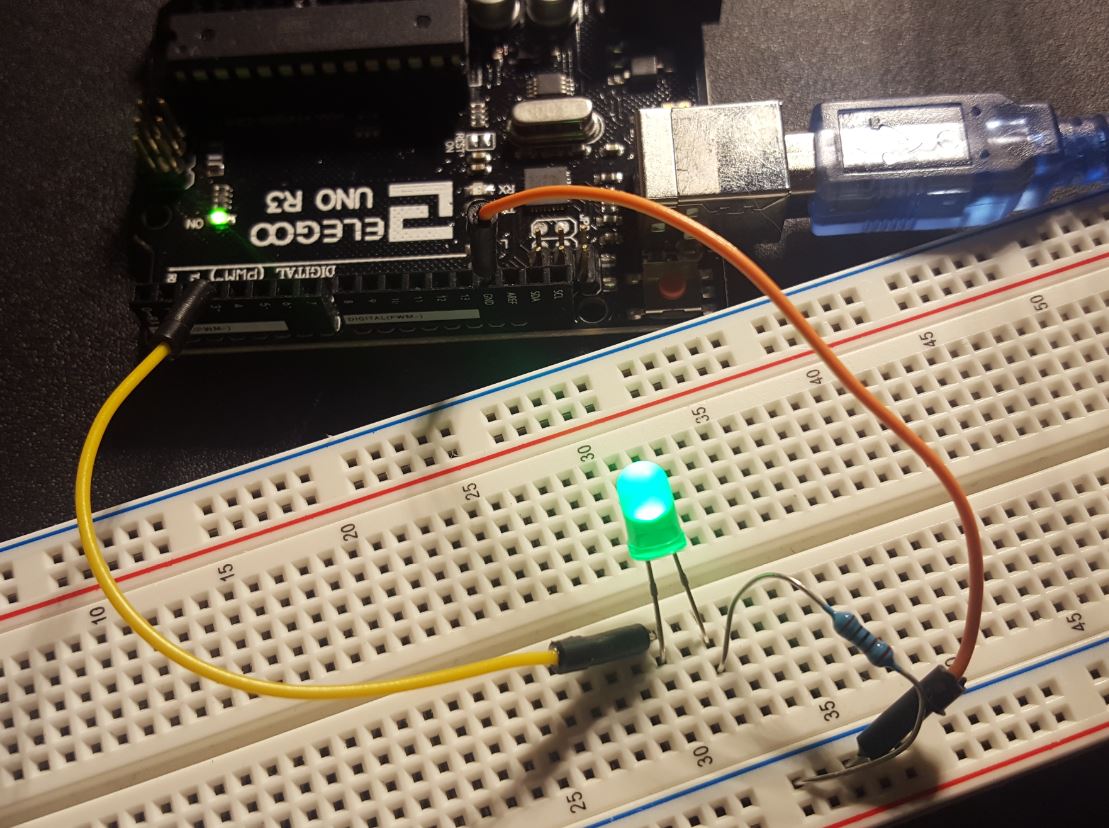
Connect the longer pin of the LED to 'pin 3' on the board, connect the
shorter pin to a 1 kohm resistor and then to GND.
Make the following changes to the code to use 'pin 3' as the digital
output:
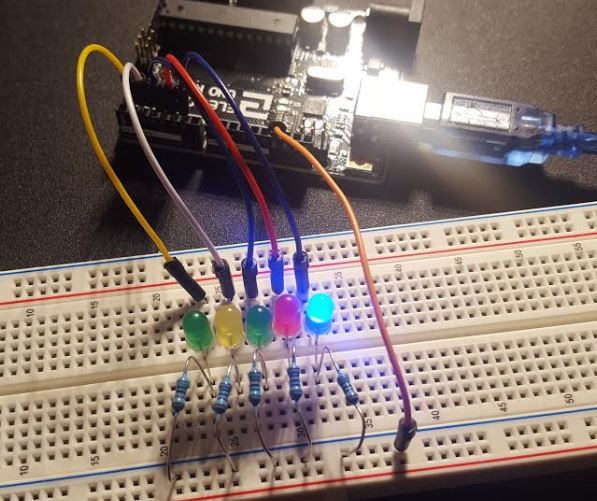
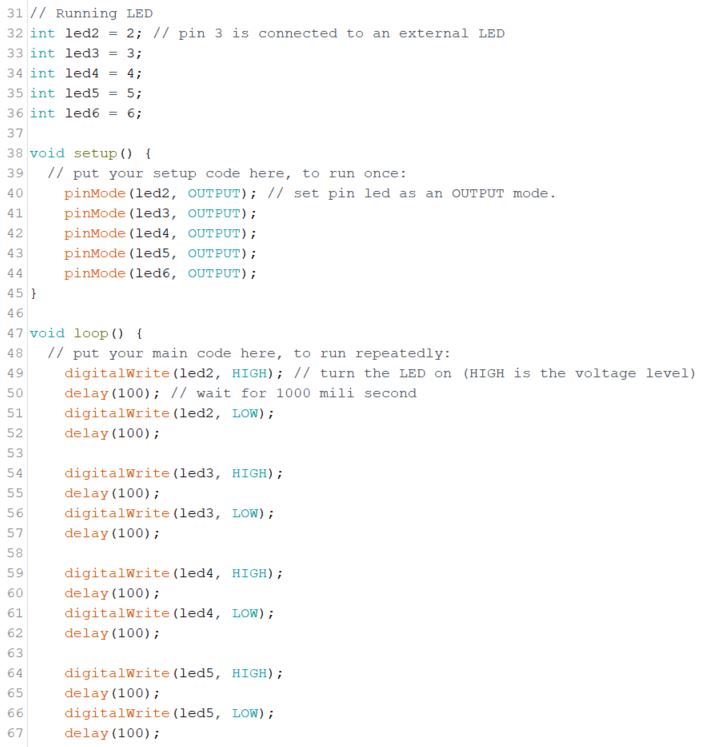
1.3 Make running LEDs
Then
use the following circuit and code to make running LEDs (the LEDs are
being turned on and off from left to right and cycles).

2. Use pushbuttons to control LEDs
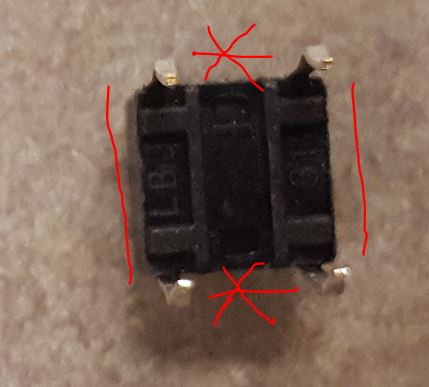
The pushbutton:
If
you flip the pushbutton, you will see there are two lines indicate the
connection of the four pins before the button is pushed.
2.1 Push to turn on, release to turn
off
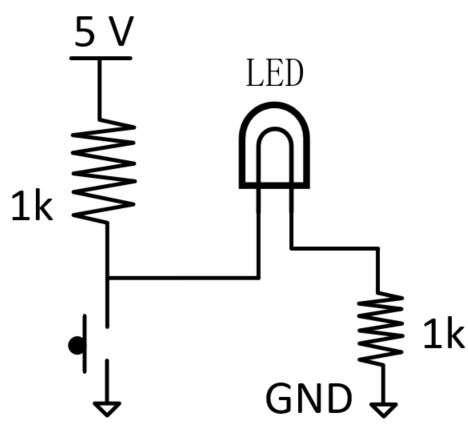
You can make a simple circuit to implement this function, even without
the Arduino (use a simple
resistor without programming):

The schematic of this connection:
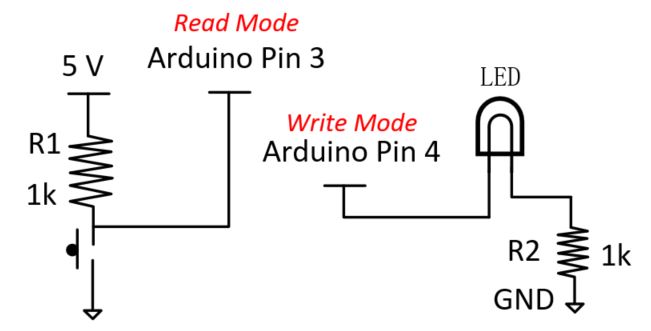
R1
is used to protect the board so when it is turned on, the 5 V pin and
the GND pin are not shorted to each other. R2 is used to protect the
LED itself.
You can also use two different Arduino digital pins to control this
LED:
Circuit connection:
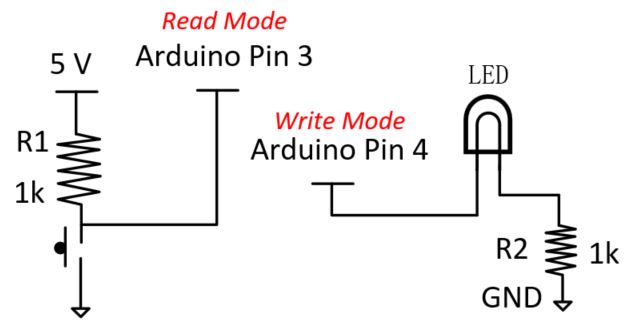
Board connection:
Code:

2.2 Push to turn off, release to turn on
Similarly, you can design a simple circuit to implement the task with
or without Arduino:
Using a simple resistor:
Use Arduino:
You can definitely use the same connection as you did in the previous
section but just modify the code:

2.3 Push to blink the LED
The schematic: (same as Section 2.1)
The circuit connection: (same as Section 2.1)
The code needs to be modified.
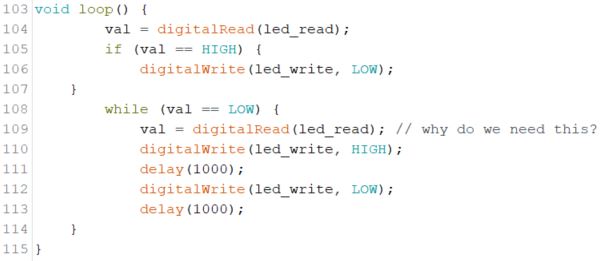
2.4 Modifications to 2.3
Modify the code to implement the following function:
The LED starts blinking (on and off) for 4 times a second. When the
user push the push button, it becomes once a second.
Tasks:
Repeat the work in Sections 1.1 (10 points), 1.2 (10 points), 1.3 (10 points), 2.1 (10 points), 2.2 (20 points), 2.3 (20 points), and 2.4 (20 points)