Week 11-13
MSP430 and STM32 Basics
Introduction
In this lecture, we were
introduced to two industry standard microcontrollers, MSP430
and STM32. We also explored the communication with the HC-05
Bluetooth module. While exploring the MSP430 and
ST32, we were introduced to two IDEs that are used with the
microcontrollers, which were the Energia IDE and CubeIDE. By
completing these tutorials we are hoping to broaden our
understanding of using microcontrollers other than the
Arduinos we have used all semester.
MSP430 Tutorial 1
In this tutorial we were
introduced to the MCU and learned about some of its
features. The first task of the tutorial had us use the
blink example to have the green led and red led blink on the
board, as seen in Demonstration 1 and 2. In the second task
we were given a piece of code to test to check the functionality
of the board and serial communication as shown in Figure 1. For
the third task we built a voltage divider using a potentiometer
and a 10k resistor, which the setup can be seen in Figure 2 and
Demonstration 3.
Demonstration 1: Green led blinking.
Demonstration 2: Red led
blinking.
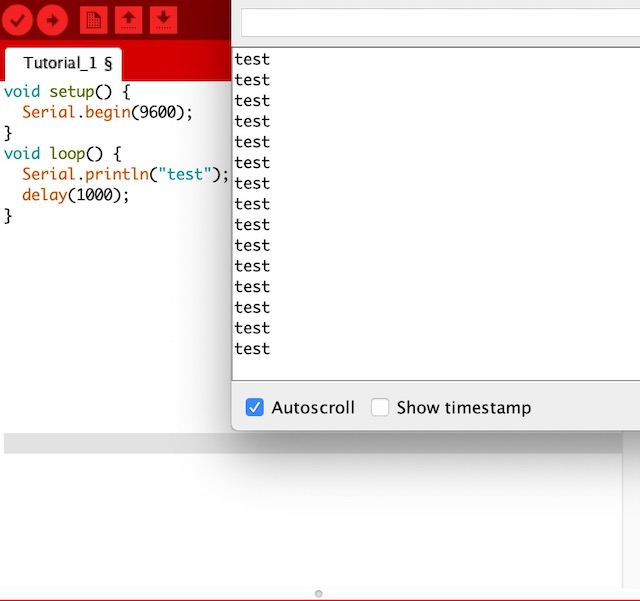
Figure 1: Checking the
functionality of the board and serial communication.
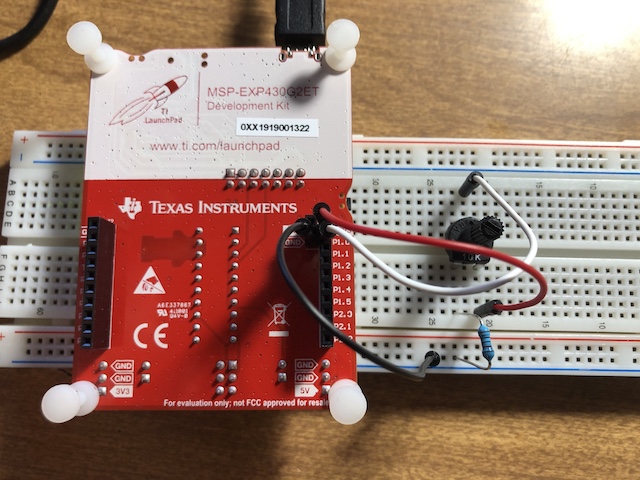
Figure 2: Setup of voltage
divider using a potentiometer and a 10k resistor.
Demonstration
3: Using voltage divider.
The
minimum value is higher than VDD/2 because of the
residue resistance of the potentiometer.
MSP430 Tutorial 2
In this
tutorial we were introduced to wireless communication
through a Bluetooth module using the HC-05. In the
first task, we were given code and schematic to
use the HC-05
and terminal app to control an LED connected to MSP430 as shown
in Demonstration 4. In the second task, we used a voice control
app to turn on, turn off, and have the led blink as shown in
Demonstration 5. In the third task we used an example code to
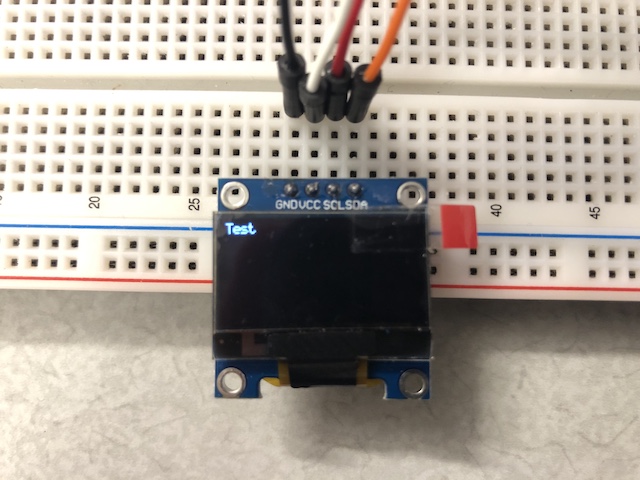
show a display on the OLED screen and to show only text on the
screen as shown in Demonstration 6 and Figure 3. In the fourth
task we used the Bluetooth module, the MSP430, OLED display, and
terminal app to send a message from the phone to be displayed on
the screen as shown in Figure 4.
Demonstration
4:
Use the
HC-05 and terminal app to control an LED connected to MSP430
Demonstration
5: Use a voice
control app to turn on, turn off, and have the led blink.
Demonstration
6:
OLED display using example code.
Figure 3: Using OLED to display
text.
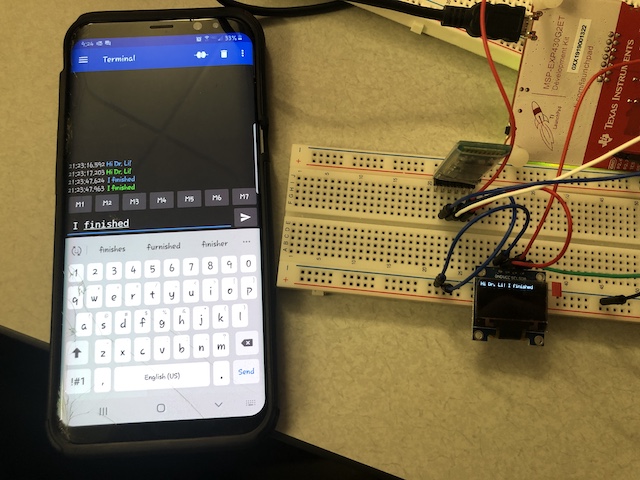
Figure 4: Send message to be
displayed on screen.
STM32 Tutorial 1
In
this tutorial we were introduced to the
STM32, which
is a popular microcontroller. In task 1, we were given the task
to get the green led on the board to blink as shown in
Demonstration 7. In the second task we needed to send a string
to the serial monitor, which we sent "Hello World!!!" as can be
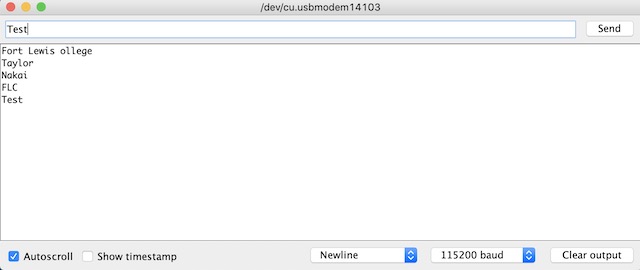
seen in Figure 5. In the third task we needed to echo any data
received over UART on the serial monitor, which can be seen in
Figure 6. In the fourth task we needed to use I2C communication
with the MPU6050 to display the measurements, which can
be seen in Demonstration 8 and 9.
Demonstration
7: Green led blinking.
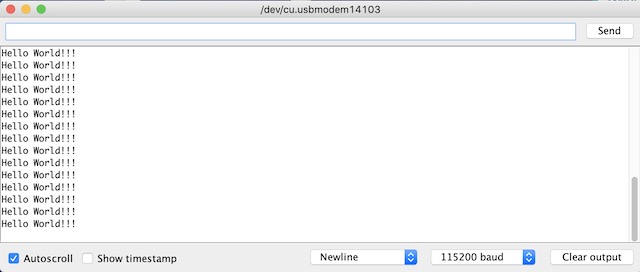
Figure 5: Send a string to the serial
monitor.
Demonstration
8: I2C communication with the MPU6050 without units.
Discussion
By completing
these tasks it gave me a better understanding of the MSP430,
the STM32, the MPU6050, the HC-05, and the OLED Display. I
was able to gain experience with using some microcontrollers
that are considered the standard in the industry. Using the
different protocols and IDEs have been a good learning
experience as I have became more comfortable with them. This
we a great tutorial to go through as I got to refine many
skills that I have picked up over the semester.
..........................