CE 433 Spring 2022
Course Project: Yoshi's Nightmare Game
Taylor Nakai & Noah Peterson
tsnakai@fortlewis.edu
Presentation
Introduction: In this project we referenced the Yoshi's Nightmare FPGA Based Video Game and the code found here.
We wanted to modify the code so to implement the use of pushbuttons to
control the movement of Yoshi and to put a FLC logo in the game.
Beginning this project required us to retrieve the Verilog code from
the repository. Once we had the code, we began looking through the code
and reading through the instruction website to see how the game was
implemented. The whole point of the game is for Yoshi to move around
collecting eggs throughout the map while trying to avoid ghosts. The
design utilizes multiple rom, conversion, state machine, and
combinational logic modules to make the game operational. The first
thing we needed to do was change the way that gameplay was controlled.
To do this we simply swithed the controller input signals to pushbutton
inputs. The next thing we needed to do was to change the background of
the game to display the FLC logo. To do this we ran a python script to
convert a figure to a rom file that we could simply just switch out
with the background currently implemented. Throughout this project I
was able to apply many of the concepts that I had learned throughout
the course.
Code: Reading
through the code we are able to see that the implementation use a
Nintendo NES controller, but unfortunately we don't have one to utilize
so the first task is to switch the controller input signals to
pushbutton inputs that are available on the Basys 3. Based on what the
what the instructions said in the tutorial we made some changes to the
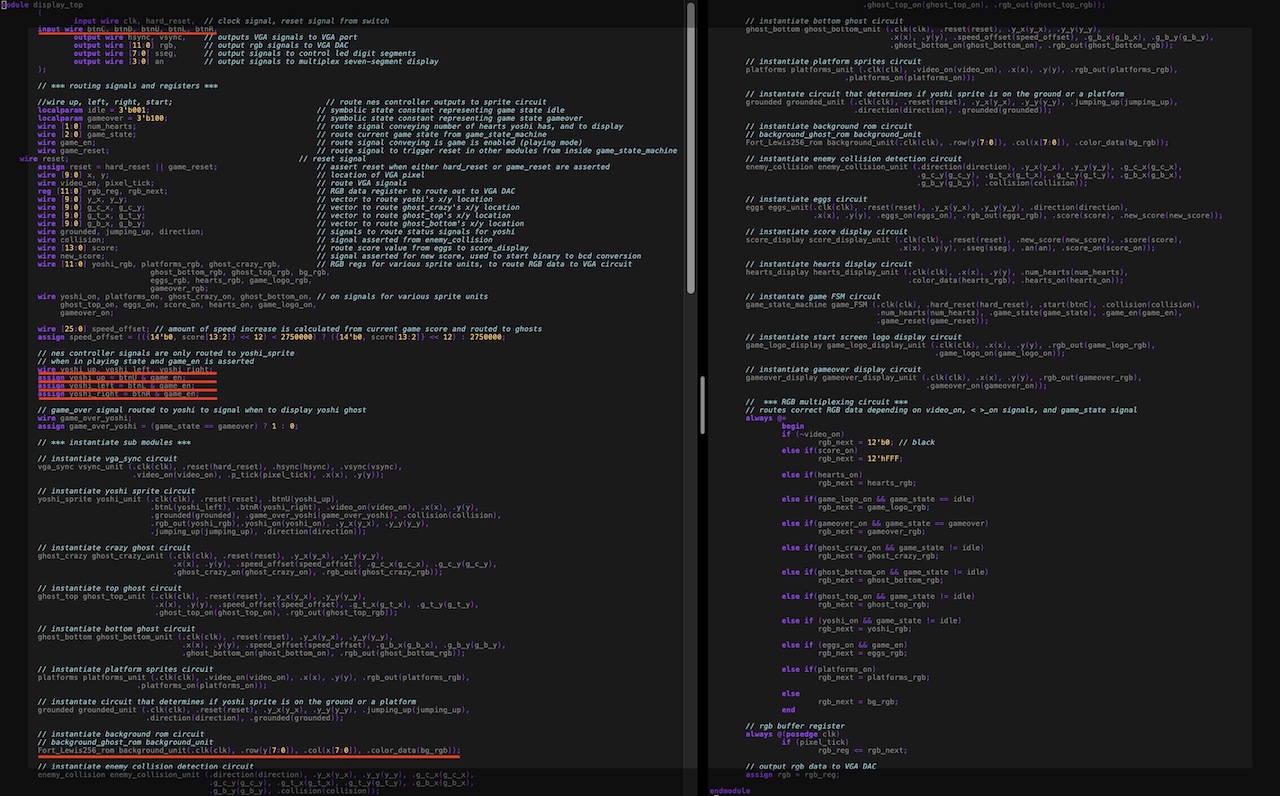
top module to enable the use of pushbuttons. Figure 1 shows some of the
changes made to the top module. Once we did that we tested to ensure
the functionality of the pushbuttons were correct. After that was
complete we started to focus on implementing the skyhawk logo, so Noah
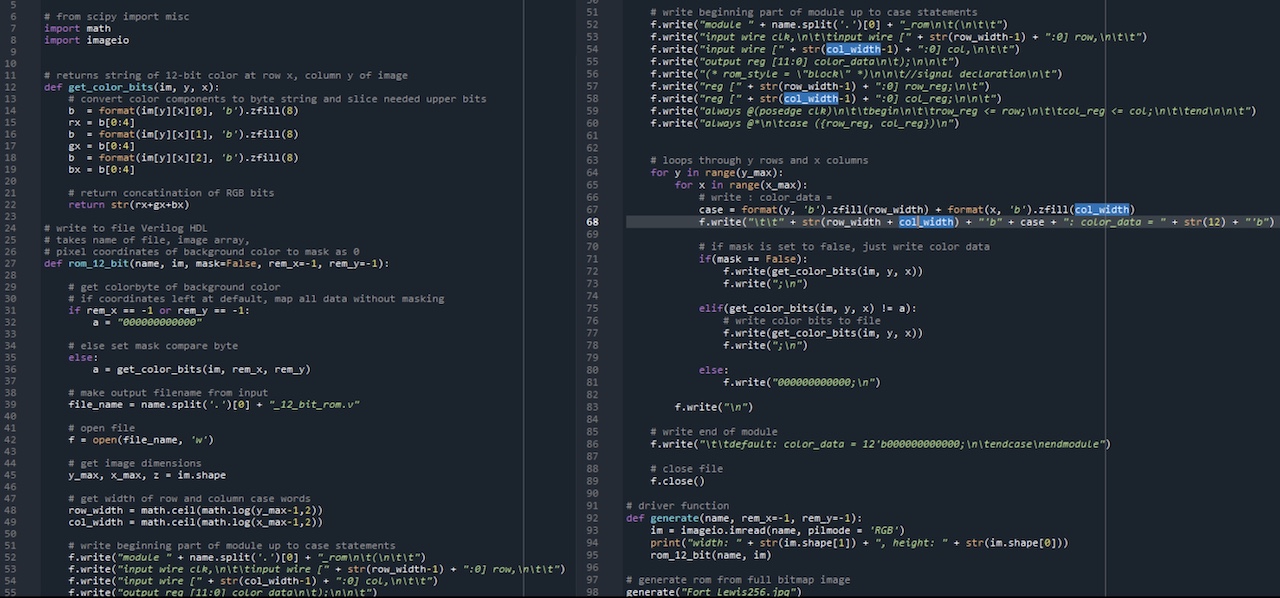
found a python script that converted an image to a rom file that could
be read to display the image. Figure 2 shows the python script that
converts the image to a rom file. Figure 3 shows the rom file that was
created from the python script. We then decided to implement the
skyhawk image in the background of the game. Figure 4 shows the
implementation of the image into the game.
Figure 1. Changes made to the top module code of the project.
Figure 2. Python code that produces the background rom file that will be used to change the background of the game.
Note:
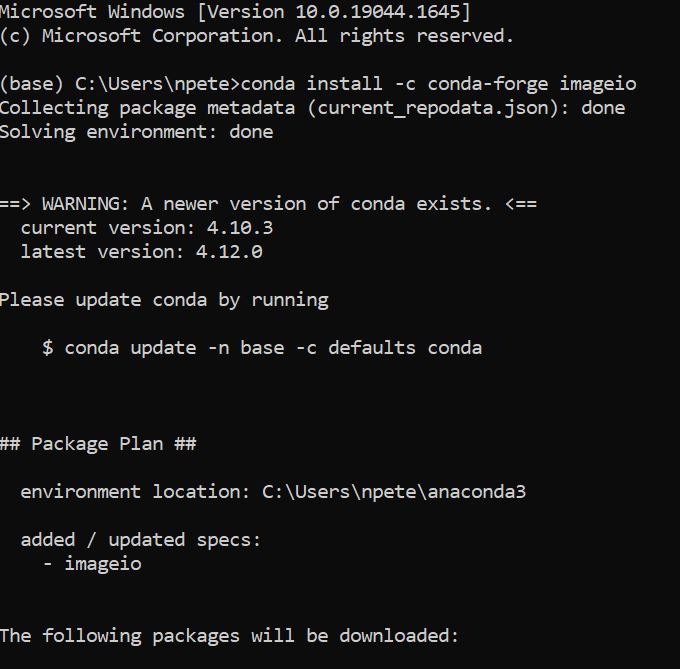
For the python code the process taken was relatively simple given the
code was also provided. The only challenging part was finding the right
version of the library imagieo to run properly with the given code. The
given code had a scipy library which new python version didn't
reconize. How we got around this was downloading anaconda and using the
terminal in anacoda, we downloaded a specific version of imagieo
library using the "conda -c conda-forge imageio" shown in figure 3.
Then the only other task needing to be done was changing the previous
imread sequence to "imageio.imread" then the code could be ran by
adding the name of the figure on the generate function given us the
12-bit rom file for the background. One could have made the back ground
multiple small skyhawks by creating an array of skyhawks in one picture
making the background a bit smoother.
Figure 3. Installation of correct library on the Anaconda terminal.
Figure 4. Background rom file that displays the skyhawk logo when playing.
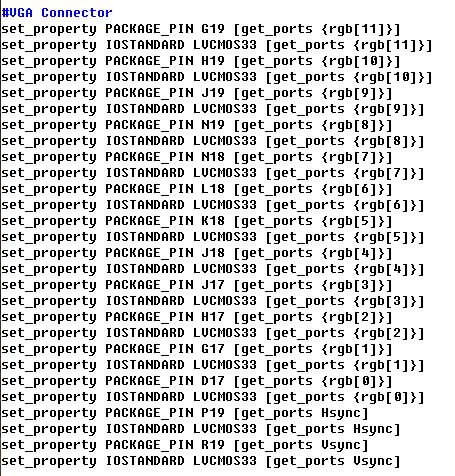
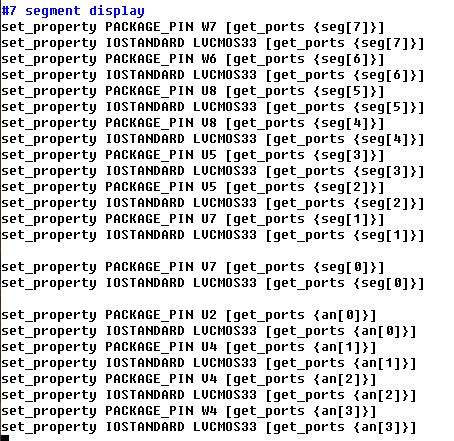
Figure 5. Modifications to previous contraints file used in class.
Note:
One can use the constraints file given with the project folder and add
the push buttons in by copying from the in class constraints file.
Similarly one can also use the inclass constraints file and change sseg
to seg and change the VGA outputs to match the given VGA outputs.
Either one will allow Yoshi to run properly.
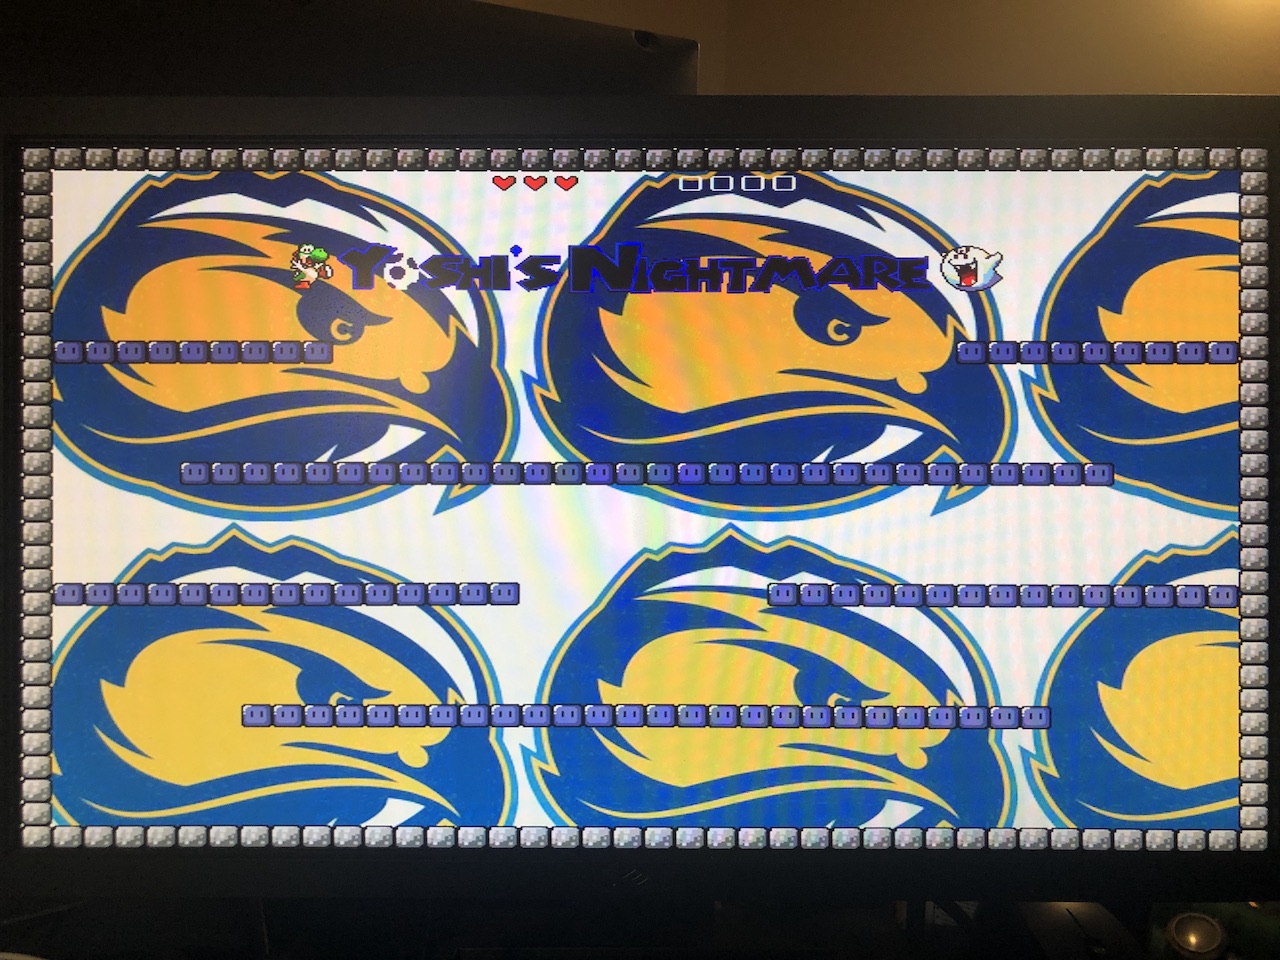
Figure 6. Figure shows that the background is changed to display the fort lewis college logo in the background.
Demonstration:
Once all the changes to the code were completed, we were able to
synthesize, run implementation, and create the bitstream of the code.
Figure 6 shows the demonstration of gameplay of Yoshi's Nightmare.
Figure 5. Demonstration of gameplay of Yoshi's Nightmare Game on Basys 3.
Discussion: By
completing this project, we were able to applying many of the skills
that we had learned throughout the course. Specifically, we used the
skills we developed working with VGA, pushbuttons using debounce, and
ensuring comfortability with Verilog and Vivado. It was pretty cool to
see what things you are able to achieve using Verilog and FPGA's. I
believe that these skills will be useful in the future. Overall, this
was a fun project!
...............................................................................