CE 432 Fall 2021
HW 4: 3D Printing
Taylor Nakai
tsnakai@fortlewis.edu
Introduction:
In homework, we had to follow Noah's 3D Printing Tutorial that
was provided. The tutorial had us go through the process of getting a
simple component printed using AutoCAD SOLIDWORKS, Ultimaker Cura, and
the 3D printer in BH602. This homework was necessary as it allowed us
to gain experience with the 3D printing process to prepare us for
upcoming Robotics II projects and other tasks that require 3D printed
components. The first step required the component to be designed using
the AutoCAD SOLIDWORKS software. The second step required the Ultimaker
Cura software to modify the 3D printing settings, the orientation of
the component, and converting the STL file that SOLIDWORKS provides
into G-code. The final step required us to load the G-code to the 3D
printer via microSD and print the component.
Step 1: AutoCAD SOLIDWORKS
In step 1, the
component to be designed using the AutoCAD SOLIDWORKS software. To
begin we needed to select that we were creating a new part. We need to
configure the dimension so they are in millimeters before we start
sketching and extruding the component. We can finally start sketching,
dimensioning, and extruding the component. After this is all done the
final design of the component is shown in Figure 1 and Figure 2.
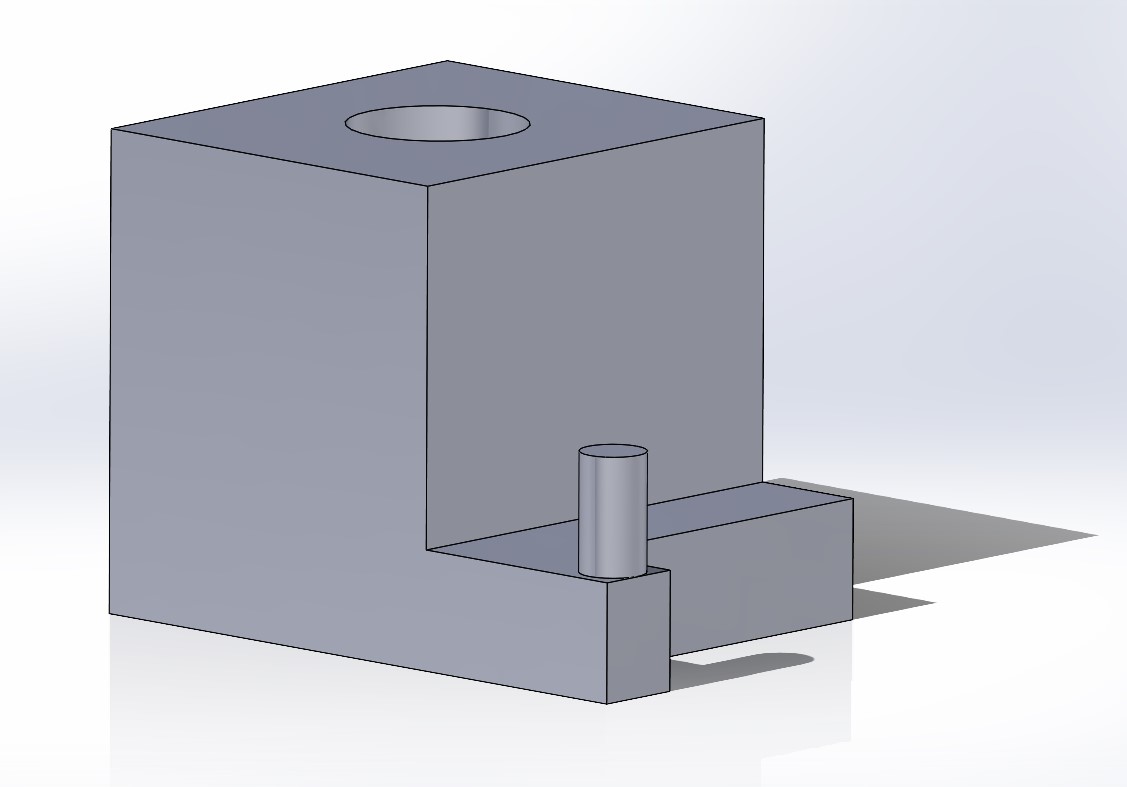
Figure 1. Final design of component after all the sketching, dimensioning, and extruding has been completed in SOLIDWORKS.
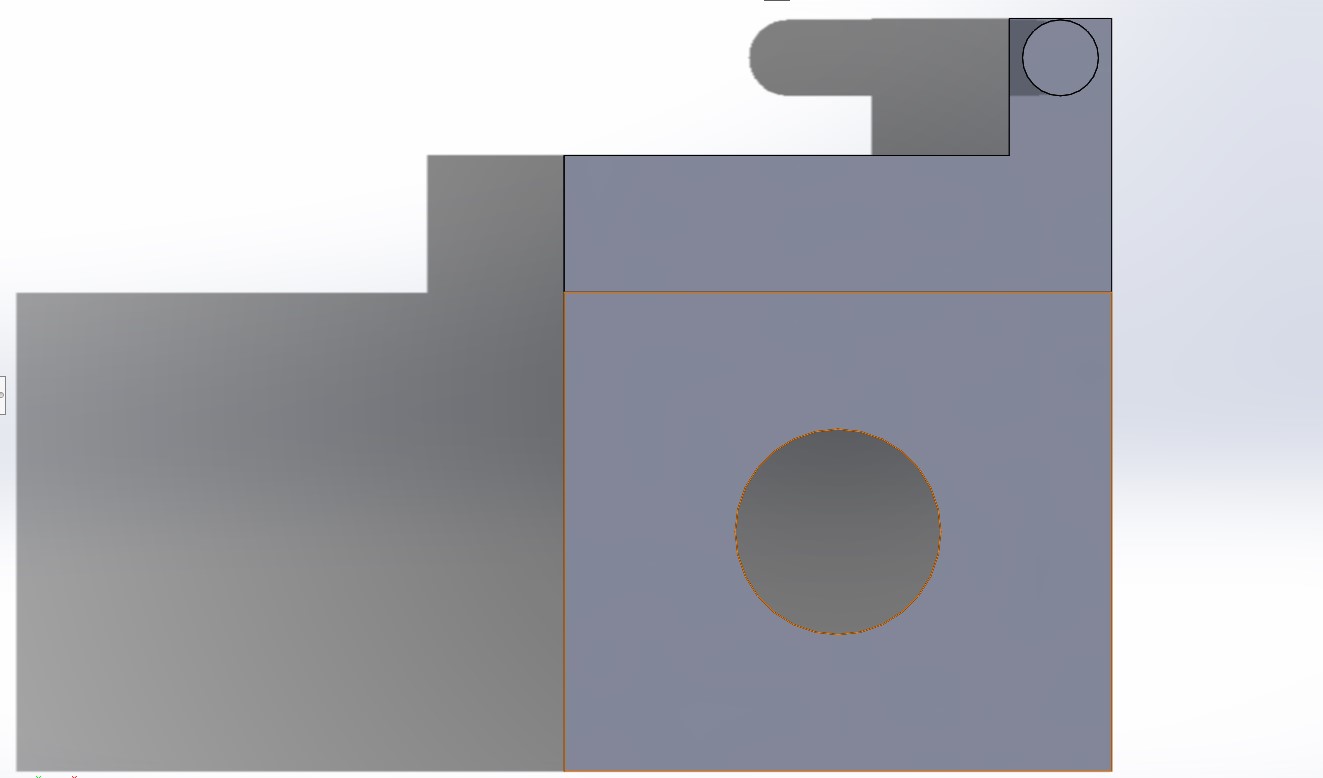
Figure 2. Top view of component showing through hole.
Step 2: Ultimaker Cura
In step 2, required
the Ultimaker Cura software to modify the 3D printing settings, the
orientation of the component, and converting the STL file that
SOLIDWORKS provides into G-code. We need to also indicate the type of
printer that is being used to create the component. The component need
to be positioned in the lower left corner of the printer's surface, as
shown in Figure 3. Once we are happy with the position, orientation,
and settings we can finally slice the file so that it can be converted
to G-code, to be saved to a microSD card.

Figure 3. Showing the placement and orientation of the component in Ultimaker Cura.
Step 3: Printing Component Using 3D Printer
The
final step required us to load the G-code to the 3D printer via microSD
and print the component. Once we get the G-code from Cura, we are able
to load that to the 3D printer and then select that file to be printed.
Once that had been done, we just needed to sit back and let the printer
do its job. In Figure 4, it shows the 3D printer hard at work printing
my component. The printed component is shown in F igure 5.
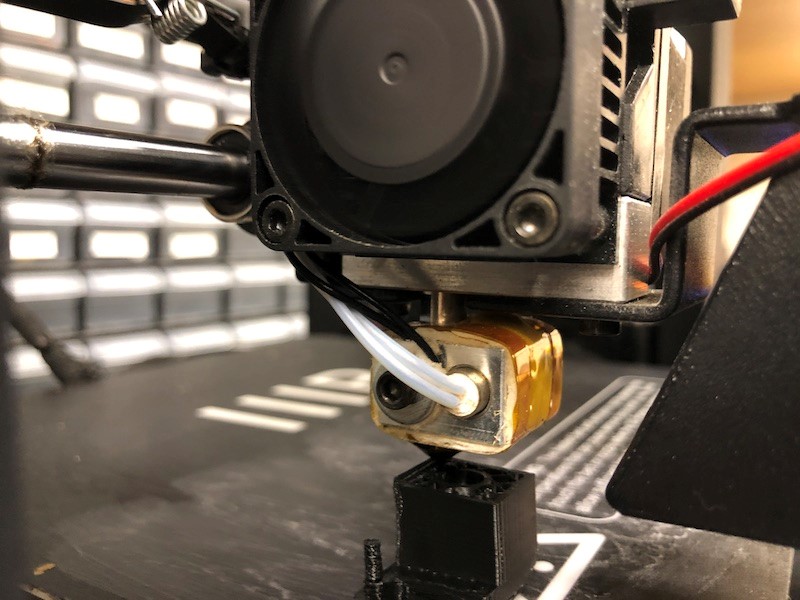
Figure 4. Showing the 3D printer hard at work printing my component.
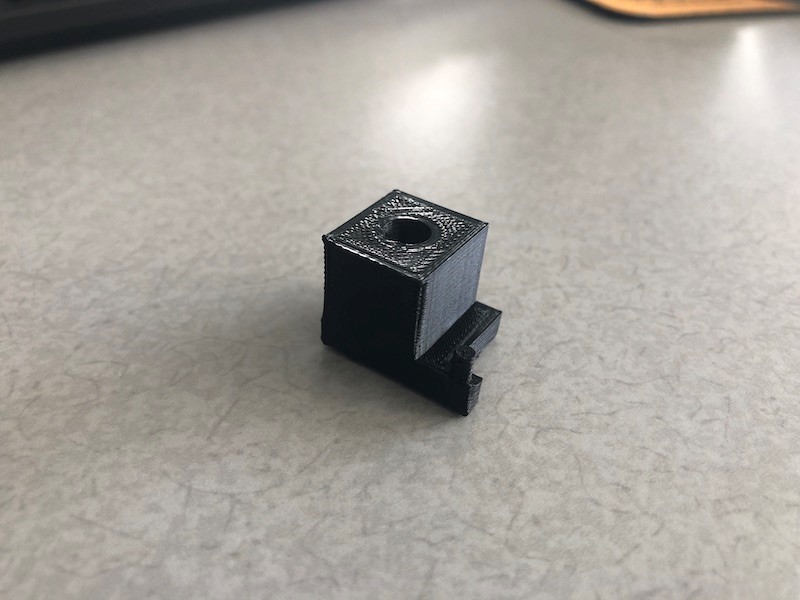
Figure 5. Showing the completed 3D print of the component.
Discussion:
By
completing this Noah's tutorial, I feel more comfortable using
SOLIDWORKS, Cura, and the 3D printer. I think I would be able to
successfully create a component using the process that we learned. I
did run into an error when printing my part as the print stopped
midway, and this was due to the microSD not having enough free space.
To fix this problem, I just uploaded my code to a blank microSD card
and that seemed to fix the problem. I think that using the 3D printer
was very cool and I will most likely be using it in the future to print
different components as it was an easy process.