Wire Bonding Tutorial
Sophie Turner
sjturner@fortlewis.edu
Wire Bonding Tutorial
Introduction
The wire bonder uses a conductive wire to make
connections between the IC and DIP. There are two common methods to make
connections: ball bonding and wedge bonding. Ultrasonic power, force, and heat
are used for the ball bonding method and it requires temperatures between 100
deg C and 500 deg C [2,3]. Wedge bonding process uses ultrasonic bonding
process that happens at room temperature [2]. Silver wire and gold wire are
common conductive wires and were included with the tpt HB05 wire bonder. Wedge
bonding can be manufactured at small dimensions which is an advantage over ball
bonding [1-3].
For more information about the tpt wire bonder or the process go here to their website
Read the manual first.
This is an extra resource for if you are running into trouble with adjustments and settings.
Find what is comfortable and practice.
Wire Bonding Set Up To set up the wire bonder follow the HB05 manual. tpt has other videos and information as well as a representative to reach out to if help is needed.
Wiring To thread the wire for ball bounding and wedge bounding watch the videos below.
Threading Capillary Tool
Threading Wedge Tool
Tips:
While
re-threading the capillary, if you lose the wire use the ultra-sonic button
to try to help bring the wire through.
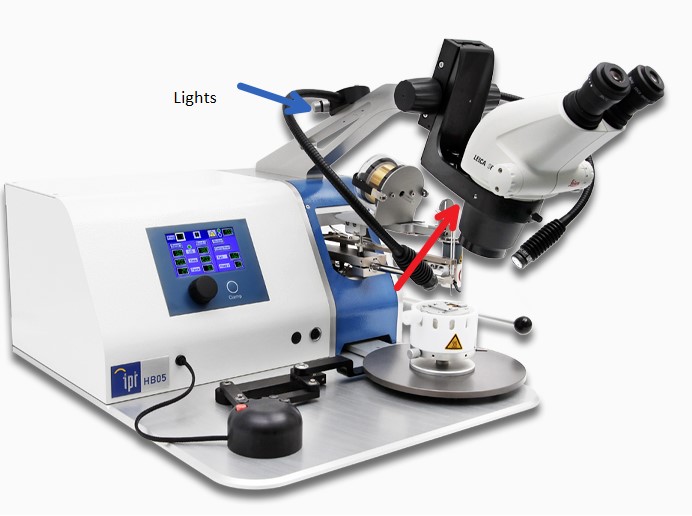
Microscope Adjustments
The
microscope can be adjusted by lifting on the black holder where the red
arrow is pointed. Lift on both sides of the black frame and it will
move slightly.
The eye pieces move in and out vertically and horizontally to adjust the focus.
EOF The EOF is needed to create the ball for ball
bounding. Read the manual to learn more about the EOF. If the EOF is not being activated,
then use the video below to adjust the EOF.
Wire Bonding Tips
Tips:
If the surface you
are bonding to has holes next to the bond the pressure is too high.
If
you do not see the flash from the EOF then the tail of the wire is too
short and you need to lengthen it by pushing the down button.
Once you see the EOF activate and a ball on the end of the wire you can ball bond.
Other Tips
Try not to touch
the wire and pads with your fingers.
If the tail
isn't sticking, make sure the surface is clean.
If the ball isn't sticking make sure the EOF was activated and there is a ball as well as a clean surface.
If the ball
isn't stickingraise the ultrasonic on the first bond parameters.
Tail setting
tells how long the tail will be cut off.
If the clamp
gets too high/low to use, push the up or down button. 3 beeps on the up or
down button will reset the clamp to higher/lower position.
You can use the reflection of the die to line up the ball to die pad.