CE 432 2021 Fall
ESP32-CAM Practice
Sophie Turner
sjturner@fortlewis.edu
ESP32-CAM Introduction
1. Introduction
This tutorial introduced different capabilities
that the ESP32-CAM has. ESP32CAM
was used to take photos and save the photos to a microSD card, we were
able to customize the filename, a push button was used to take photos,
a webserver was used to capture, rotate, delete, and email photos from
the ESP32, and the Telegram app was used to take photos with the ESP32
remotely.
2. Methods
The
ESP32-CAM was connected using FTDI cable and bread board using the
following schematic. ESP32-CAM, FTDI cable, breadboard, 10k
resistor, pushbutton, PCB antenna, power supply, and Telegram app were used for this project. For a more detailed method
section go to http://www.yilectronics.com/Courses/CE432_RoboticsII/f2021/lectureTopics/esp32CAM_tutorials/tutorial_2_takePhotos/tutorial_2.html
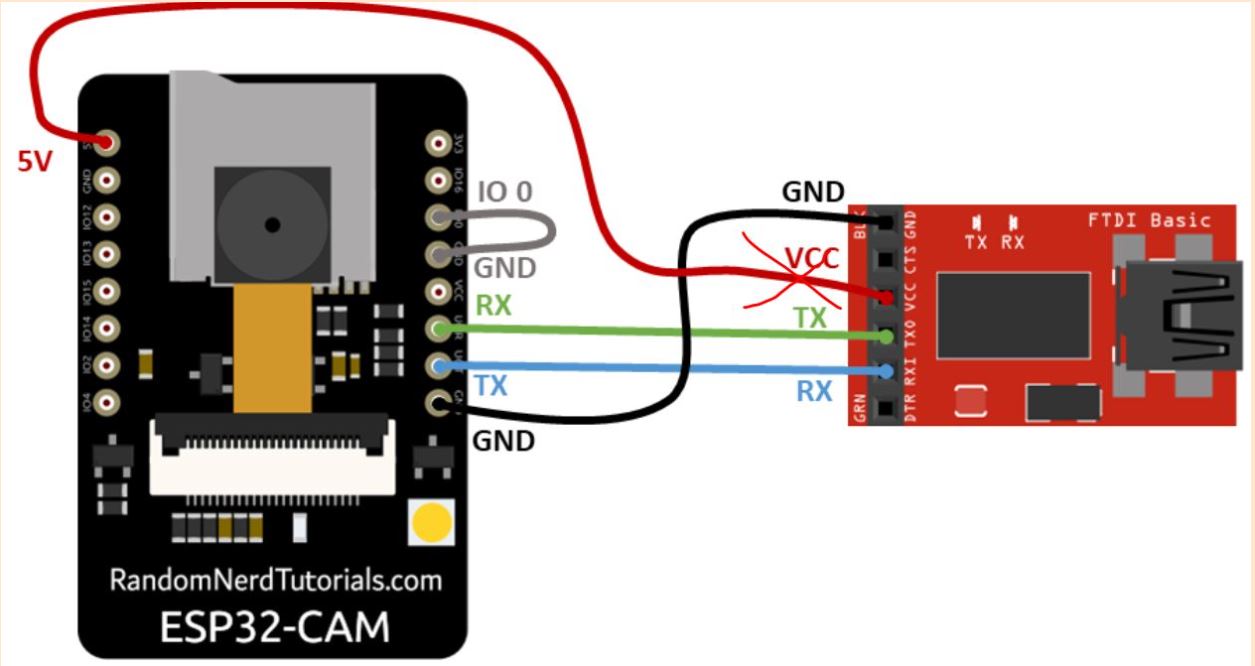
Figure 1. ESP32-CAM to power connection.
3. Results
Task 1.
ESP32-CAM
was used to take photos that saved on a microSD card. The code took
photos every 10 seconds and saved the photos to the card as seen in
Figure 2.
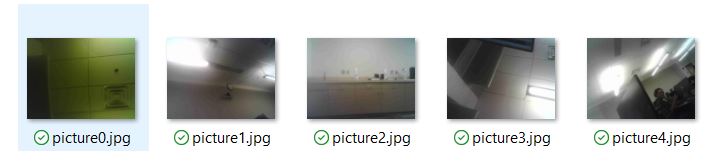
Figure 2. Five photos taken on the ESP32-CAM in 10 second increments.
Task 2.
The objective of this task was to change the photo filename to date and
time saved. The ESP32-CAM connected to WIFI then connected to the NTP
server to initialize
date and time. The code needed to be modified for
MT time since the default is GMT. The cam took photos every 10 seconds
and the photo is saved onto the microSD with a filename that contains
date and time taken. The pictures were taken 09/10/2021 at about 2:40pm
MT time according to the filenames.
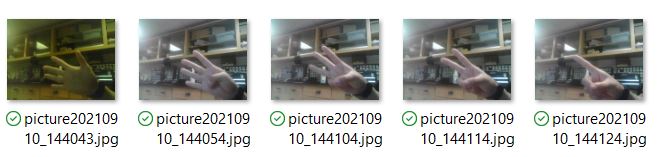
Figure 3. Photo file name changed to date and time photo was taken.
Task 3.
A
pushbutton was used to take a photo on the ESP32-CAM and saved the
photo to the microSD card. A software debounce checks the state of the
pushbutton twice within 50ms to make sure if the button was pressed.
Without a debounce multiple photos will be taken in a short period and
crash the ESP32. If the button is pressed the button state is LOW and
HIGH when the button is not pressed.
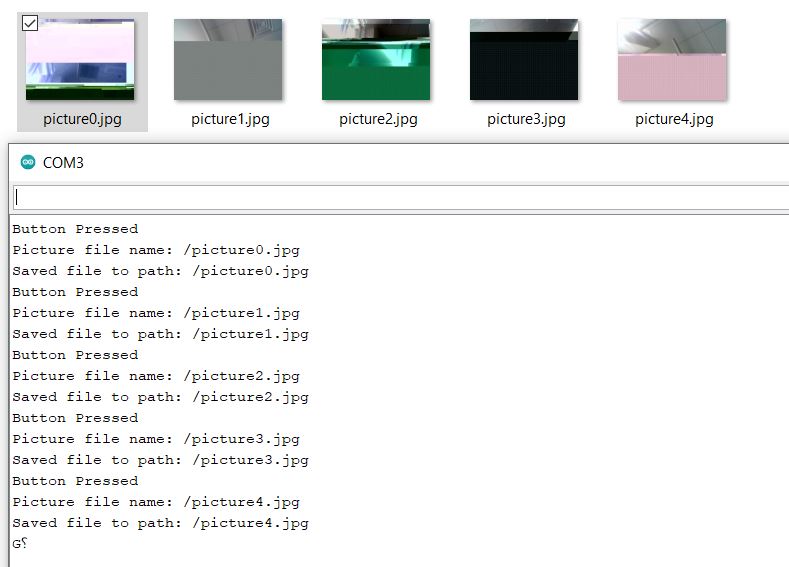
Figure 4. Using a pushbutton to capture photos on the ESP32.
Task 4.
The
objective of this task is to use the webserver to take pictures. Two
libraries were downloaded for this task: ESPAsyncWebServer and AsyncTCP
libraries. The webserver allows you to capture the photo and rotate it,
then you have to refresh the page to display the last photo taken.
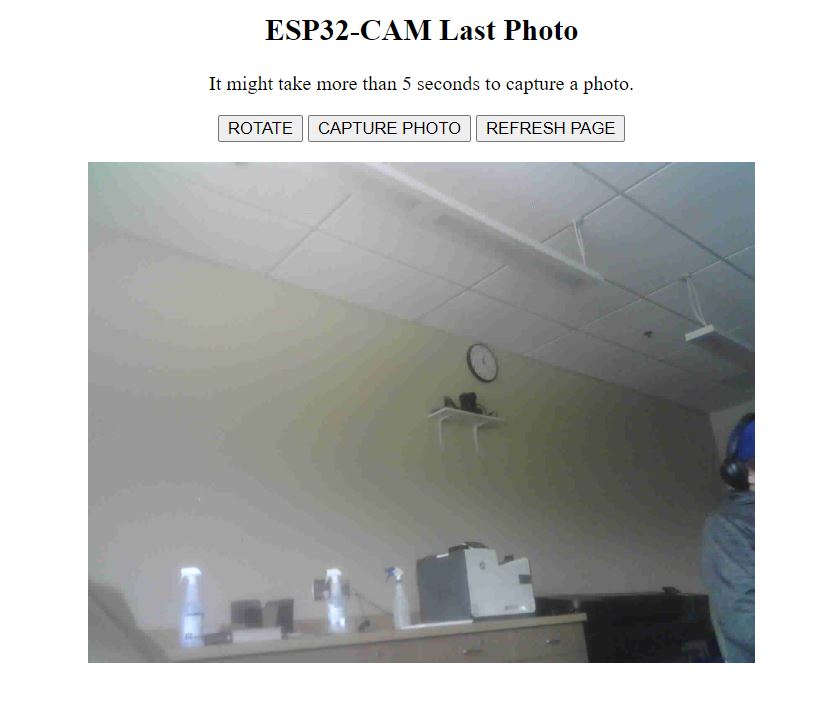
Figure 5. Webserver displaying a image taken from the ESP32-CAM.
Task 5.
The code builds a webserver that allows photos to be taken. The photos are saved on the microSD
and you can rotate, capture a photo, or view and delete photos. Photos
previously taken can be viewed or deleted on the webserver. The
filenames are the date and time that the photo was taken as seen in
Figure 6.
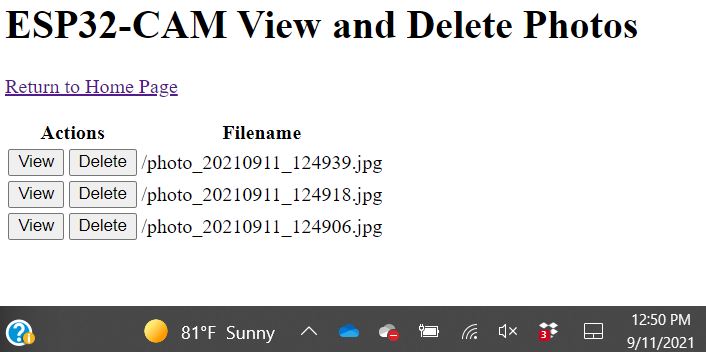
Figure 6. Webserver displaying a list of images previously taken and you can delete or view them.
Task 6.
Photos are taken from the ESP32-CAM and then are sent to an
email account. ESP-Mail-Client library was downloaded. My gmail address
and password was inputted into the code so the attachment could be sent.
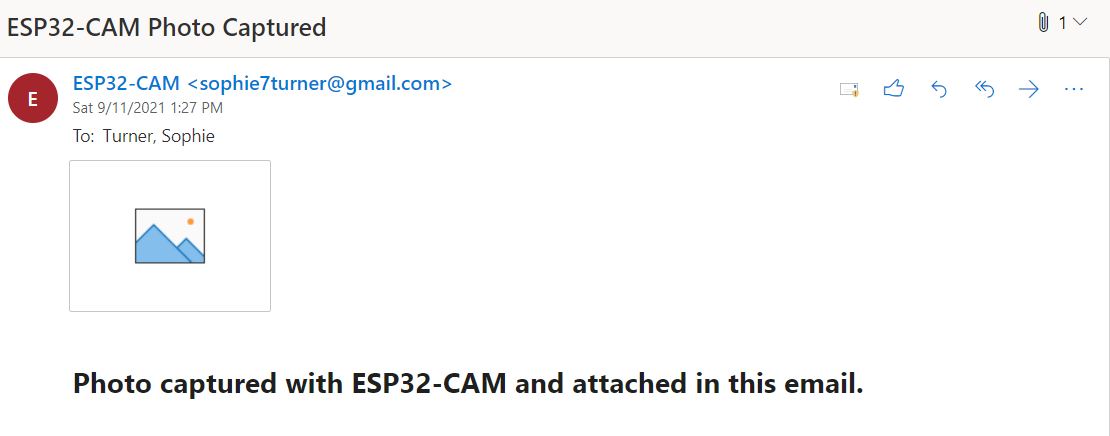
Figure 7. Photo captured by the ESP32-CAM and sent the photo to my gmail account.
Task 7.
The objective of this task was to take a photo with the webserver and
then email the photo. The code creates a webserver that allows users to
capture a photo and email the photo. My email credentials were inputted
into the code to allow for the attachment to be sent to my gmail. The
serial monitor in Figure 8 shows that two messages were sent
successfully.
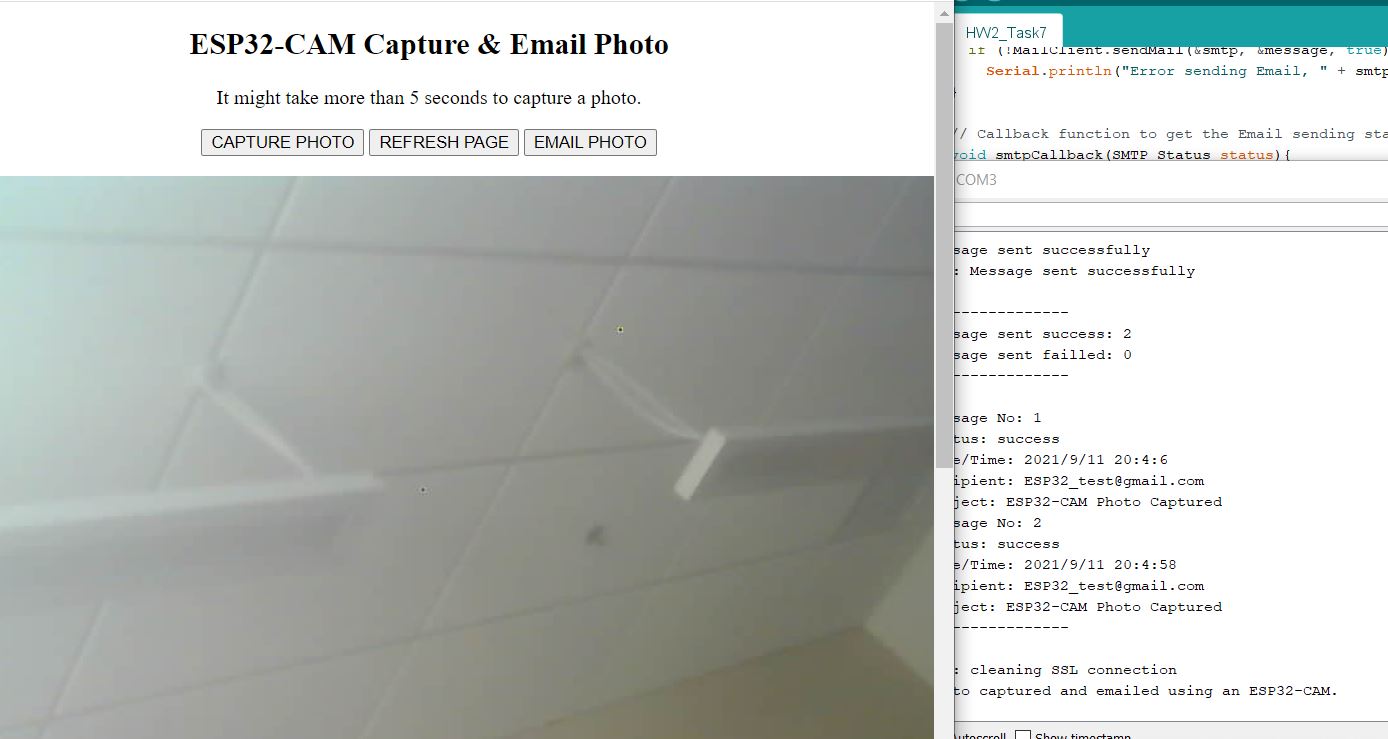
Figure 8. Flash light controlled by a push button.

Figure 9. Photo taken with the webserver was sent to my gmail.
Task 8.
In
this task the ESP32-CAM was connected to Telegram App. An account was
created to interact with the ESP32. From the app you can take photos
with the ESP32. Universal Telegram Bot library was downloaded for this
task as well as the Telegram app. ID numbers, and bot token numbers
from the Telegram app in order to interact from the app to the ESP32.
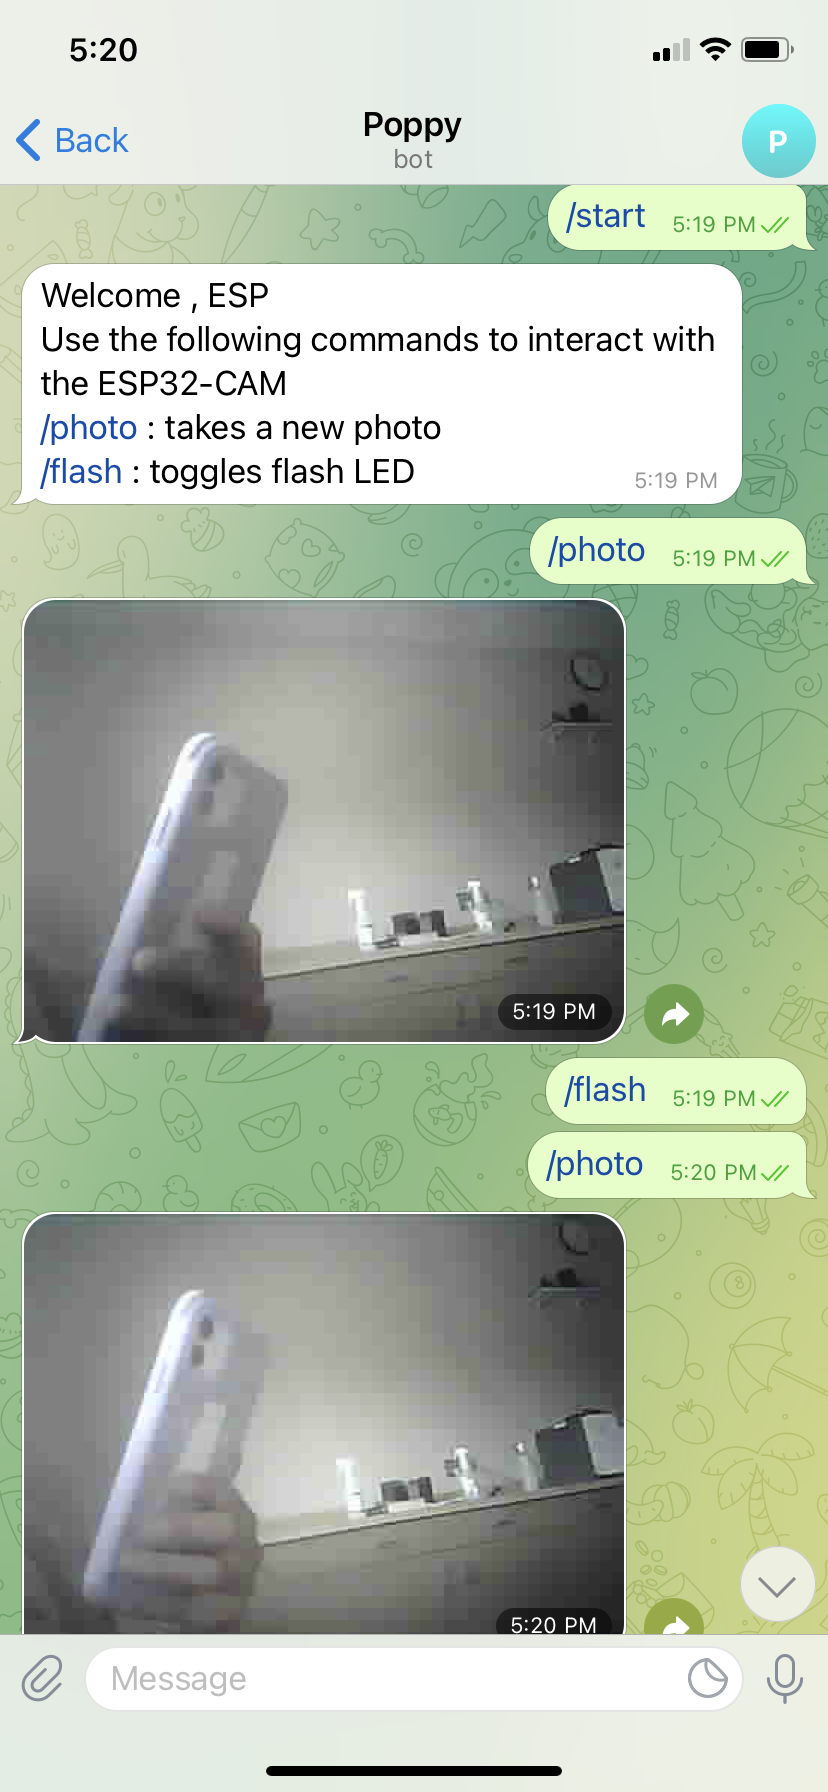
Figure 10. Telegram app taking photos from the ESP32-CAM.
2. Discussion
I
was able to successively complete all the tasks. This tutorial allowed
me to see and use the different capability the ESP32-CAM has. The ESP32
has useful features with the different ways to take a capture a photo
with the cam. With the Telegram app you can interact with the ESP32-CAM
from anywhere which is very useful.