The
Arduino C Programming Language Basics
1.
Introduction
In
Lab 2 coding in Arduino C language is introduced. Basic 'for' loops, 'while'
loops, switch statements, 'do' while, and Boolean operation were all practiced
in this lab.
Arduino was also used to convert hexadecimal to decimal. Another
task was to wire five LEDs in parallel and to transmit a 5-bit binary number on
to the LEDs using a bit mask.
2.
The Code and the Results
The
following figures are examples of coding in the Arduino C language.
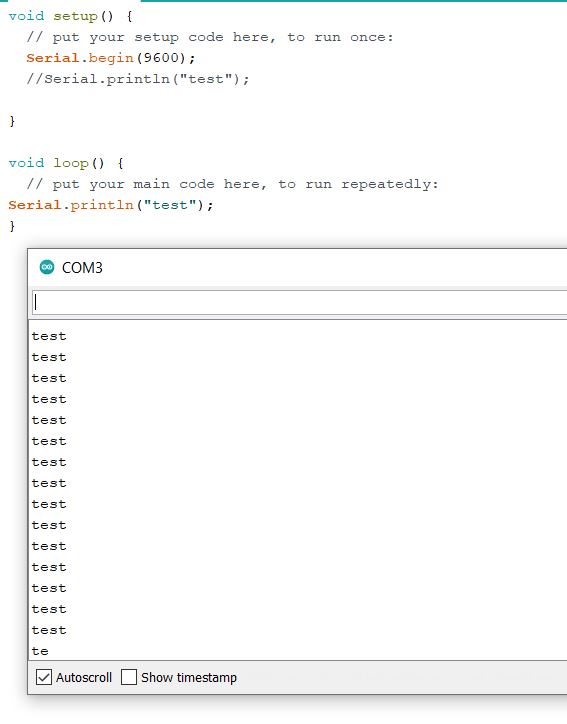
The
code will continuously run until the Arduino is unplugged, because the void
loop() function is an infinite loop.
Figure
1. Testing
the void loop() function.
Serial.end()
is used to end the loop after the first execution. Shown in the figure below,
Arduino can also preform arithmetic operations.
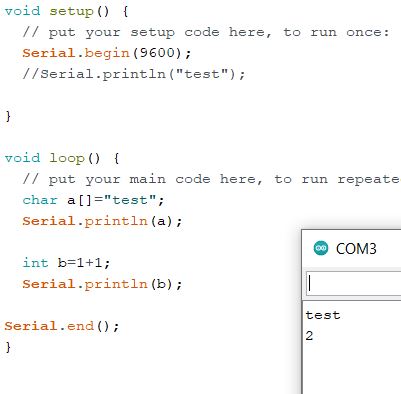
Figure
2. Example
of using an arithmetic operation and to print 'test' once using
Serial.end().
Logic
expressions can be executed in Arduino as shown below in Figure 3. The Boolean
operator will return 0 for false and 1 for true.
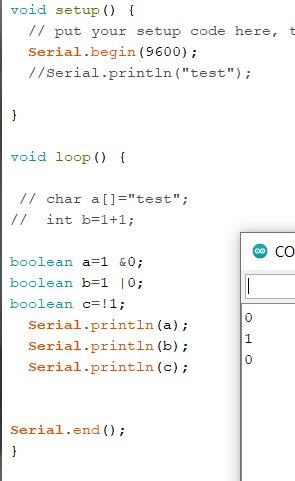
Figure
3. Example
using the Boolean operators.
In
Figure 4 a 'for' loop was created to print out numbers from 1-9.
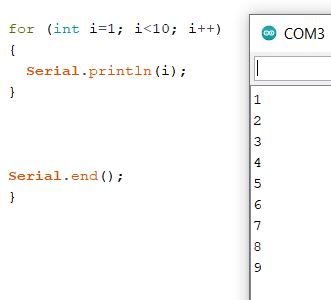
Figure
4.
Example of 'For' loop.
The
'while' loop is used to print out numbers from 0 to 9. The while loop
will start at i=0 and increment by 1, then stop executing at i=9.

Figure 5. Example of 'While' loop.
In
Figure 6 a switch statement is used to print out "Now it is 3" for
case 3 and "Now it is 6" for case 6. Without the break function in between
cases, case 6 would run twice.
The switch statement will execute to case 3
first (switch (3)), then run through the cases below the entry. Case 6
will then be executed again when switch(6) is called.
The
break statement terminates the cases and returns to the for loop.
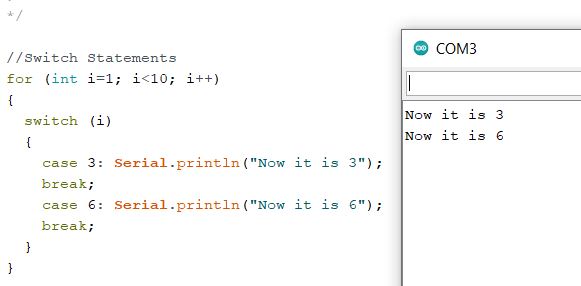
Figure 6.
Switch statement example.
Figure 7 contains a 'do while' function. My example has 'a' incrementing
by 3 and the function will declare if the number is even or odd in a while loop
for a < 50.
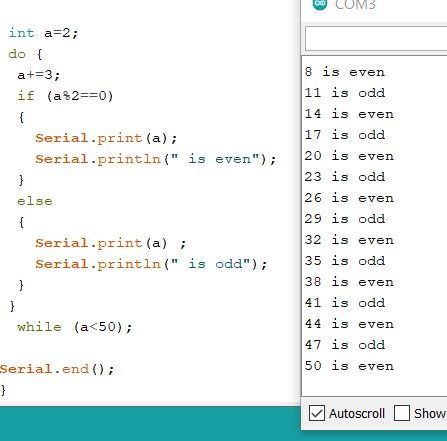
Figure 7.
'Do while' example.
Arduino can convert hexadecimal
to decimal using 0x as a prefix. Arduino can also convert binary to decimal and
octal to decimal. In Figure 7 0x1000 output is
4096 because Arduino is
converting hexadecimal to decimal (1x16^3 + 0x16^2 + 0x16^1 + 0x16^0 =4096).
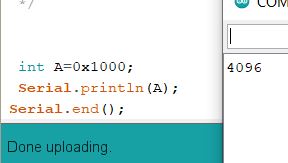
Figure 8.
Converting hexadecimal to decimal.
Task
4:
Use the HEX format (0x.....) (16 bits)
to represent the following numbers:
a) 1000 1111 0011 0101 (2) ---> 0x8F35
1000 = 0x8
1111 = 15 = 0xF
0011 = 0x3
0101 =0x5
b)
55 (10) ---> 0x37
55/16 : remainder 7
3/16 : remainder 3
c)
11 (2) ---> 0x3
Task
5:
Convert the following HEX format into Binary:
a)
0xFFFF ---> 1111 1111 1111 1111
F=15=1111
b)
0x3210 ---> 0011 0010 0001 0000
0x3 = 0011
0x2 = 0010
0x1 = 0001
0x0 = 0000
c)
0xABCD ---> 1010 1011 1100 1101
0xA = 1010
0xB = 1011
0xC = 1100
0xD = 1101
Task 6:
A binary number is
transmitted to LED pins on the Arduino board. A bit mask is used to retrieve
the binary number and store it into an array. A 5-bit binary number is
displayed on five LEDs in parallel.
Transmit stored an array of pins that the
LEDs were connected to. A for loop was inserted so the binary number could be retrieved
using a left shift operator. If both the mask and
transmit[i] were 1 then the
LED would be turned on. In Figure 10, 13 was transmitted and the LEDs
displayed 01101.
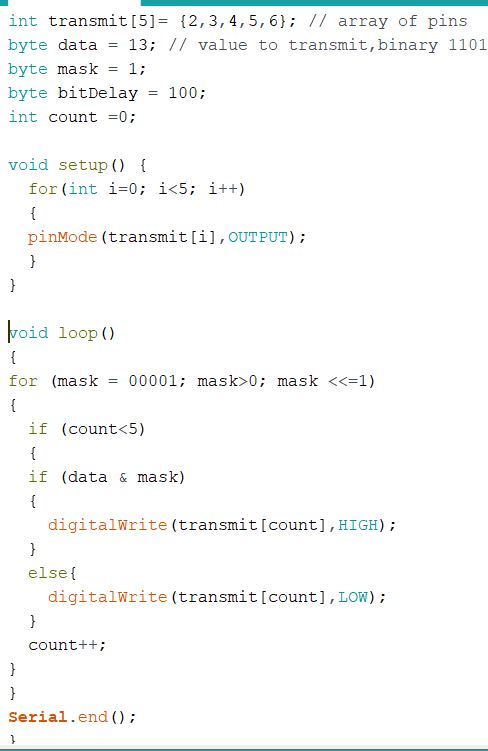
Figure 9. Code
to display 13 as a 5-bit binary number on five LEDs.
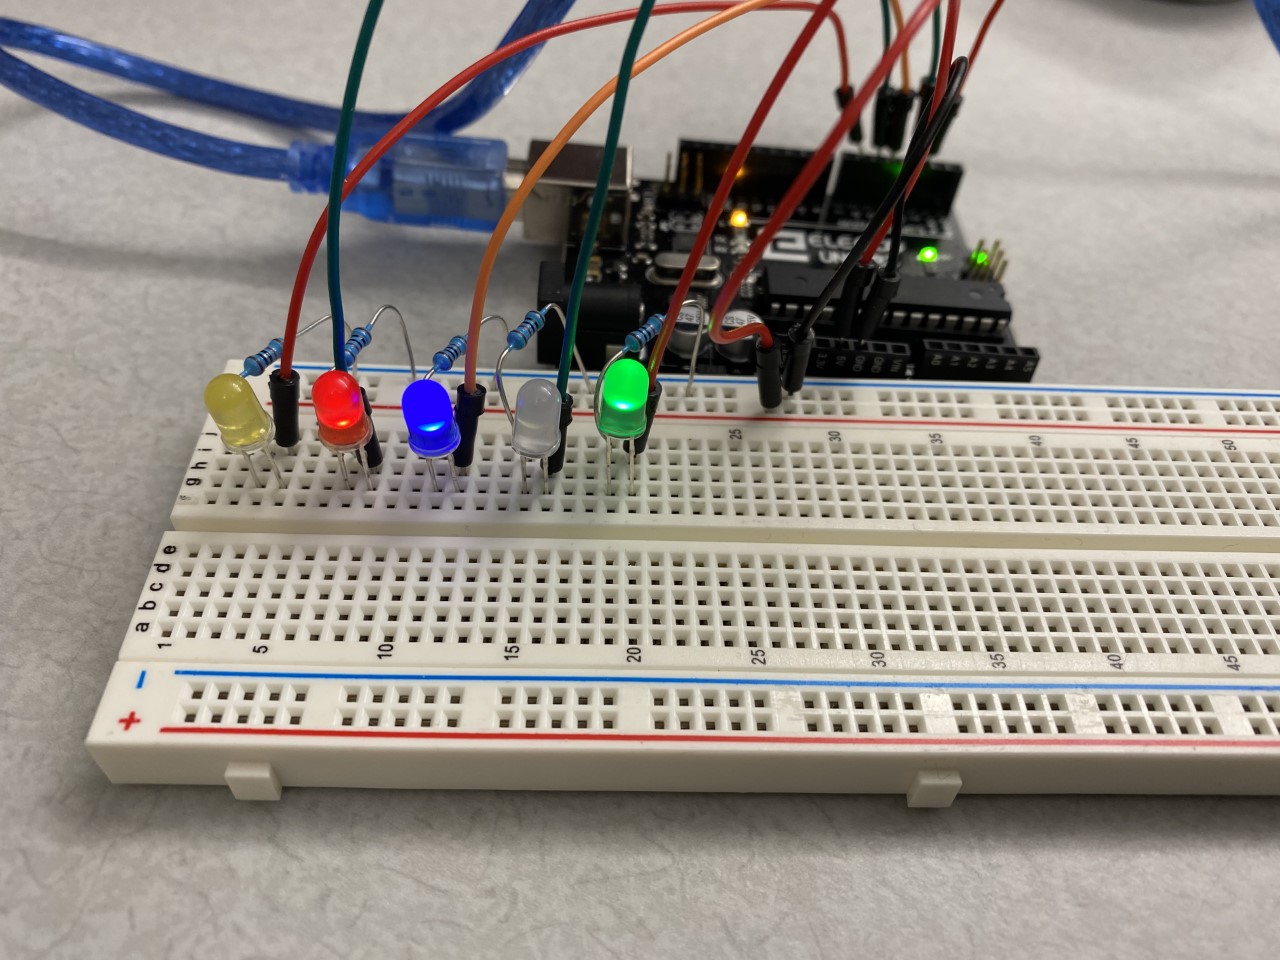
Figure 10. LEDs lighting up 01101 in binary (13 in decimal).
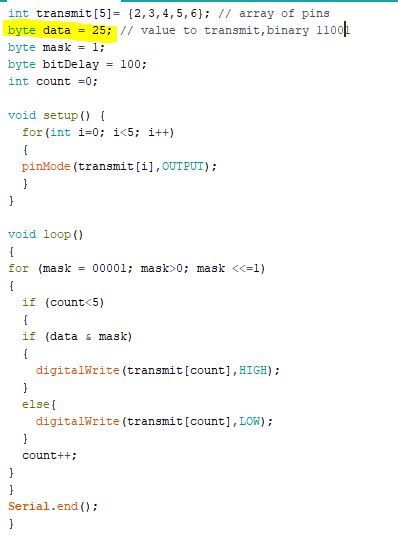
Figure 10. Code to display 25 as a 5-bit binary number on five LEDs.
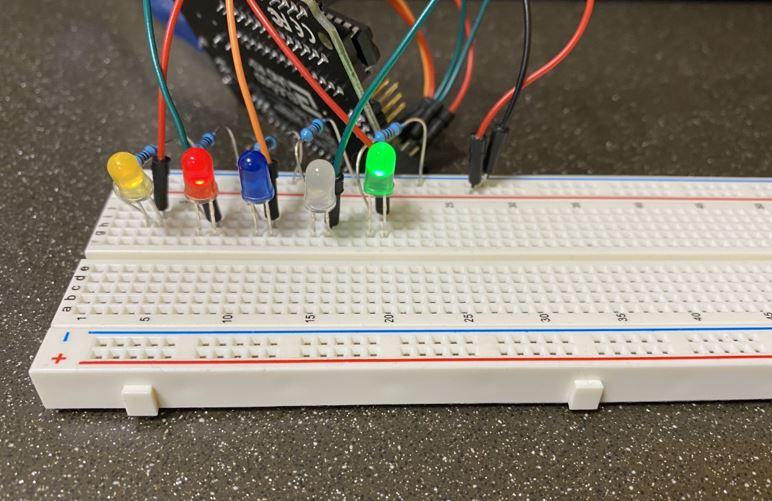
Figure 12. LEDs lighting up 11001 in binary (25 in decimal).
..........................