CE 433 Lab Spring 2022
Course Project
Name: David Lee and Max Krauss Email:
djlee1@fortlewis.edu, mtkrauss@fortlewis.edu
Yoshi
Nightmare - Course Project
The objective of this project was to take a an old verilog
game and change the input parameters to be able to use the Buttons on
the Basys3
FPGA board to control Yoshi in the game. Another objective was
to add FLC logo into the background. Since we had extra time, we
decided to try and play using a joystick instead of the pushbuttons.
This sllowed for more intuitive controls and made the game more fun to
play.
Materials and Methods:
Gvim, Vivado, Python,
Basys 3 FPGA Board,
B103 348 (joystick) and the master files found on gitHub. The
Website details on what each of the files can do are here.
The first thing that was decided to accomplish was to get the buttons on
the FPGA board to control yoshi. After we were successfully able to do, that
we added the skyhawk background and finally we decided try making a
joystick function as the controller.
Results:
Using Buttons to control Yoshi's Motion:
In order to do
this we had to figure out what was were being called to make Yoshi move
if we were to
use the NES controller, which the game had previously used. This was
done
using a module called nes controller. This module was taking the data,
latch and clock
from the NES controller and translating it to the Up, Left, and Right
motion.
Once this was figured out, we had to reassign the control inputs from
the nes controller module to the pushbuttons of the Basys3.
We thought that we might have to use a debounce module to make the
buttons function but we did not since we didnt care about how fast or
slow the button was released.
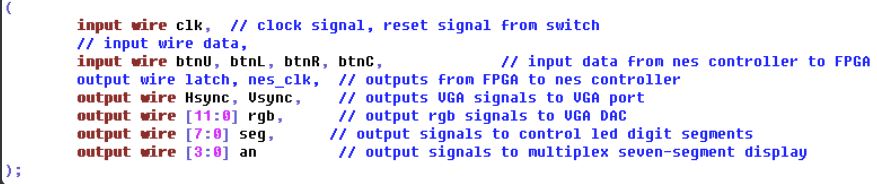
Figure 1: These are the instantiations needed
in the display_top module in order to utilize the pushbuttons on the
Basys3. The lines commented out where the inputs and outputs needed for
the nes controller. The instantiation for the nes_controller module was
also commented out.
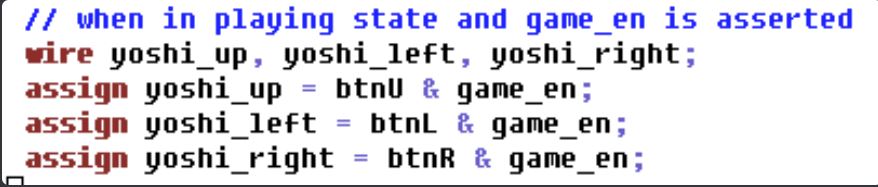
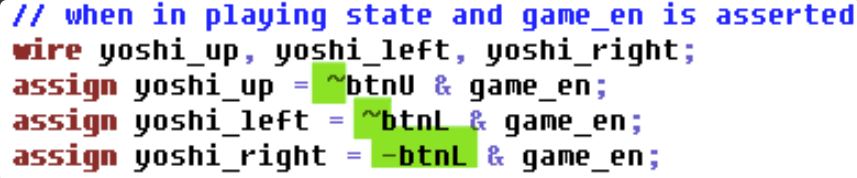
Figure 2:This was the assignment changes we
had to make in order to make the pushbuttons control Yoshi's movement in the game. Figure
3: We had to make the highlighted change so that we could use
button C to start the game from the menu.
We also had to make changes to our constraint file that allowed for the
calling of rgb[11:0] values instead of vgaRed, vgaGreen and vgaBlue that were in our constraint file initially.
Using Creating a Skyhawk
background:
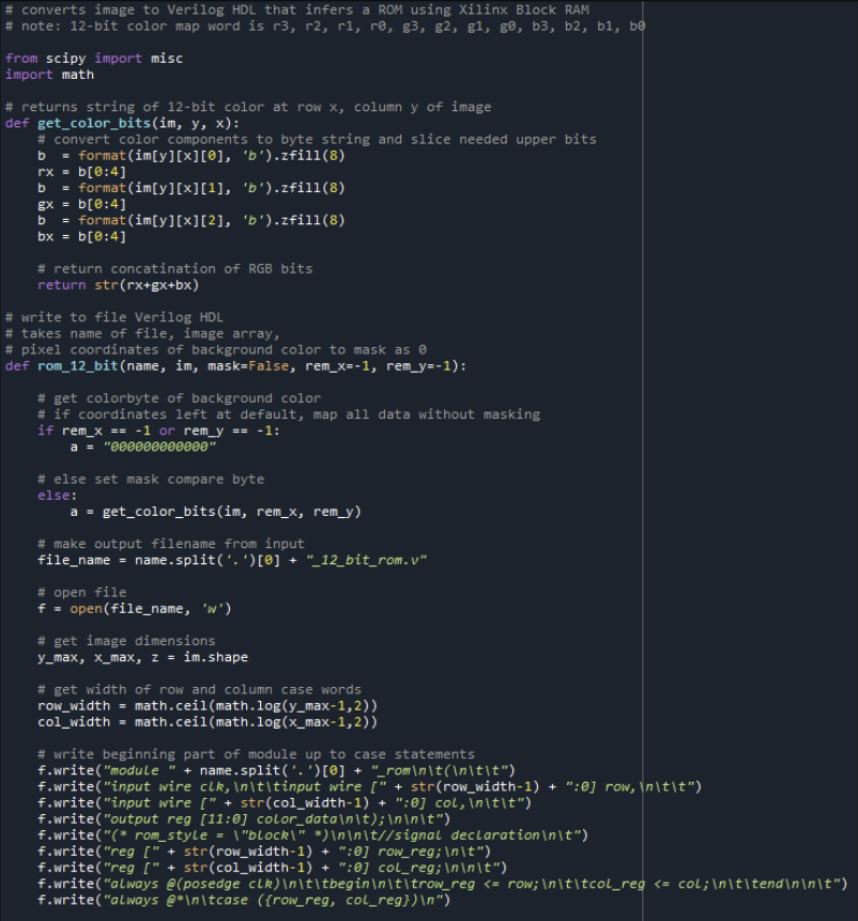
To do this we used a python script found on the main website. This script took an
image and created a .v file containing the xilinx block ram of the images color data. With this rom file we were
able to upload this as the background and resynthesize the project to
be able to see the logo as our background.
Figure
4: Shows the
Python Script Used 1 of 2
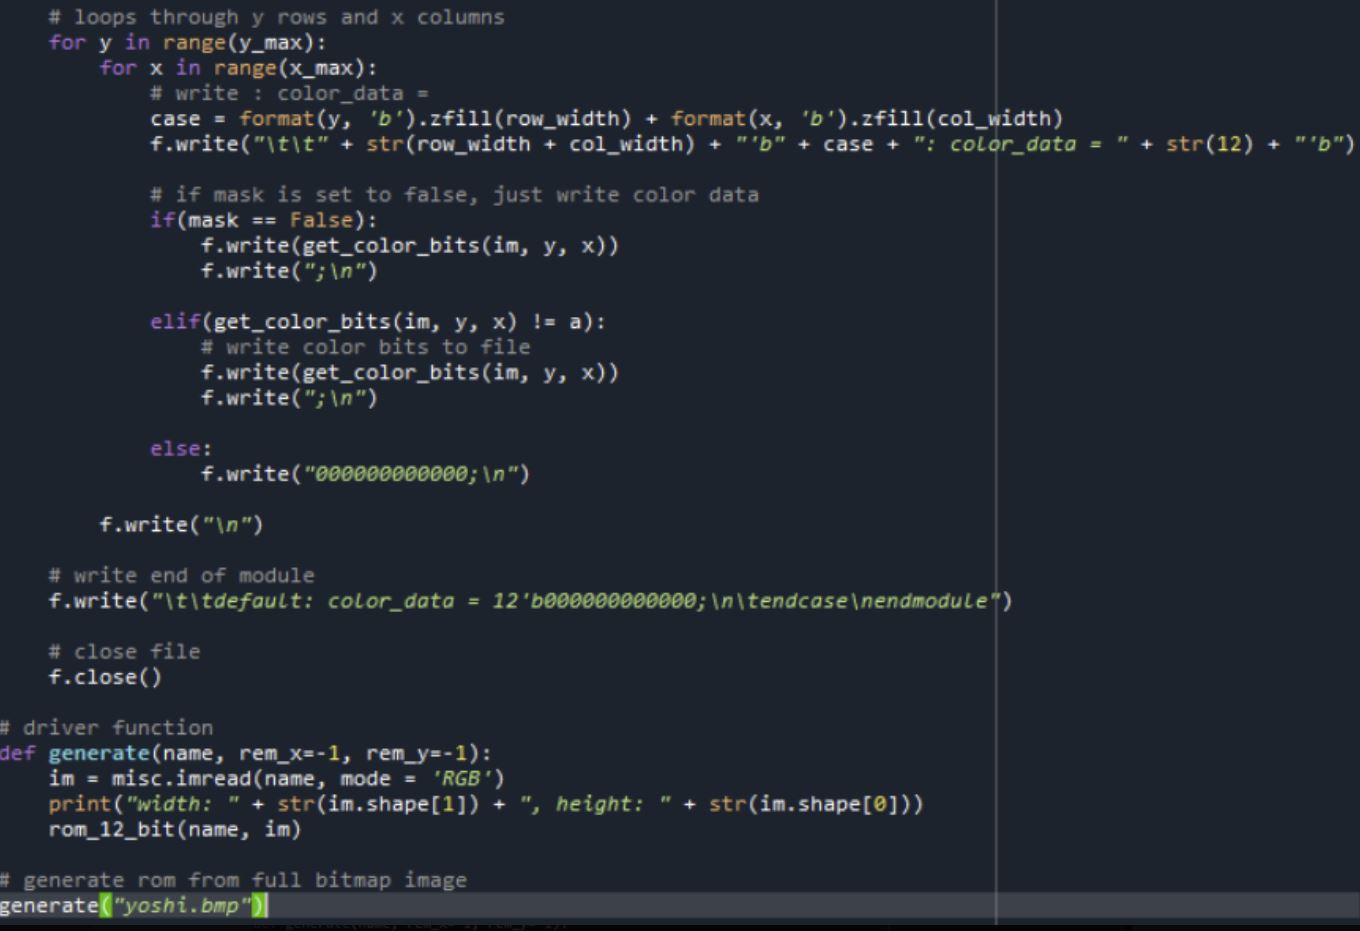
Figure 5:Shows the Python script used 2 of 2
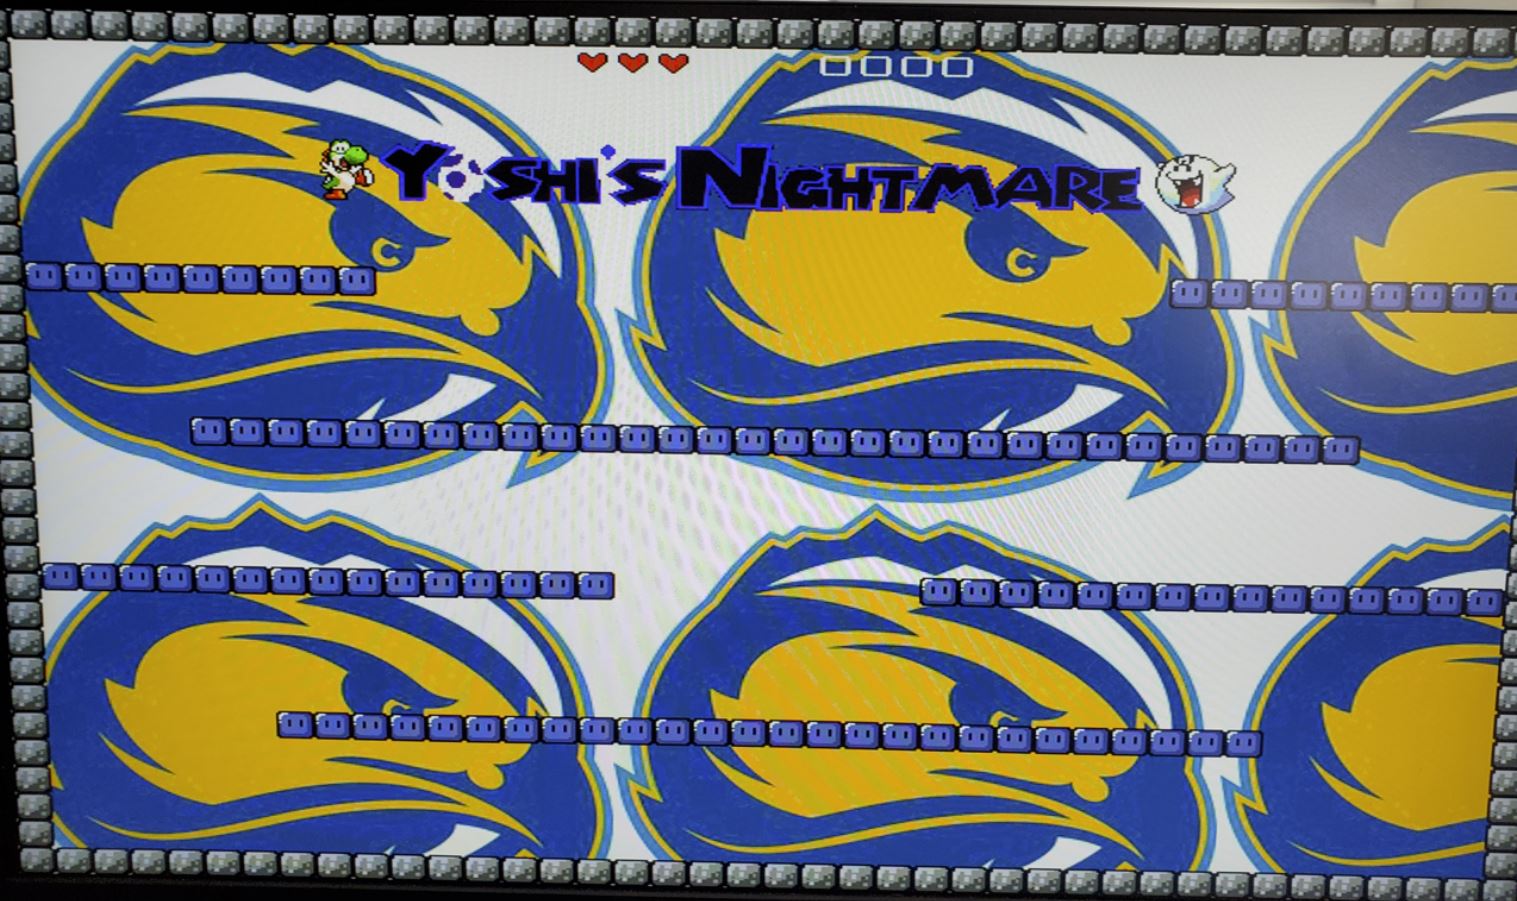
Figure 6:Image used to create the background. This was a 256x256 sized image just like the original background image for the game. Figure 7: The Final Background in
game
Figure 8: This is the video using button control with the skyhawk background
Joystick control of Yoshi's Motion: Since we had
extra time we tried to use a joystick to control the motion. This was
fairly straight forward since we just had to change the constraint file
and attach the joystick to the board. Figure
9: Shows what elements changed in the display_top module to make the joystick work
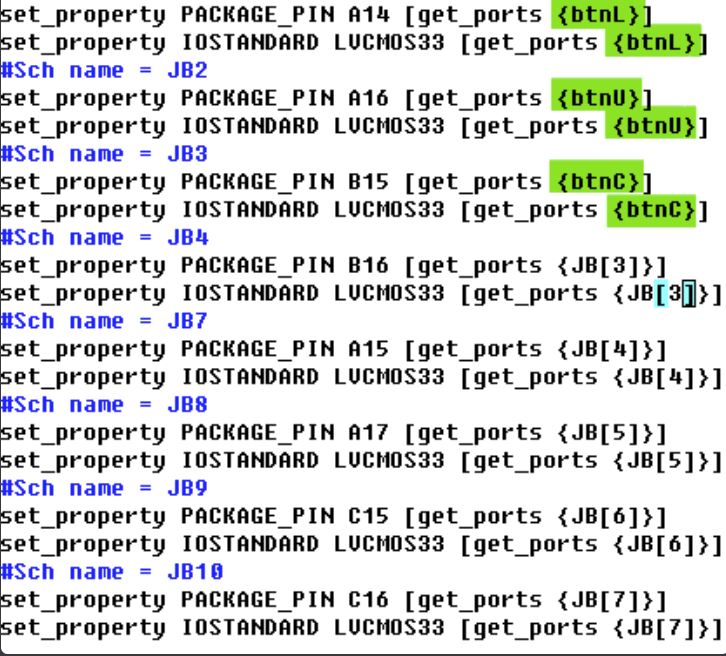
Figure
10: Shows the changes made in the constraint file to connect the joystick
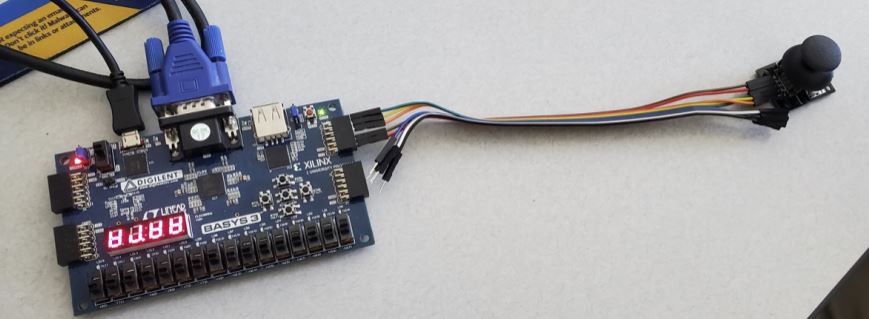
Figure
11: Shows the joystick connected
n/a Figure
12: Shows us playing the game using the joystick We were not able to implement this part correctly since the joystick is analog and not digital.
This makes yoshi always moves right
unless the joystick is moved left. This created the false idea of
functionality.
However, while it may not operate like it should or as intented it is
still more fun to play with the joystick over the buttons even if there
is a slight bug. With more time, we would be able to use the JXADC
inputs on the Basys3 to implement this correctly since they are analog
inputs. 5. Discussion This
Project was fun to complete. Even though all the verilog code
was provided, you had to be able to understand what was happening in
order to make the correct changes to the files. Once we read through
the files enough to understand what was needed to be changed this
project was straight forward. The biggest challenge about this project was
the synthesising in vivado because of how long it took.
During this project we were averaging about a 40-50 minute synthesis
time, which makes the testing excruciatingly long. Overall this
project was able to be successfully completed. In order to make this
project better we would either need a Digital joystick or create JXADC inputs
to change the input values of the joystick to make it function
better/correctly.