Task 1.1:
Figure 1.1: Video verification for the repetition of example 1.1.
Task 1.2:
Figure 1.2: Video verification for the repetition of example 1.2.
Task 1.3:
Figure 1.3: Video verification for the repetition of example 1.3.
Task 2:
Figure 2: Video verification for the repetition of example 2.
As you can see in Figure 2, the ISR is has no interference with the sensor display. The ISR writes the LED to high every 4 seconds and it does not interfere with either the OLED or the sensor, as they continue to update the temperature throught the ISR.
Task 3: Repeat this example on your side. (50 points)
Figure 3: Video verification for the repetition of example 3.
Task 4: Add a few pushbuttons to the system to allow the user to change the WiFi AP username and password. (10 points)
This task was done by implementing the pushbutton code in James report.
Figure 4: Video verification for task 4.
Task 5: Design the schematic and the PCB layout of the system in Eagle.
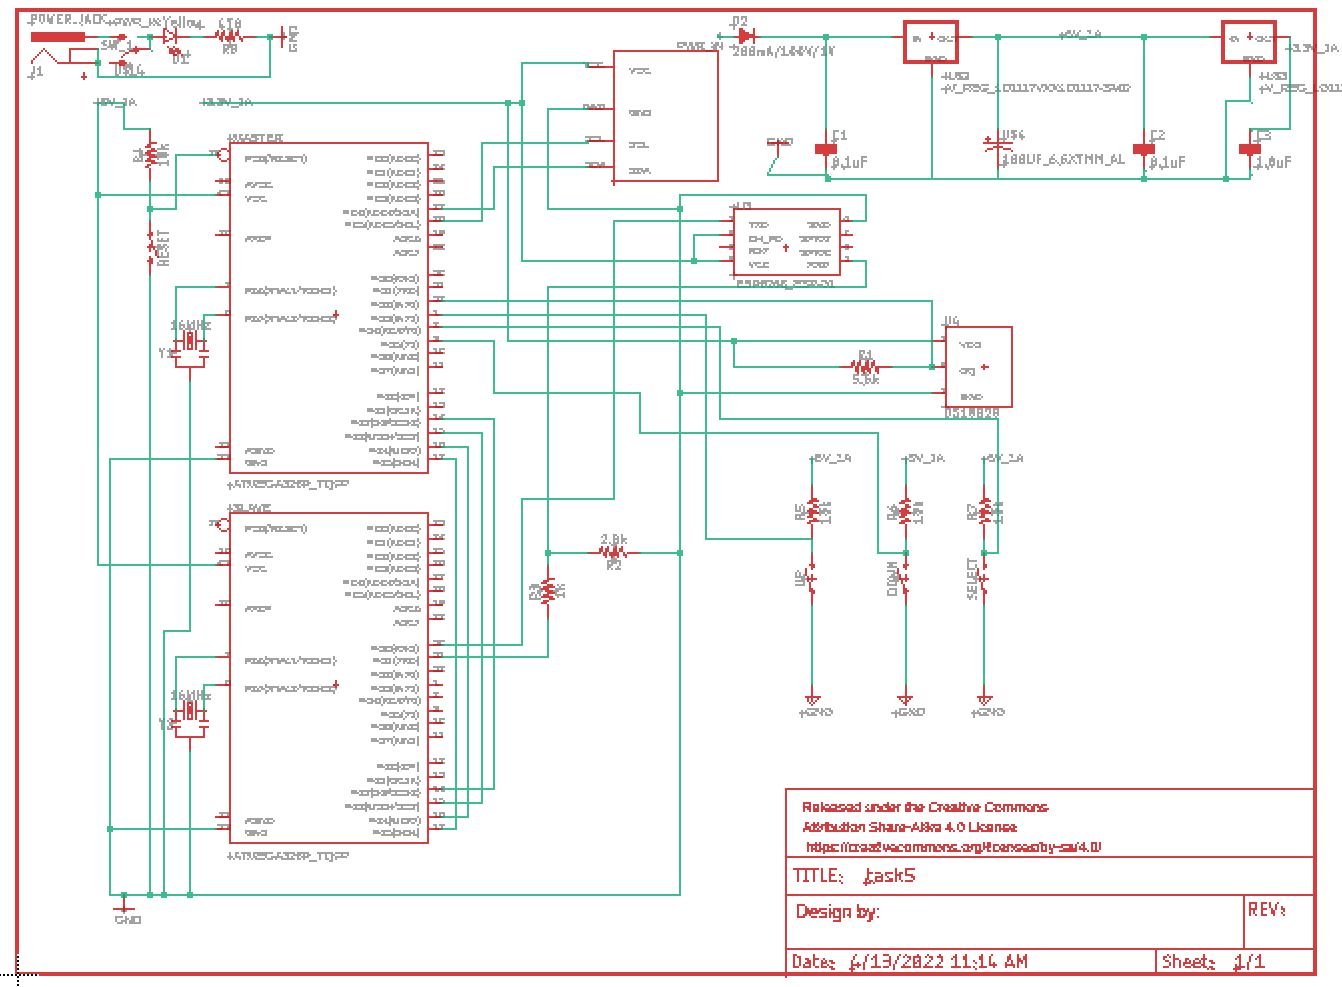
Figure 5.1: Very pixelated screenshot of the schematic for task 5.
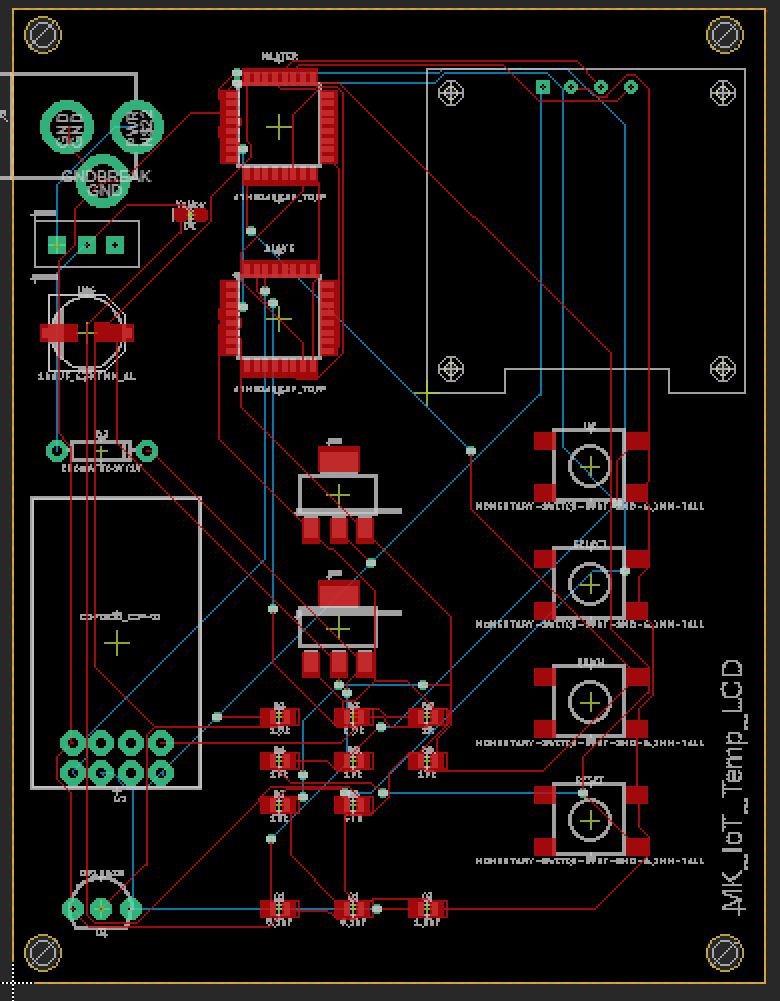
Figure 5.2: Screenshot of the PCB layout for task 5.
Results: This tutorial allowed us to implement the IoT using a temperature sensor and an ESP-8266. I enjoyed using my Eagle PCB skills when designing task 5 and I look forward to practicing my soldering skills when finalizing the PCB. Updating temperature data in real time to the internet is satisfactory.