CE 351 - Robot
Smart Car Name:
Max
Krauss Email:
mtkrauss@fortlewis.edu
Intro: This tutorial we implemented the Elegoo Smart Car 3.0 to be controlled with a simple remote control using Arduino.
Task
1:To
assemble the car, please follow the tutorials in the following video
series. Please take GOOD care of the small parts of the car when you
assemble it.
-Already done for us! Thanks Dr. Li
Task
2:Just
repeat what I did in the video above. Take screenshotes or videos for
your report. You will use the same ultrasonic sensor in the robot car
kit.
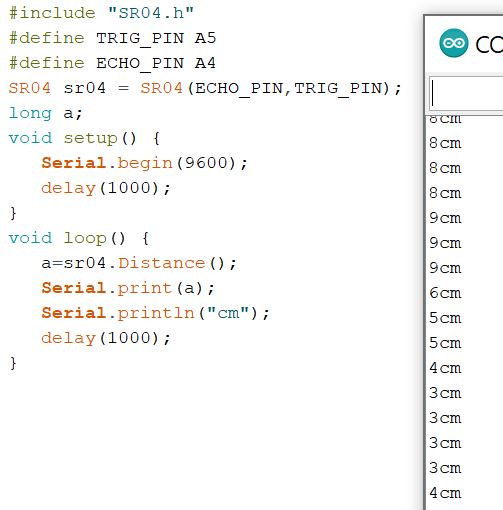
Figure 2.1 : Code snippet and serial monitor for testing the ultrasonic
sensor.
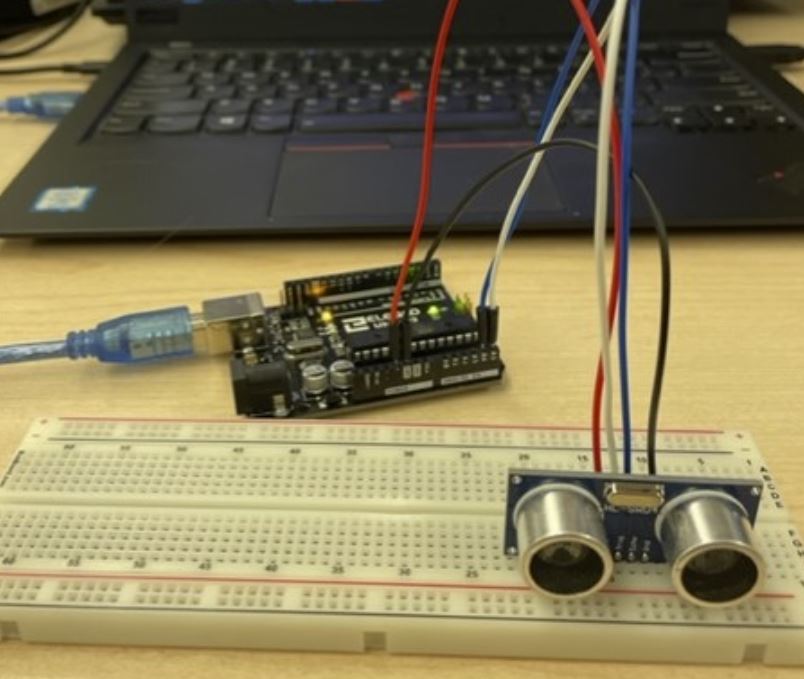
Figure 2.2 : Image of ultrasonic sensor testing.
Task
3:Understant
the code and repeat it on your side. Take VIDEOs for your report.
Task
4:Use
the example code to turn on the motors of the car, take VIDEOs for the
report.
Figure 4.1: Video demonstration for task 4, the DC motors.
Task
5:Repeat
my work in the demonstration video and use the similar method to test
the Right and the Left IR emitter-receiver pairs.
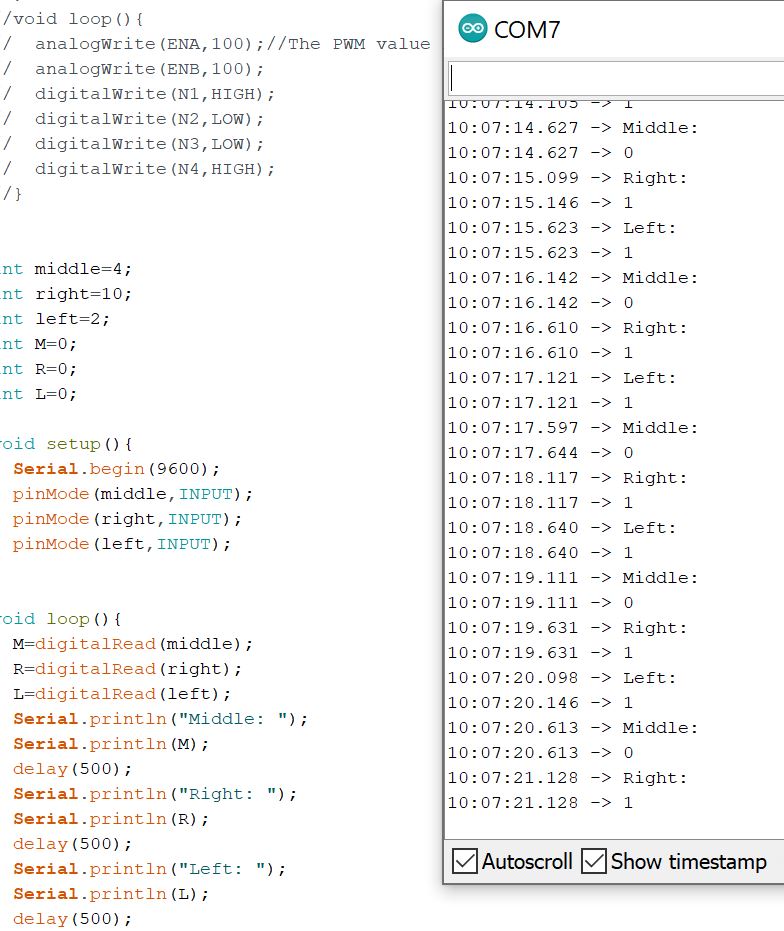
Figure 5.1: Code snippet and serial monitor output for testing the IR
sensors on the bottom of the car. The car was placed over a white sheet
of paper with a black line of electrical tape. Then to test the
sensors, we moved the car onto different sides of the tape.
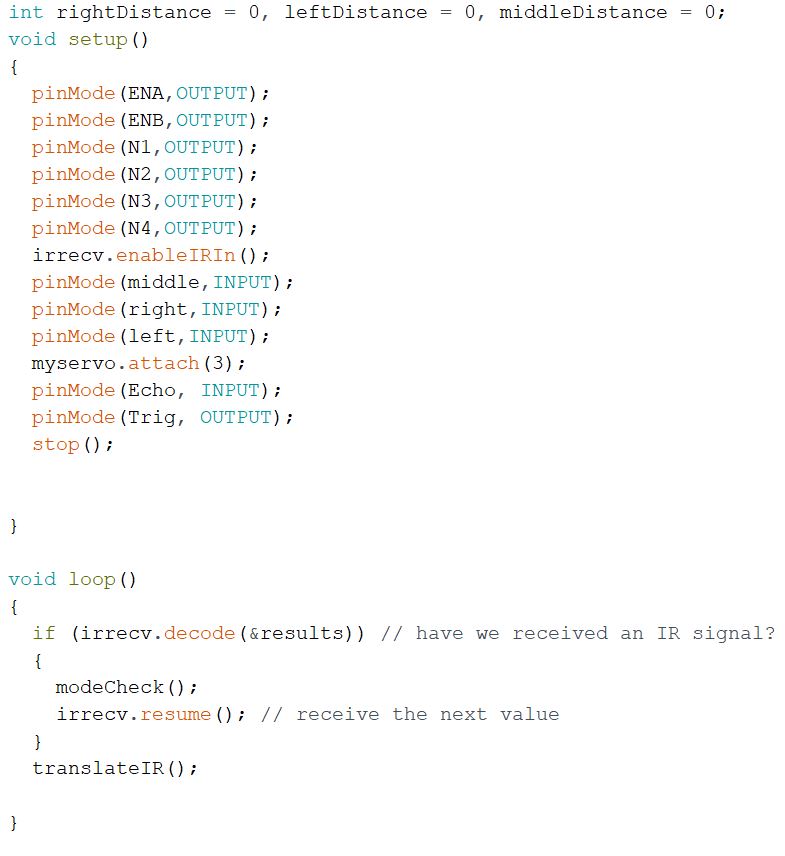
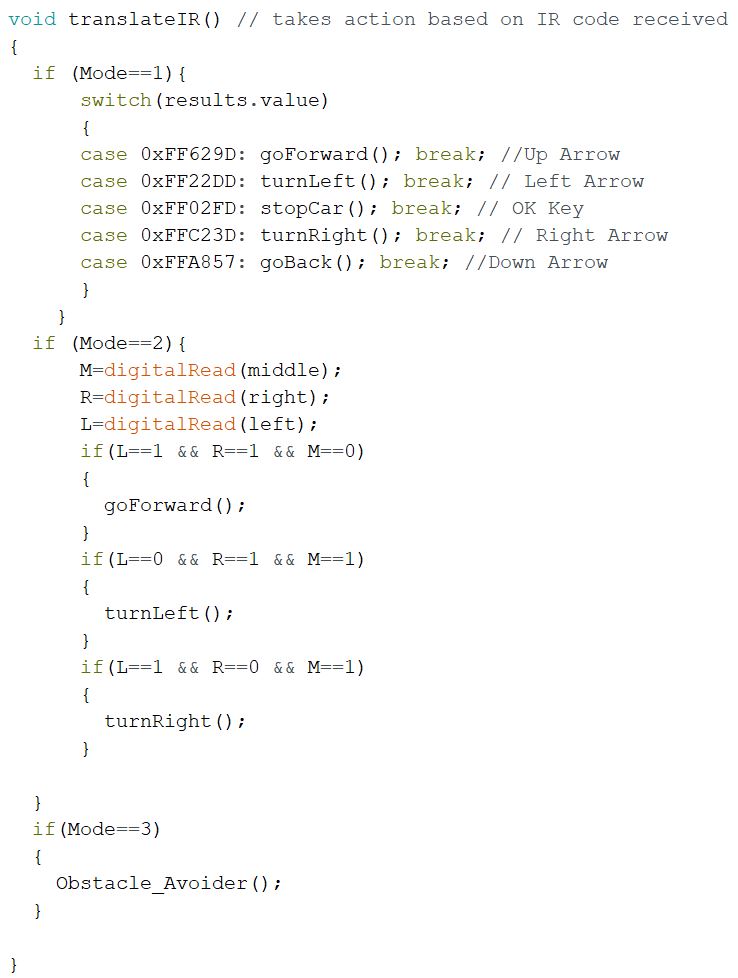
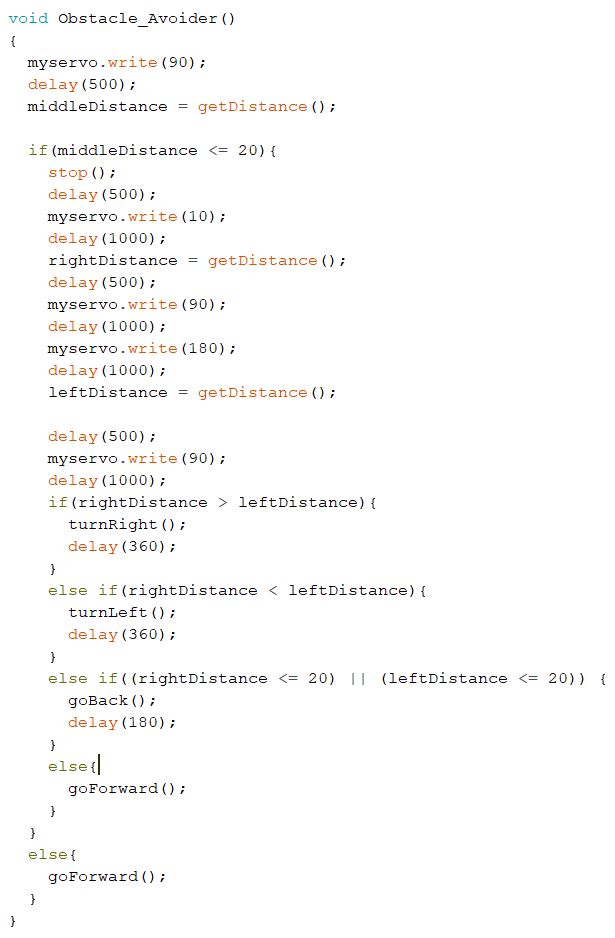
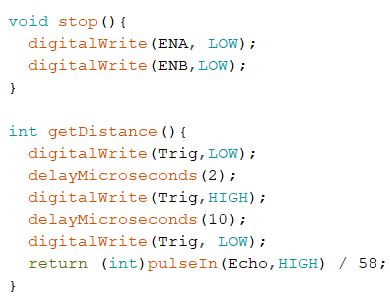
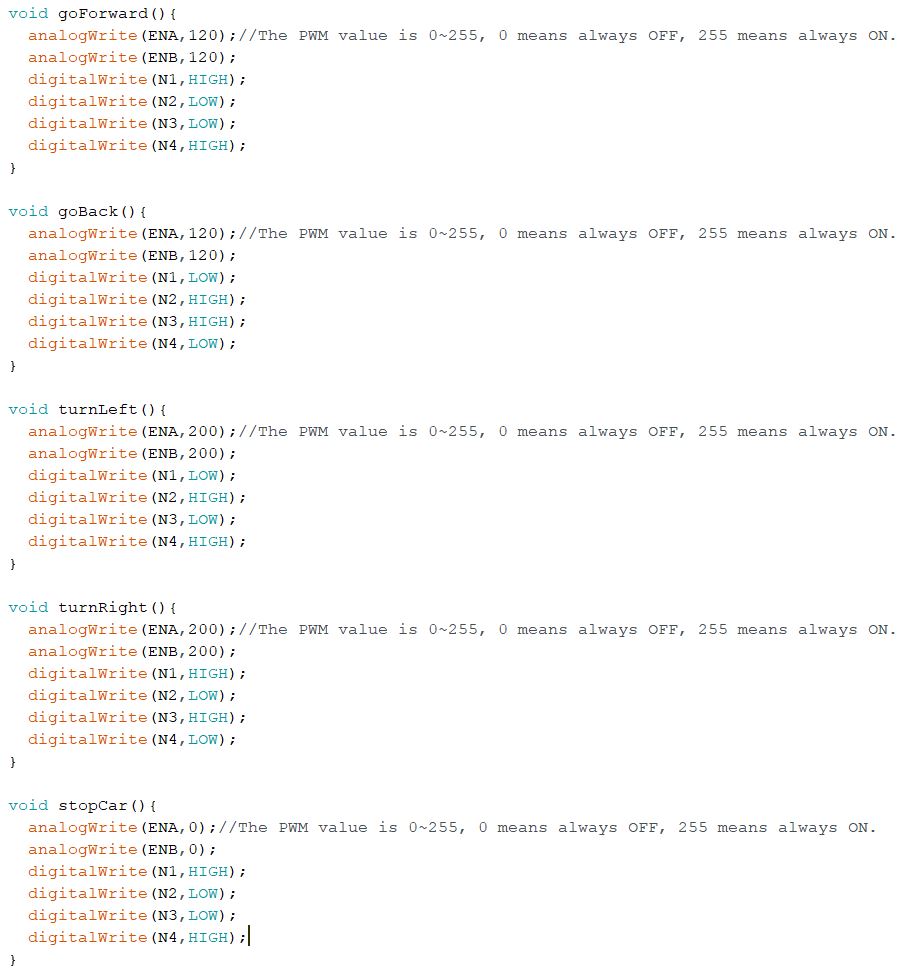
Task
6,7,8:Smart
car modes 1, 2, and 3
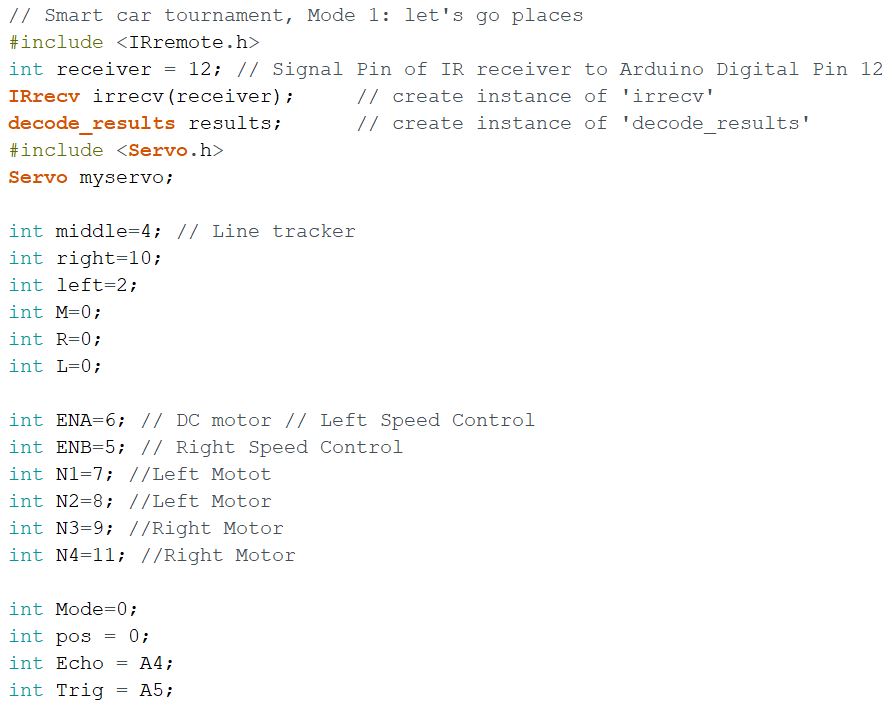
Figure 6: Code snippets for all 3 smart car modes, controlled by the
remote control.
Figure 6.1: Video demonstration for all 3 smart car modes.
Results: This tutorial was quick and fun. Using simple coding
techniques we were able to make a operational RC car with obstacle
avoidance and line tracking.