CE 351 Report 3
- LCDs and Sensors Name:
Max
Krauss Email:
mtkrauss@fortlewis.edu
Intro: This lab allowed us to us Arduino to implement liquid crystal
displays and temperature sensors by ourselves. We also got to code our
remote to allow wireless inputs to be used.
Task
1:Display
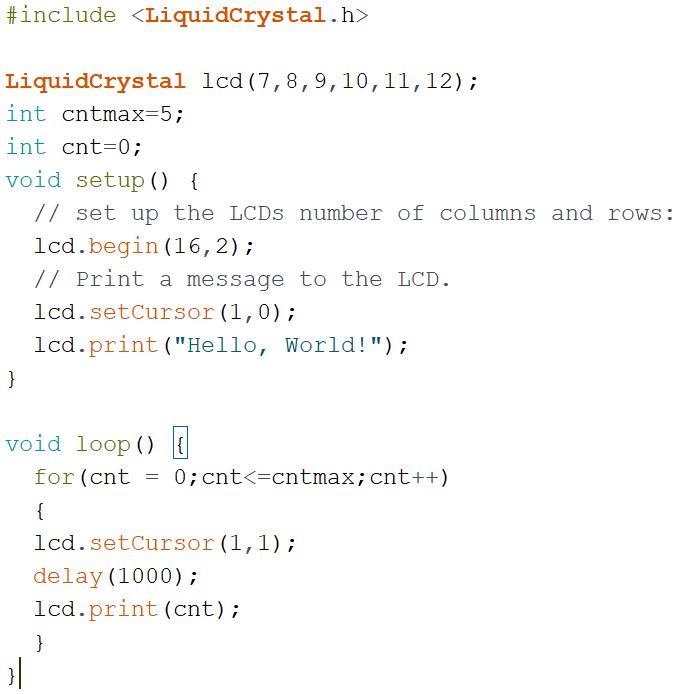
the 'Hello World!' starting from the second rectangle on the same line. Task
2:Count
to 5 and then reset to 0, then start over:
Figure 1 : Code snippet for tasks 1 and 2.
Task
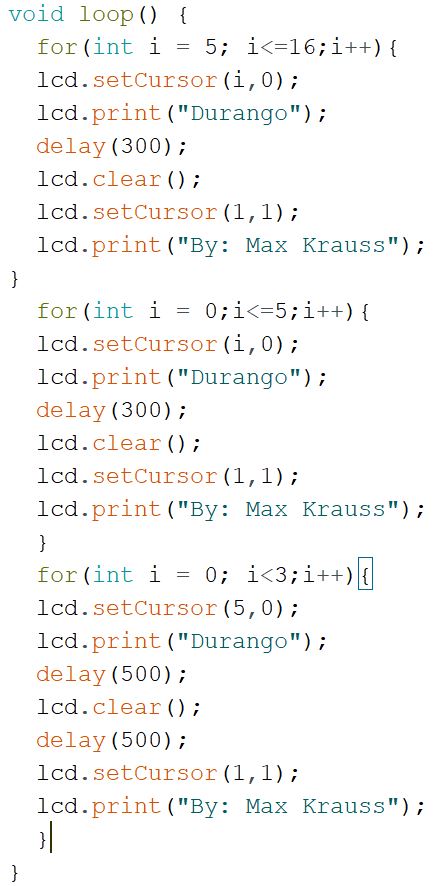
3:Given
that the command 'lcd.clear()' will clear out everything on the LCD.
Modify the code to implement the scrolling text as presented in the
video below
Figure 2: Code snippet for task 3.
Task
4:Repeat
the work above, show room temperature on the LCD. Use your finger to
warm it up see if it changes.
Task
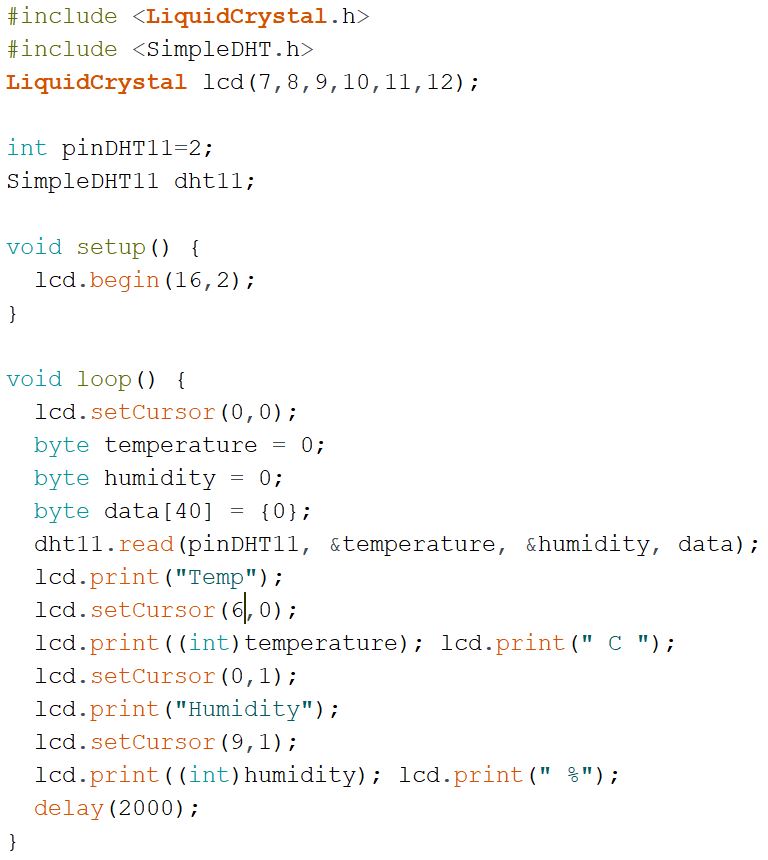
5:Modify
the code to display in the form below. Simply blow at the sensor to
change the temperature and the humidity to test it. Show a
demonstration video in your report.
Figure
3: Modified code for task 5.
Task
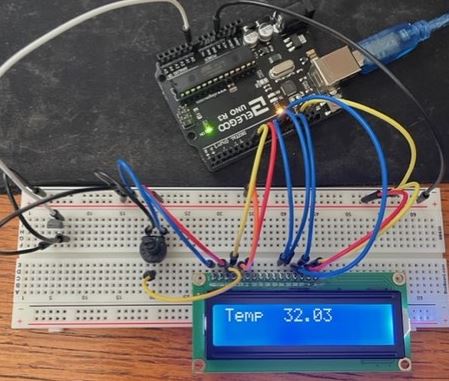
6:Repeat
the work above to display temperature data from TMP36.
Figure
4: Task 6 verification.
Task 7:Modify
the example code to match your new remote controller.
Modifications for task 7 were simply changing Hex number inputs to
match ones own remote.
Task
8:Repeat
the work in the demo video above, show your result in a VIDEO for the
report.
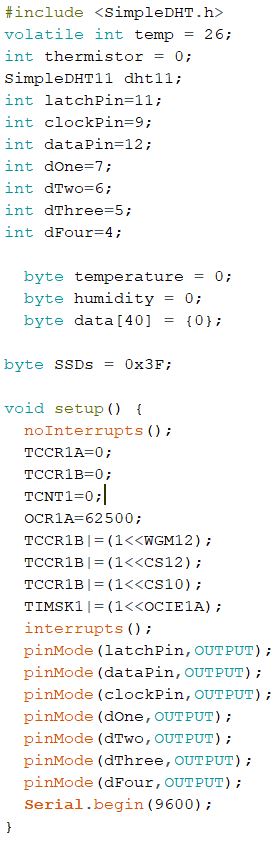
Task 9:Use
the barebone ATMega 328p to build a portable digital temperature meter.
Use an Interrupt Service Routine to update the temperature display. The
temperature/humidity sensor is the DHT11, the display unit is the
4-digit 7-segment display.
Record a video for the report.
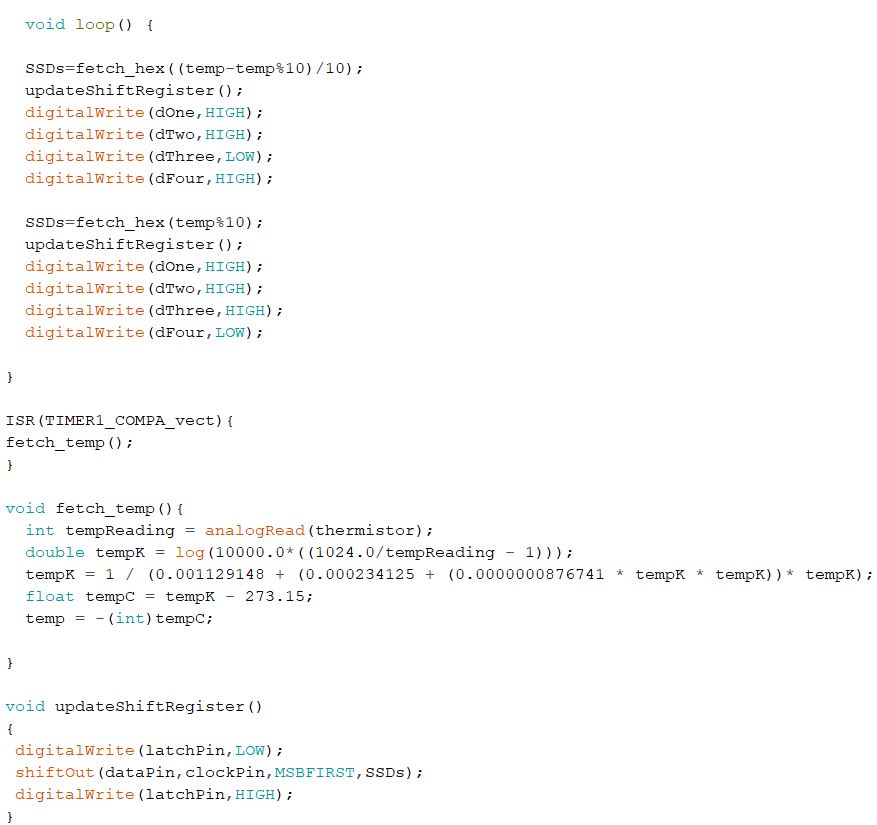
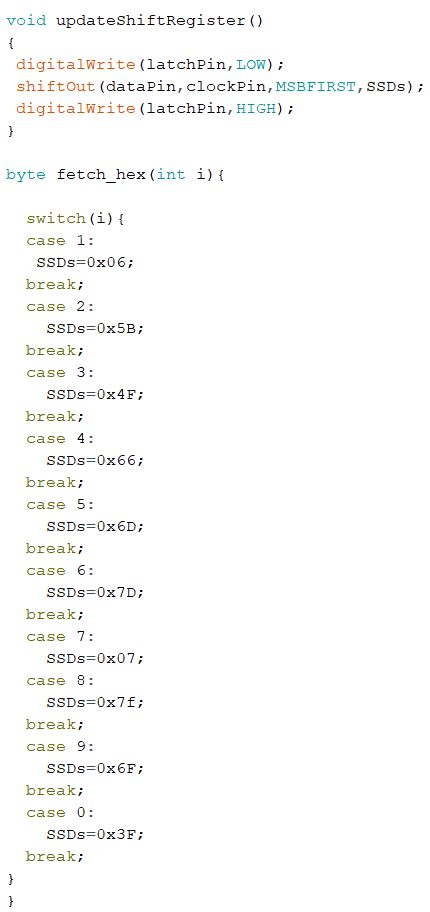
Figure
5: Code snippets for task 9.
As
you can see, I did not implement the DHT11 as my temperature sensor, I
used a thermistor. This was hypothetically due to the ISR not allowing
the DHT to read temp when called because of some behind the scenes
internal code blockage inside of the DHT11. Rightfully so, I switched
to the thermistor as it only reads changes in voltage and has nothing
going on that would collide with how the ISR works.
Results:
This tutorial was challenging and informative which made it more fun to
complete. I enjoyed working with the barebones chip as it allowed one
to learn the in's and out's of the Arduino board and how it works with
the processor. Task 9 took a lot of thought and time but was very
satisfying to me once I implemented it correctly!