LCDs and Sensors
CE351 2020 Fall
John Hitti
jdhitti@fortlewis.edu
Introduction
This lab was focused around using LCD screens, temperature/humidity sensors, internal interrupt functions and using the ATmega328p without the Arduino board. We were directed to display different text and sensor readings to the LCD while interacting with the sensors to receive real-time environment data. We then removed the processor from the Arduino board to create devices that could be free of the usb to serial chip onboard. This allowed for a more professional concept of a commercial device that would utilize these microcontrollers. We then incorporated the "interrupt" function on the Arduino to tie together all the skills from this lab and previous ones in the final task.
TASK 1
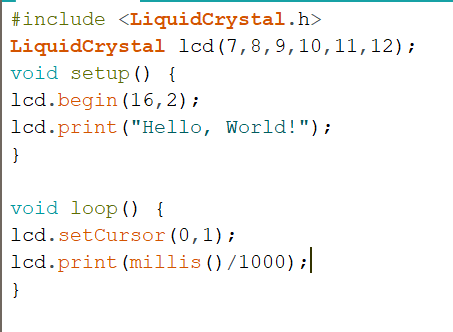
In this task we were directed to display "Hello World" on the LCD display using the Arduino and a library for the display. Below that there is a counter that is refreshed every second.
Figure 1. The driver code for displaying to the LCD
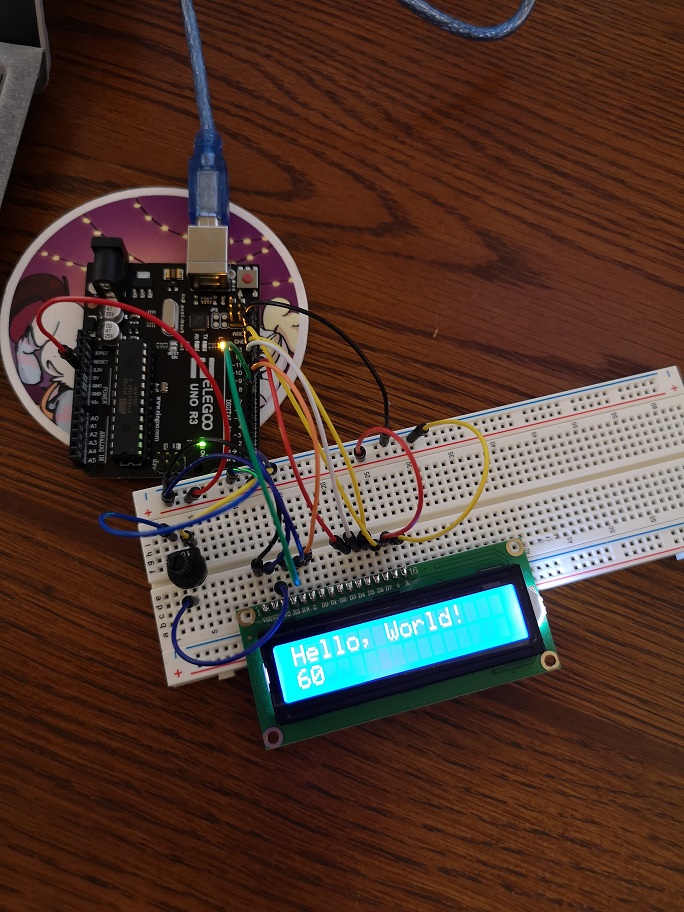
Figure 2. The LCD displaying a message
TASK 2
In this task we were directed to take out previous code and make the counter count to five and then reset back to zero.
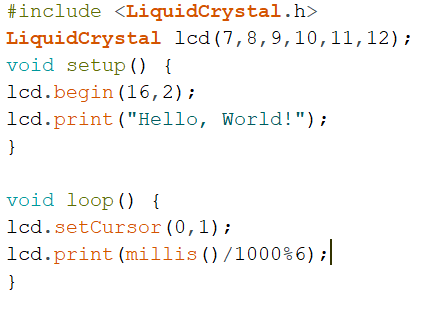
Figure 3. The driver code for displaying to the LCD
Video 1. Video displaying the LCD message and counter
TASK 3
In this task we were directed to flash "Durango" on and across the screen.
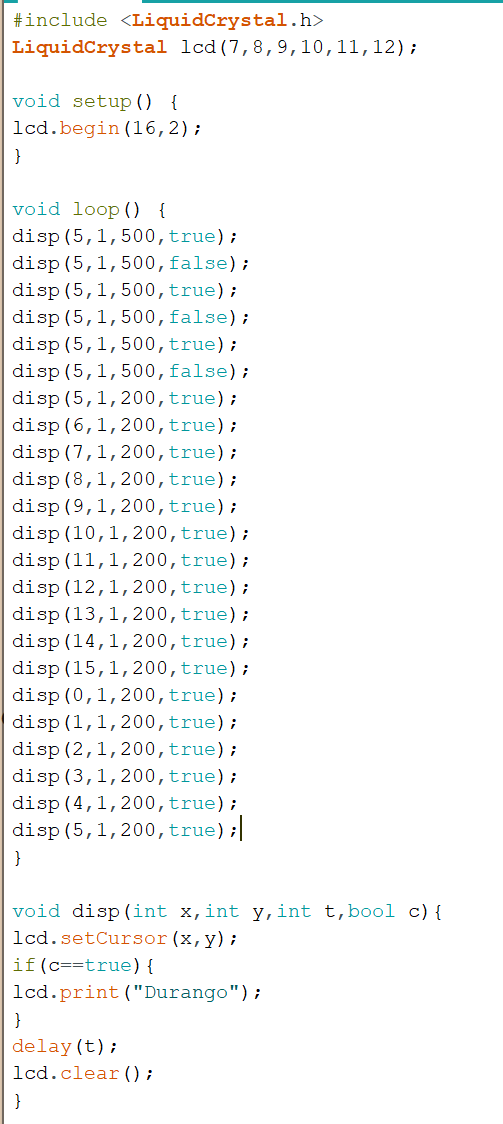
Figure 4. The driver code for displaying to the LCD
Video 2. Video displaying the LCD message
TASK 4
In this task we used out LCD screen to display the temperature readout of a simple thermistor.
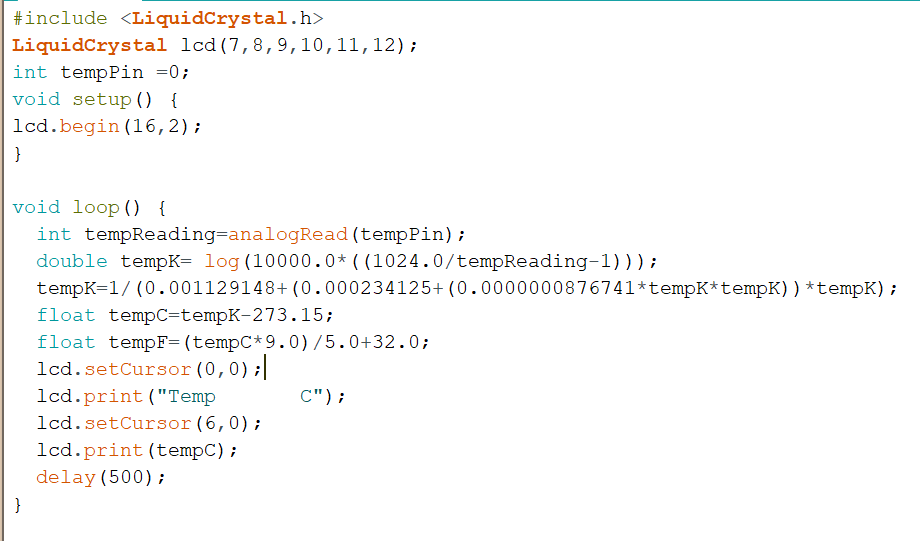
Figure 5. The driver code for displaying to the LCD and reading the temperature from the thermistor
Video 3. Video displaying the temperature readout
TASK 5
In this task we used a DHT11 module to measure the temperature and humidity of our surroundings. When we blew on the sensor the humidity increased greatly.
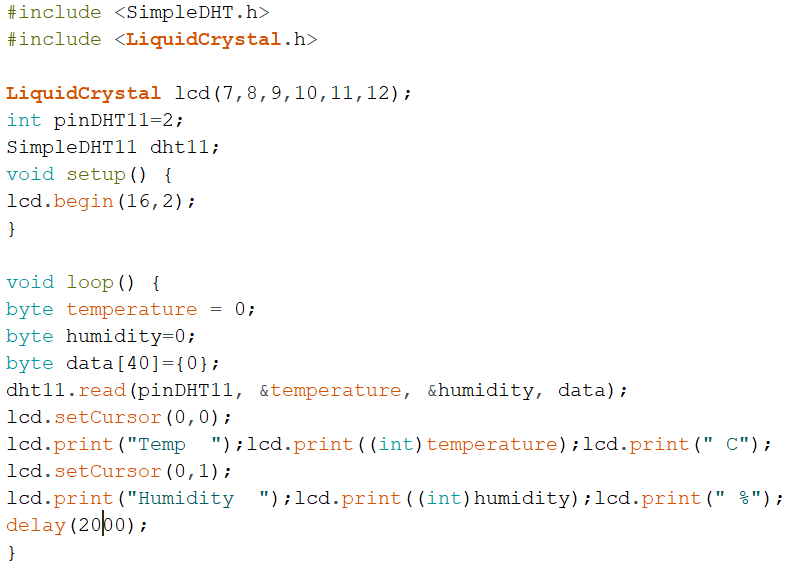
Figure 6. The driver code for displaying the temperature data to the LCD
Video 4. Video displaying the temperature and humidity readout before and after blowing on the sensor
TASK 6
In this task we used an electronic integrated circuit temperature sensor to detect the surrounding temperature.
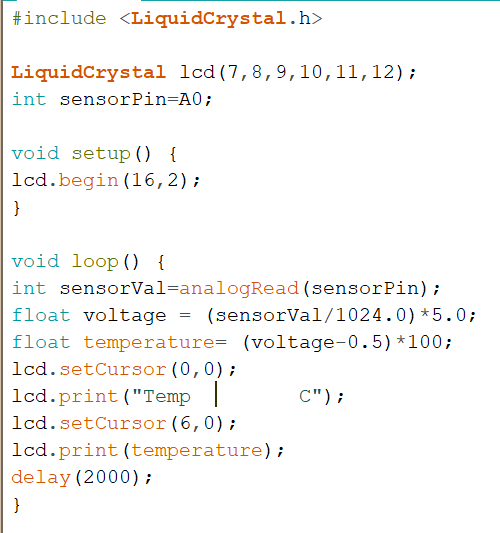
Figure 7. The driver code for displaying the temperature data to the LCD
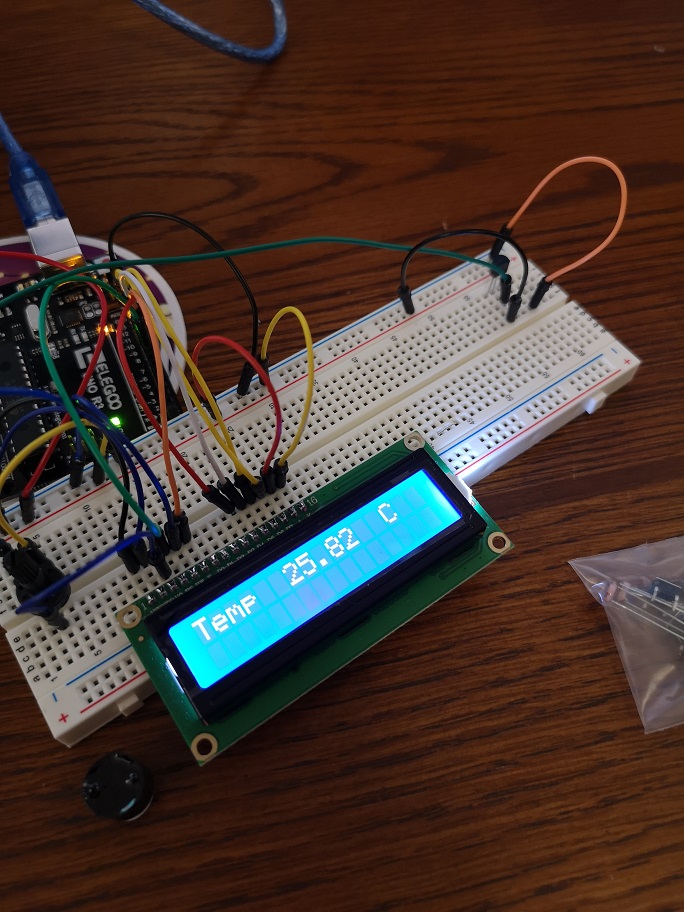
Figure 8. The temperature measured by the device is displayed on the LCD
TASK 7
In this task we were directed to reprogram the given code to match our remote when the IR commands from the remote were received by the IR receiver. Unfortunately, this could not be documented by video as my phone's camera also emits an IR signal that interfered with the receiver.
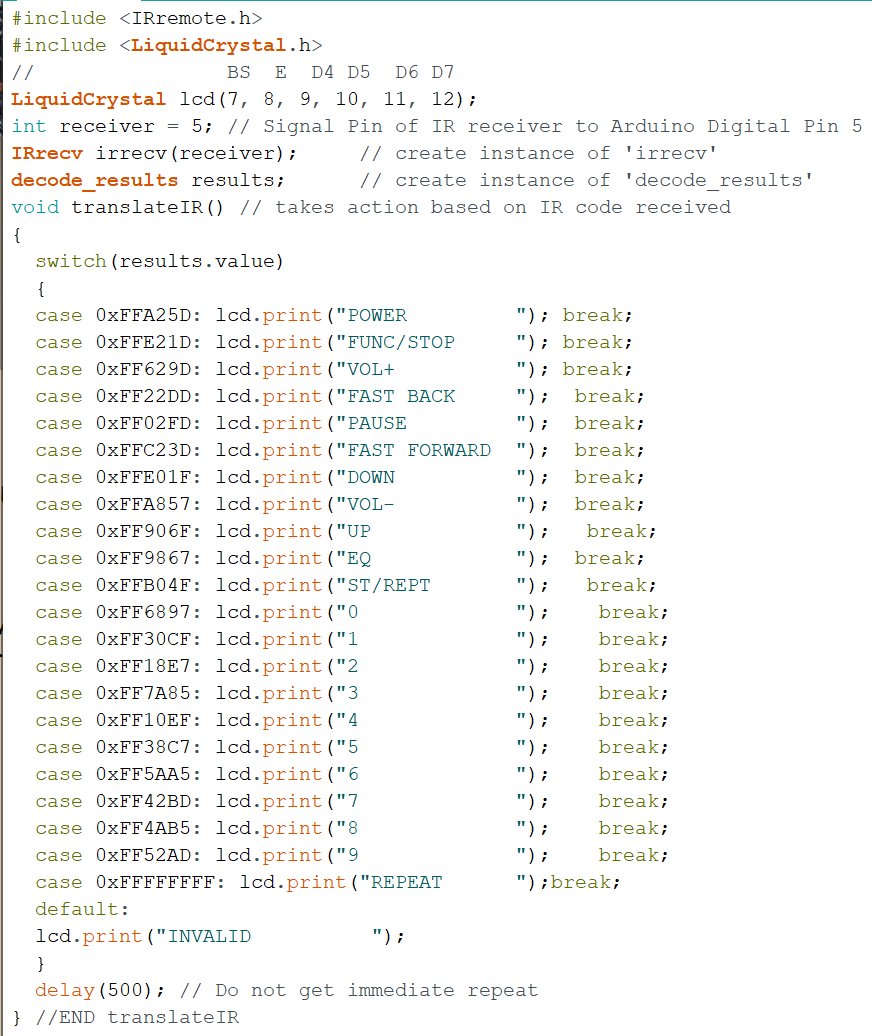
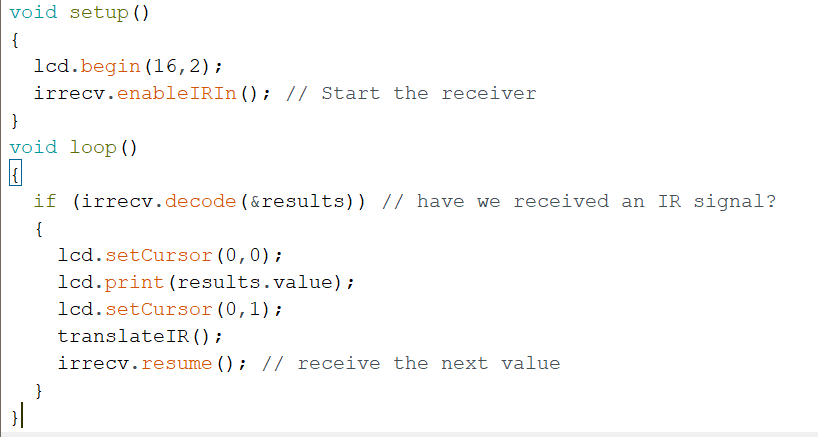
Figure 9. The driver code for receiving IR commands and displaying them
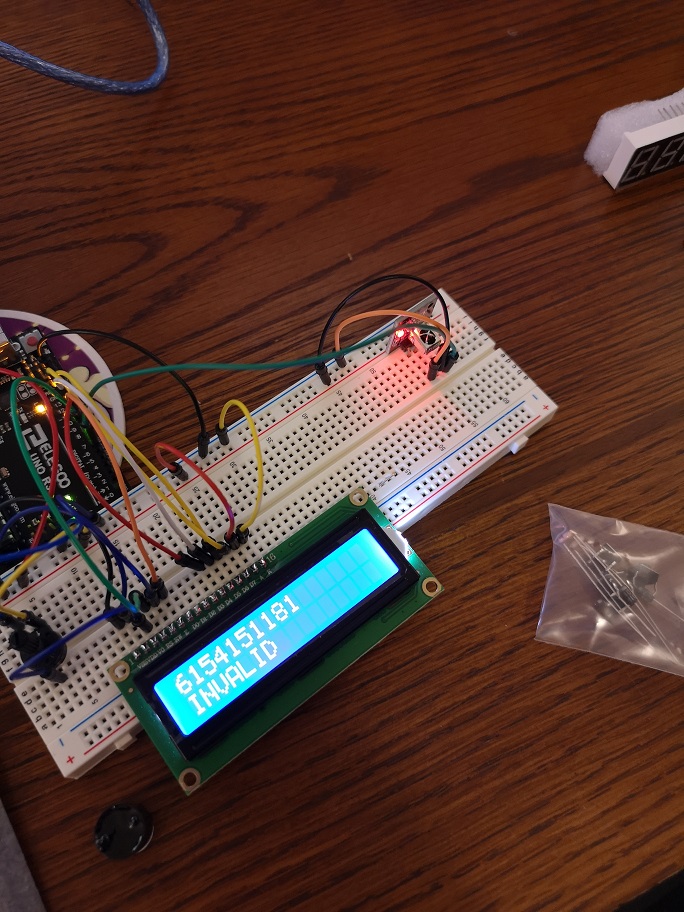
Figure 10. The IR receiver outputs an invalid code when the phone camera is aimed near it
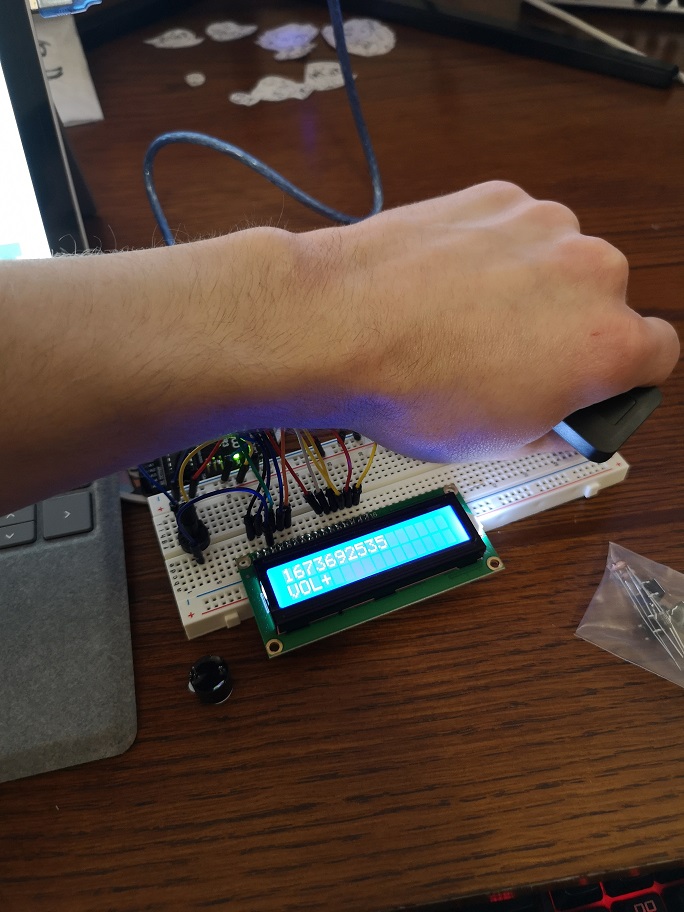
Figure 11. Covering the receiver allows us to capture a picture of the receiver operating properly
TASK 8
In this task we were directed remove the ATmega328p from the Arduino board and build a simple circuit using only the chip and its paired oscillator.
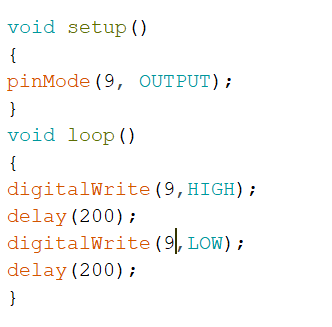
Figure 12. The driver code for blinking the LED
Video 5. This video displays the barebone ATmega328p executing the above code to blink an led
TASK 9
In this task we were directed use our barebone ATmega328p, the DHT11 sensor, a shift register, and a seven segment display to create a portable temperature sensor free of the arduino board. To update the seven segment display continuously without error we used the Arduino's "Interrupt Service Routine" to record the temperature every four seconds to update the display. The hex return function allows us to take this temperature reading and turn it into code the shift register can understand.

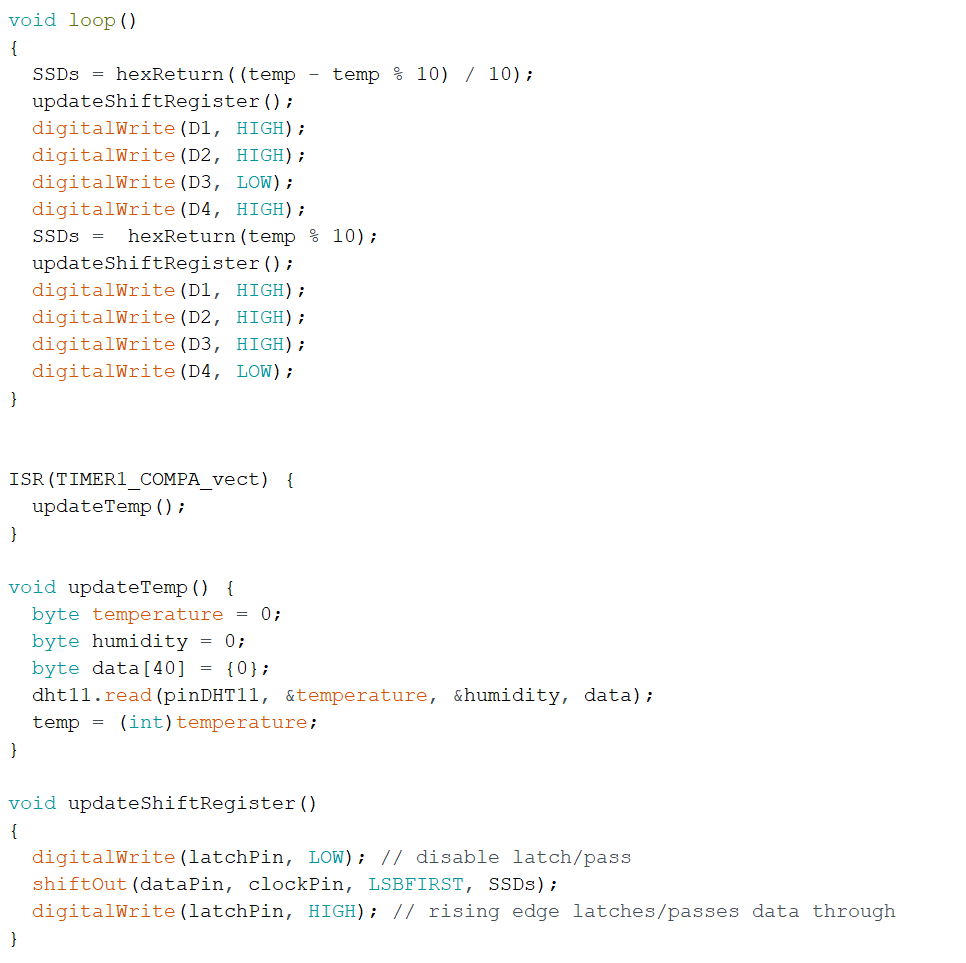
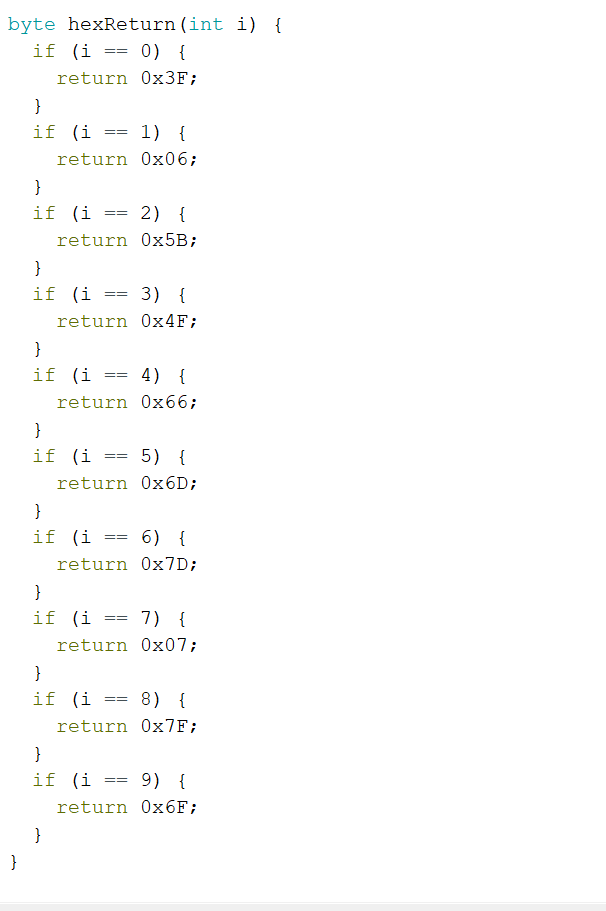
Figure 13. The driver code for reading temperature and then updating the seven segment display
Video 6. A video showing the seven segment display being updated when the DHT11 is blown at
Discussion
Overall
this lab was extremely valuable in showing how sensors, and LCD's can be used
with the Arduino’s microcontroller to create simple measurement devices that
are effective. By combining all of this knowledge we are able to make a
streamlined and reliable temperature sensor that is compact and runs at the
logic voltage of 5v.