Week 1-2 The Arduino C Language
CE351 2020 Fall
John Hitti
jdhitti@fortlewis.edu
1. Introduction
In
this lecture, the fundamentals of the
Arduino C language are introduced. The important contents in this
lecture are
data types, operators, the ‘for’ loop, the ‘while’ loop, the ‘if’
statement,
and the ‘switch’ statement’.
2. The Code and the Results
TASK 1
Below are figures and descriptions that describe some of the various functions and capabilities of the Arduino C language.
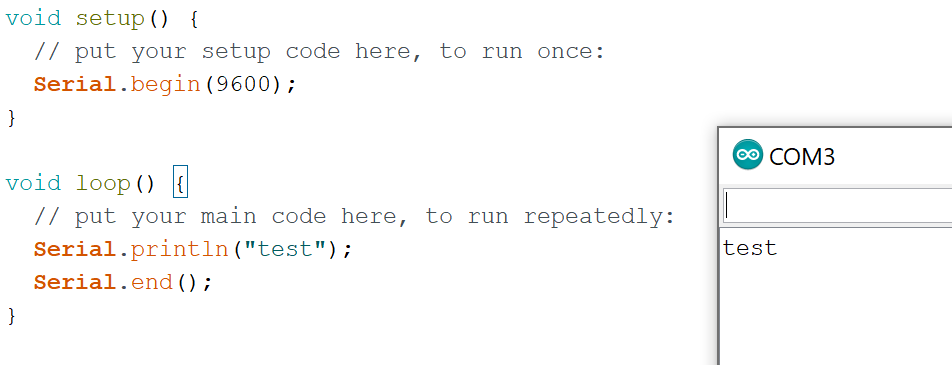
Figure 1: An example of the serial function
In
Figure 1, a simple example of the Arduino's ability to send serial
commands is displayed. The baud rate of 9600 bit/s is selected and the
arduino is told to send a simple string. After the string is sent the
serial communication is ended.
..........................
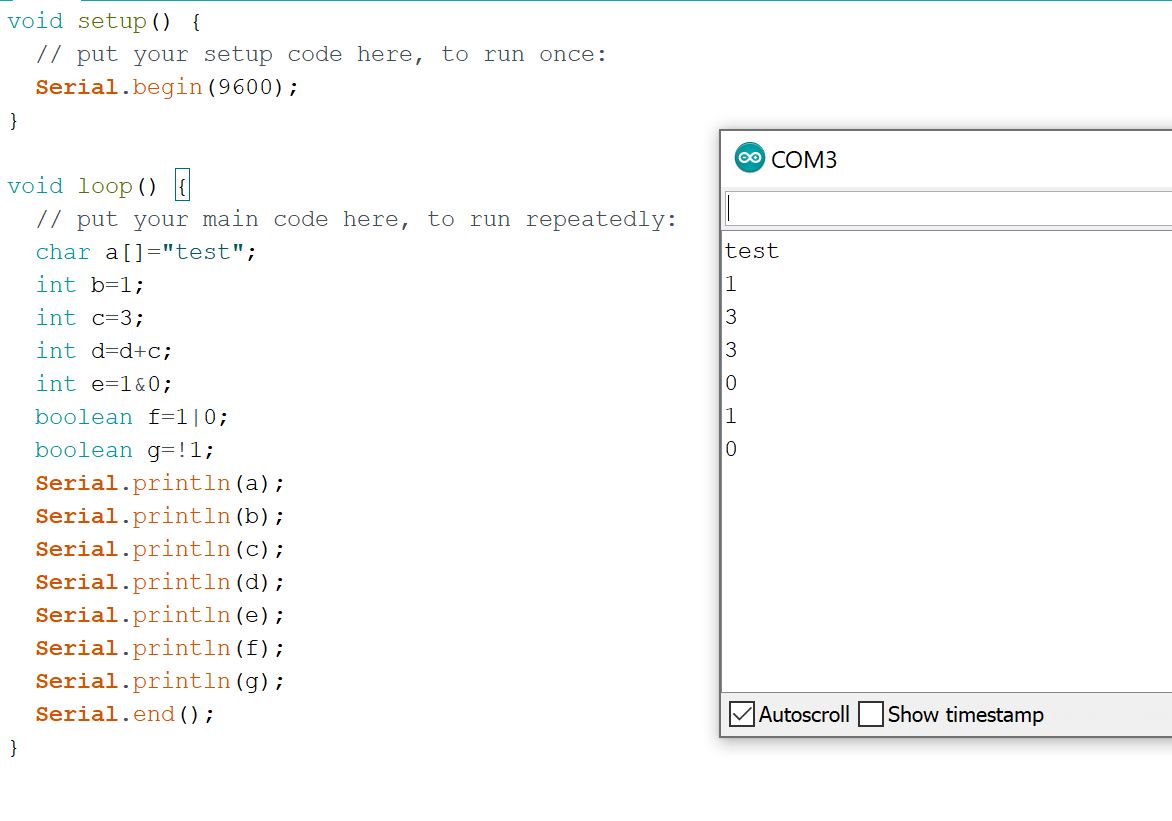
Figure 2: An example of some of the types of arithmetic and data capabilities from the Arduino.
Figure
2 describes how data can be stored and manipulated using the Arduino.
Data can be stored in the form of characters, integers, binary values,
Boolean values and more. This data can then be manipulated using the
fundamental operations corresponding to each data type
..........................
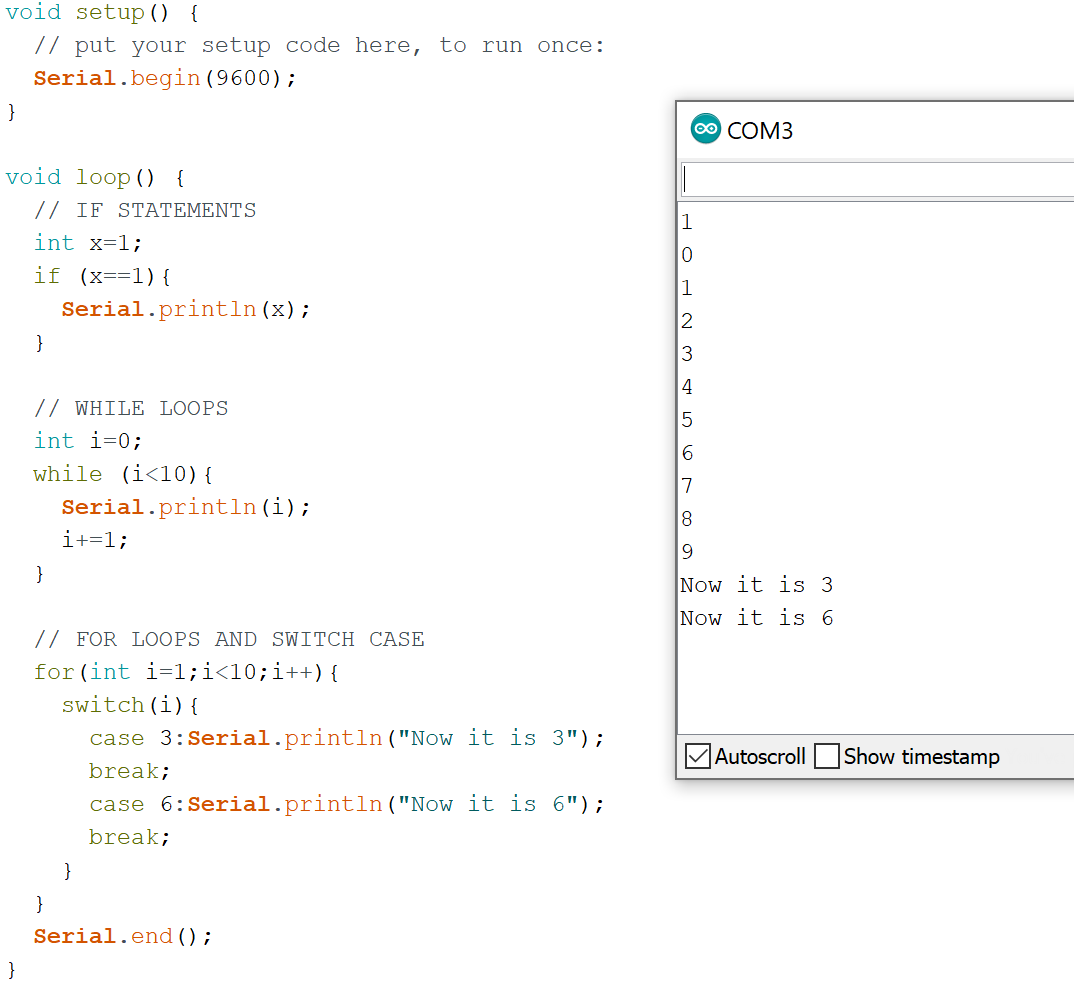
Figure 4: An example of the many conditional statements used by the arduino.
In Figure 4, there are four different conditional statements displayed. The first one is the 'if' statement. This statement will run given the condition within the 'if' statement is true. If it is not the Arduino will skip over the internal code.
The 'while' loop is similar to the 'if' statement as it will loop through the internal code given its condition is true. Once the condition is not true it will exit the loop.
The 'for' loop has three different components, the variable, the condition, and an iterator. The loop will start at a value, iterate as defined, and once it reaches its condition the loop will exit.
The
'switch' condition takes in a variable and executes the specific case
if the variable matches that case. In out example when "i" is equal to
3 the case with the value of 3 is executed.
..........................
TASK 2
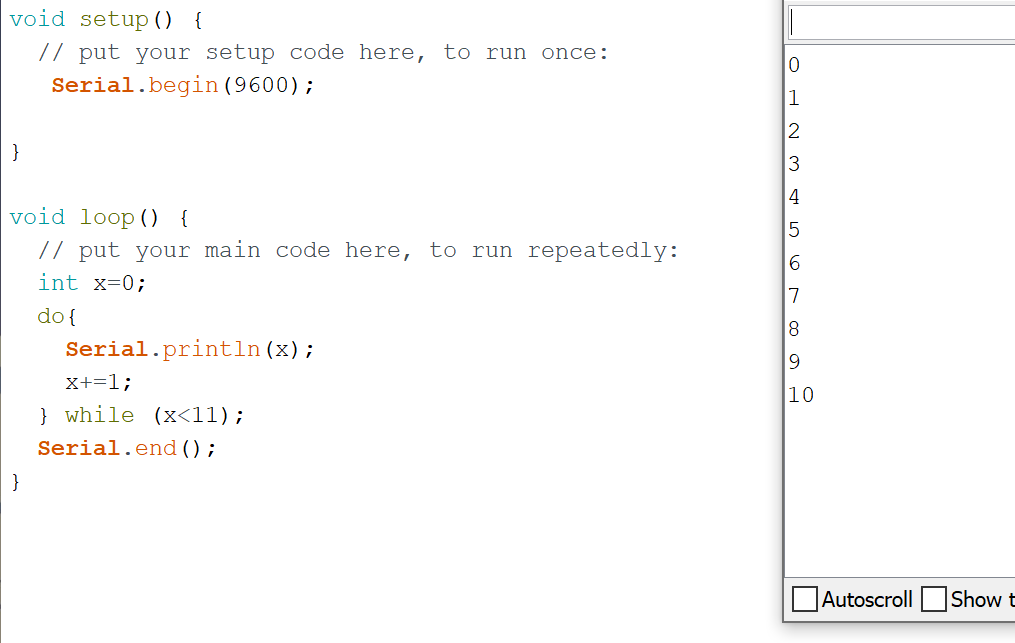
Figure 5: An example of a 'do while' loop
Figure 5 represents a conditional statement called a do while loop. This loop is very similar to a while loop with the one difference being that the condition is evaluated at the end of the loop and the code is ran before the condition. This ensures the loop will always be ran at least once.
TASK 3
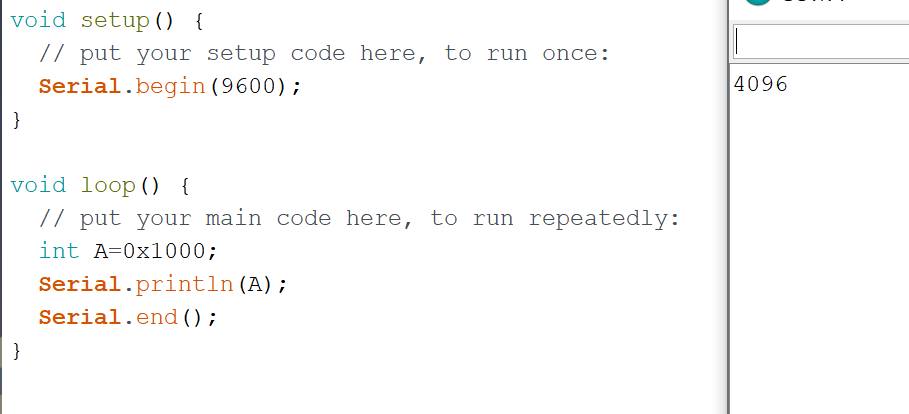
Figure 6: An example of using hex numbers in the Arduino code
In figure 6 the hex value of 1000 is assigned to the variable A. It is then sent as a serial command and displayed in decimal form as 4096.
TASK 4
In task 4 we were asked to represent the following numbers in the arduino HEX format.
A) 1000 1111 0011 0101 (binary)
B) 55 (decimal)
c) 11 (binary)
In HEX
A) 0x8f38
B) 0x37
c) 0x3
TASK 5
In task 5 we were asked to represent the following HEX numbers in binary.
A) 0xFFFF
B) 0x3210
c) 0xABCD
In binary
A) 1111 1111 1111 1111
B) 0011 0010 0001 0000
c) 1010 1011 1100 1101
TASK 6
In task 6 we were asked to use bit masks to transmit a 5-bit binary number to an LED array.
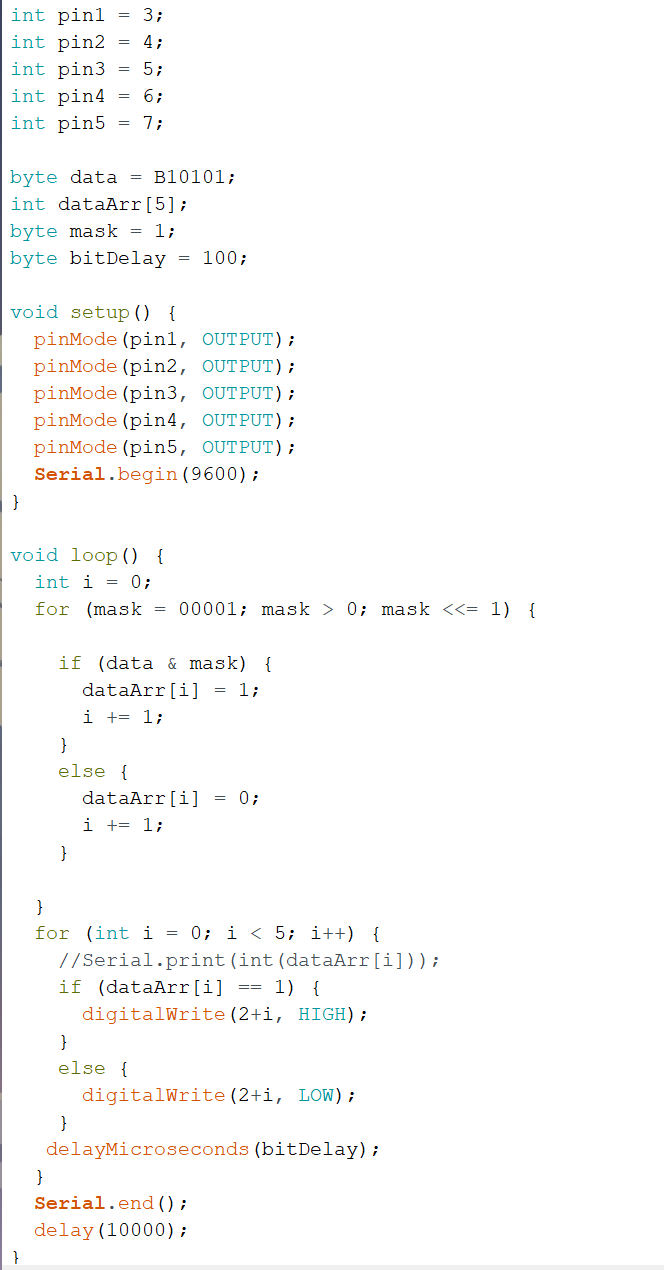
Figure 7: The code that uses bit masks to transmit a 5 bit number to an led array
In
figure 7 the code initializes our data as "10101"and out output pins as 3,4,5,6,and 7. A for loop then uses bitmask operations to place out binary code into an array.
A for loop is then used to take the elements of an array and light up the corresponding LEDs as assigned by the original binary data.

Figure 8: The LED array is lit up in the proper pattern
In
figure 8 we can see that the led array has been properly light up as described by our original array of "10101".