Week 1-2
The Arduino C Language
1. Introduction
In
this lecture, we used coding examples to explore some basic
functionality of the Arduino IDE. We learned about and used data types,
operators, for loops, if statements, while loops, switch statements, and bit masks to complete this project.
2. The Code and the Results
In
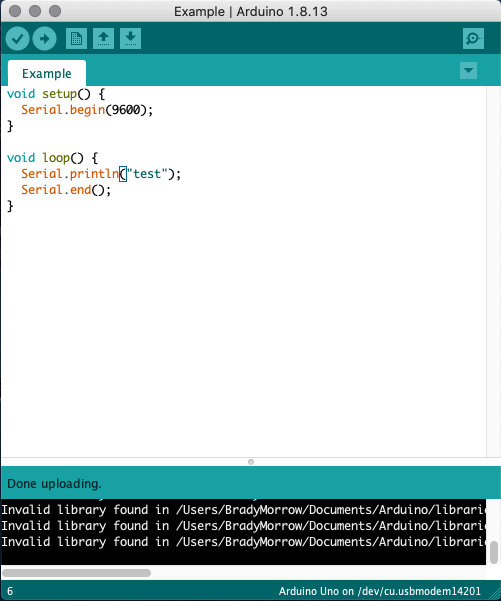
Figure 1 and Figure 2 we can see an example of how an Arduino can print
to the Serial Monitor. The 'Serial.end()' line must be included so the
Arduino won't continue printing "test" as it goes through the loop.
Figure 1. An example of serial communication in Arduino.
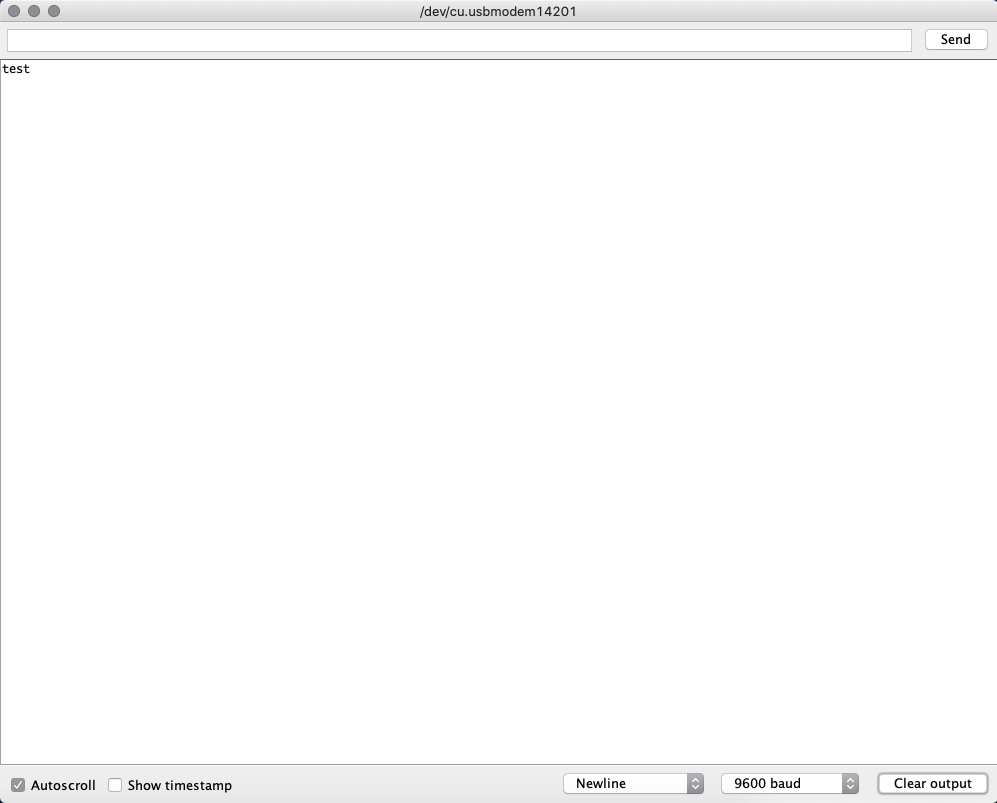
Figure 2. The results for the serial communication example.
In Figure 3 and Figure 4 we can see an example of how an Arduino can handle boolean logic. The variables are defined as booleans, so they can only have a value of one or zero (meaning true or false respectively).

Figure 3. An example of boolean logic in Arduino.
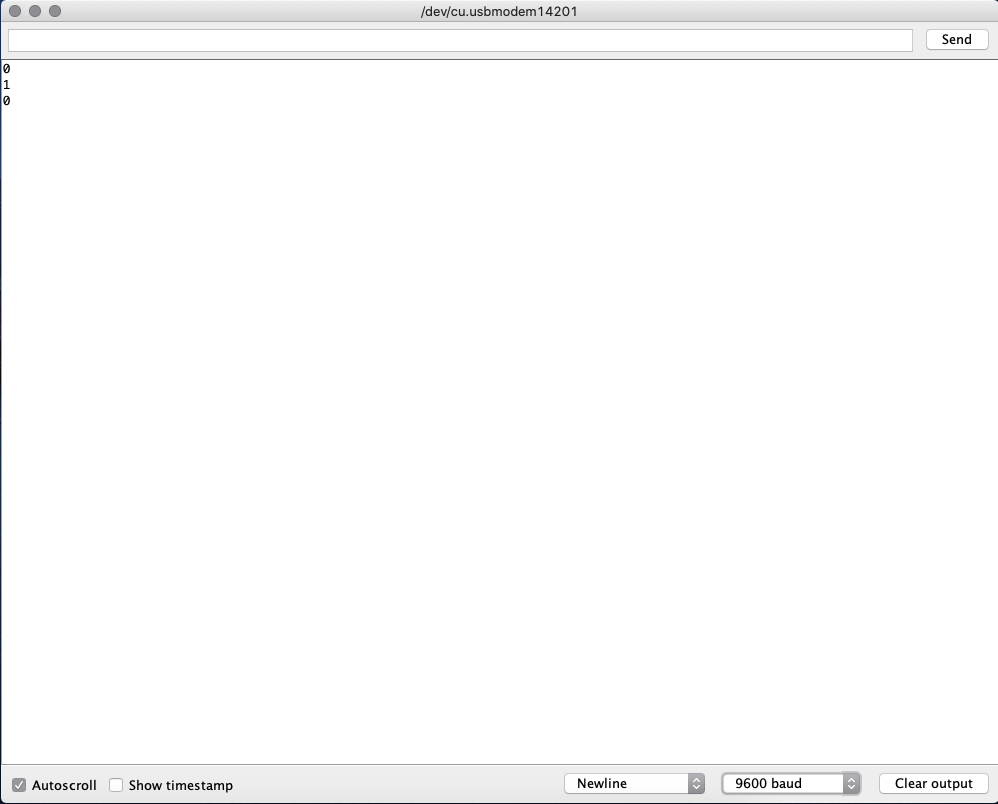
Figure 4. The results for the boolean logic example.
In Figure 5 and Figure 6 we can see an example of an if statement in Arduino. If the statement contained in the parenthesis is true, then the code within the curly brackets will run. If the statement is false, it runs whatever is in the 'else' statement's curly brackets.
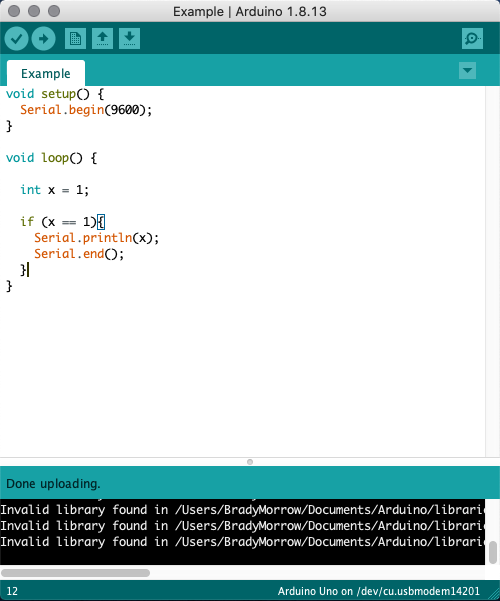
Figure 5. An example of an if statement in Arduino.
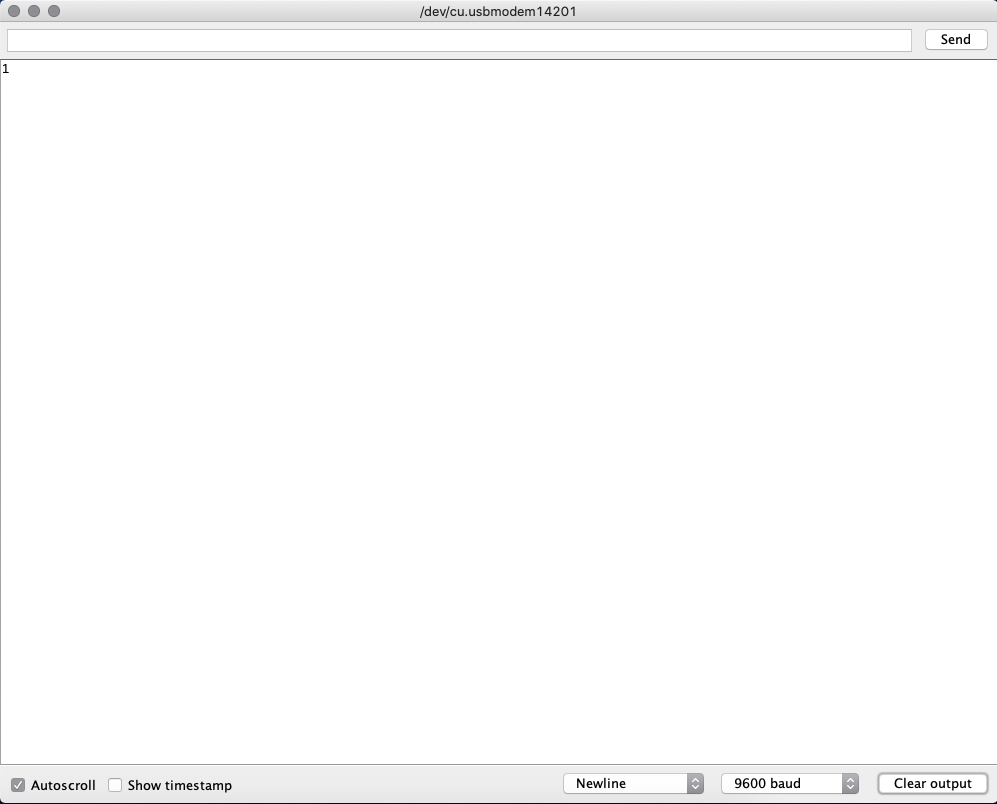
Figure 6. The results for the if statement example.
In Figure 7 and Figure 8 we can see an example of a for loop in Arduino. Within the parenthesis, the first section of the for loop input defines your iterator. The second section defines the limit of the iterator. The third section defines how to manipulate the iterator so it eventually reaches the defined limit. The for loop continues running with new values of the iterator until it reaches that defined limit. In our example we are printing out the integers from zero to nine. If we wanted to print out ten as well we would need to change our limit to include ten.
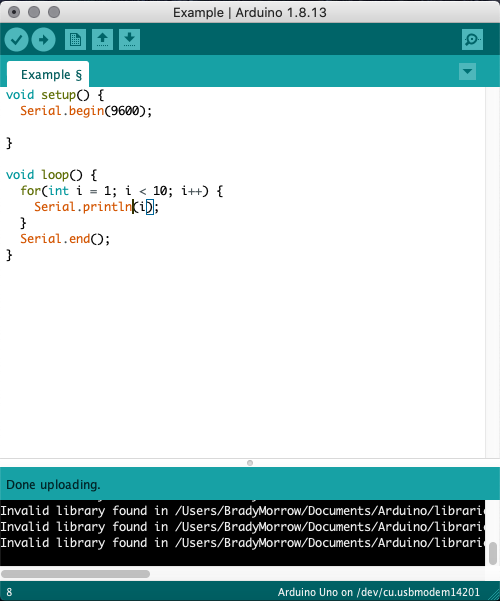
Figure 7. An example of a for loop in Arduino.
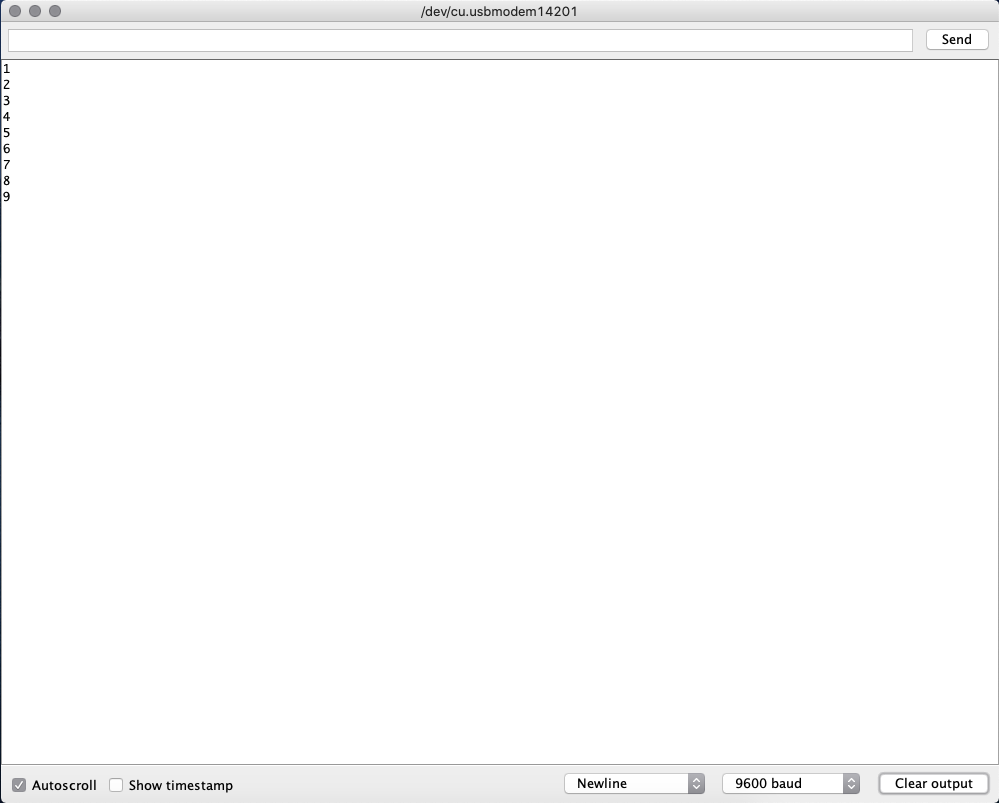
Figure 8. The results of the for loop example.
In Figure 9 and Figure 10 we can see an example of a while loop in Arduino. The while loop continues running until the condition contained within the parenthesis is false. In our example the while loop will continue running until the iterator i is greater than or equal to ten.
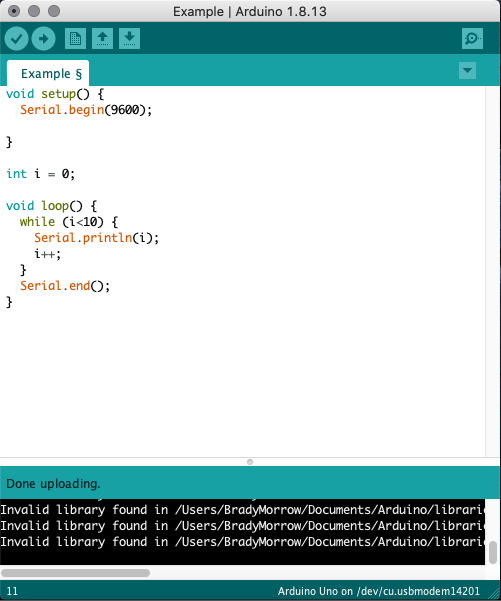
Figure 9. An example of an while loop in Arduino.
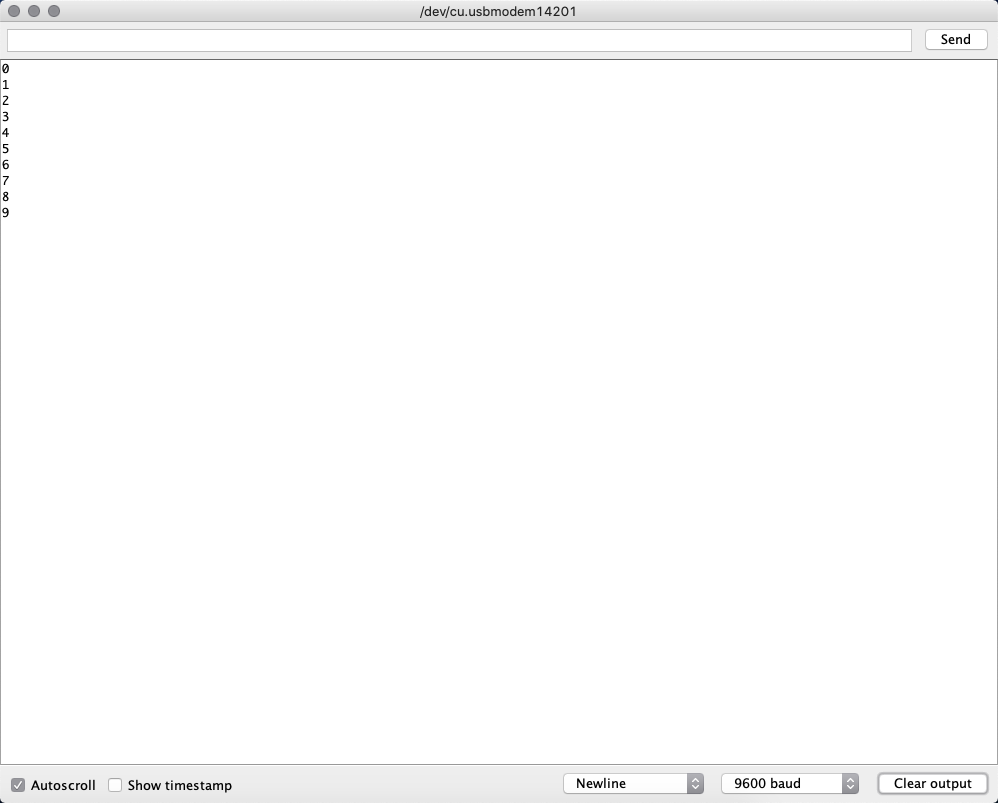
Figure 10. The results for the while loop example.
In Figure 11 and Figure 12 we can see an example of a switch statement in Arduino. The value contained within the parenthesis is the value the switch statement will check. If that value is equal to the value specified in a case then the script within that case will run. If the 'break' command is not included any script under the case statement will also run (in our example the statement "Now it is 6" would print twice).
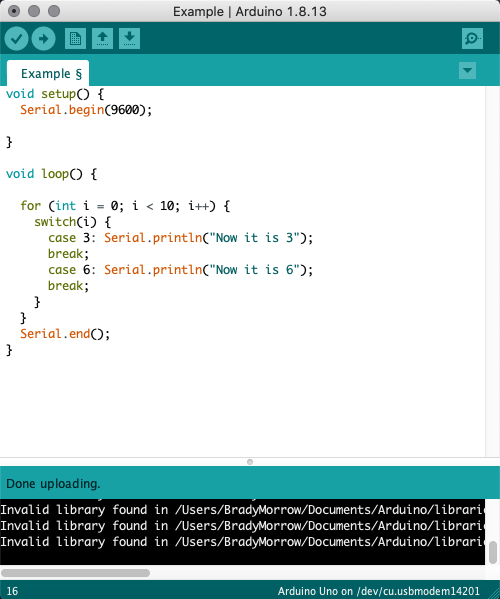
Figure 11. An example of a switch statement in Arduino.
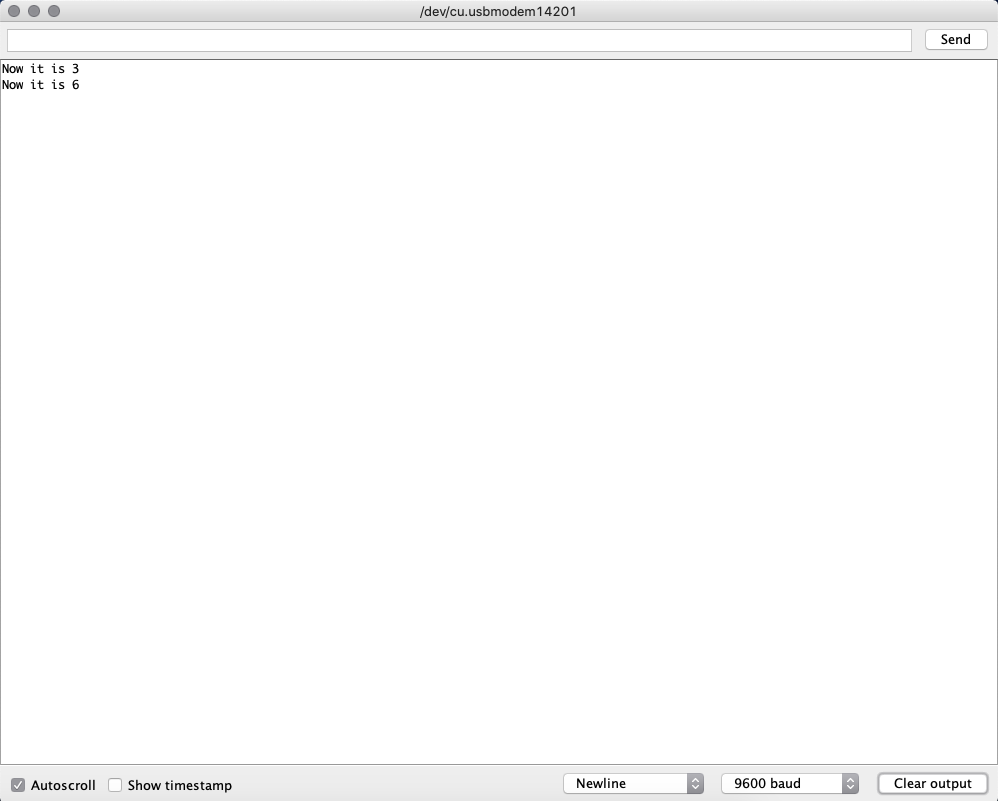
Figure 12. The results for the switch statement example.
In Figure 13 and Figure 14 we can see an example of a do-while loop in Arduino. The 'do-while' continues running until the condition contained within the parenthesis after the 'while' statement is false. In our example the do-while loop will continue running until the iterator i is greater than or equal to ten.
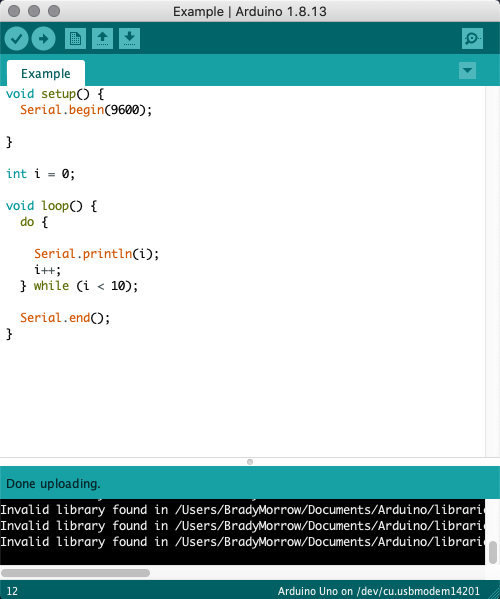
Figure 13. An example of an do-while loop in Arduino.
Figure 14. The results for the do-while loop example.
In Figure 15 and Figure 16 we can see an example of the hexadecimal format in Arduino. By entering '0x' before we define a variable we can define it as a hexadecimal number. Therefore, when we print out the example below we get "4096" because it is displaying our hexadecimal input in decimal (i.e. 1*163+ 0*162+ 0*161 = 4096)
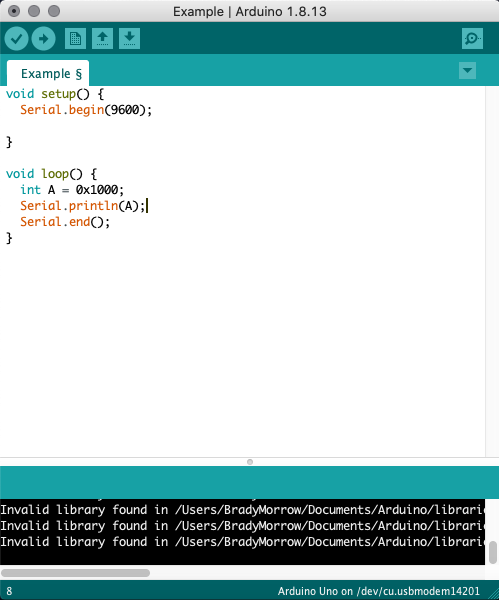
Figure 15. An example of hexadecimal format in Arduino.
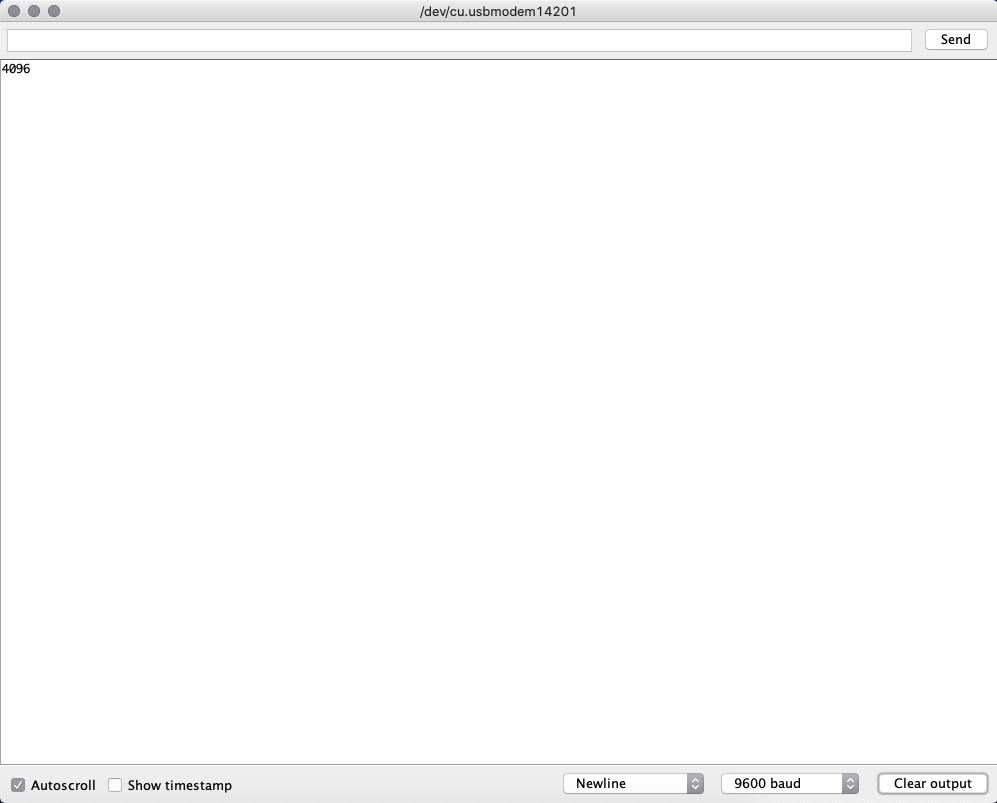
Figure 16. The results for the hexadecimal format example.
In Figure 17 and Figure 18 we can see an example of the hexadecimal format of binary and decimal numbers being printed to the serial monitor. This is done by adding the second argument 'HEX' to the 'Serial.println()' command. This formats the output to be in hexadecimal, and by padding with zeros we can display the 16-bit hexadecimal number that is equal to the provided binary and decimal numbers.
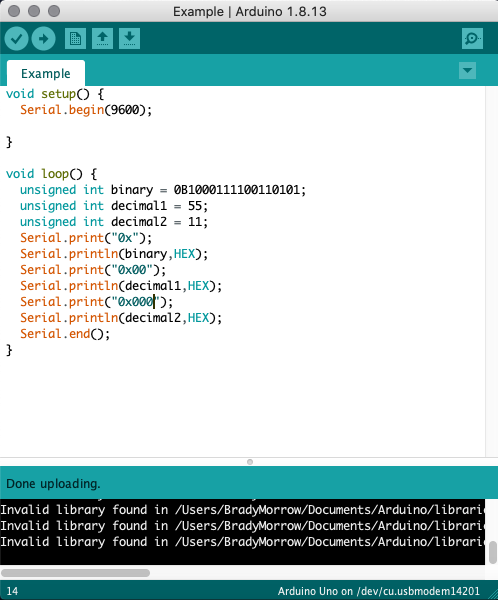
Figure 17. An example of hexadecimal formatting provided by the Serial Library.
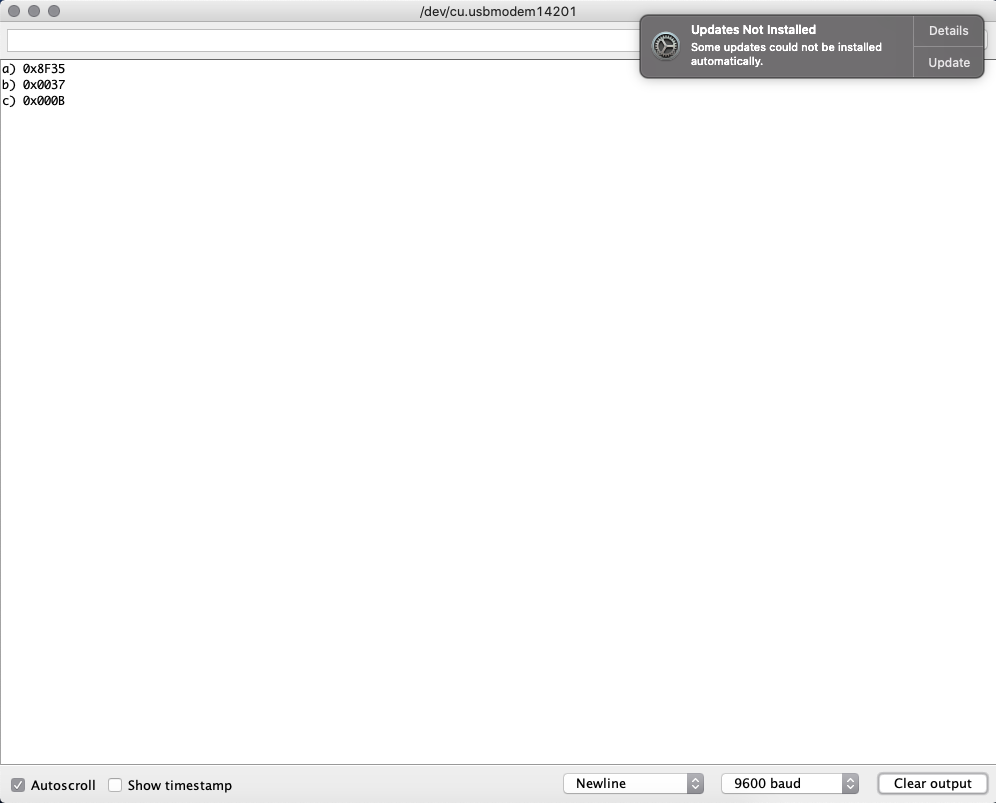
Figure 18. The results for the hexadecimal formatting provided by the Serial Library example.
In Figure 19 and Figure 20 we can see an example of the binary format of hexadecimal numbers being printed to the serial monitor. This is done by adding the second argument 'BIN' to the 'Serial.println()' command. This formats the output to be in binary, and by padding with zeros we can display the 16-bit binary number that is equal to the provided hexadecimal number.
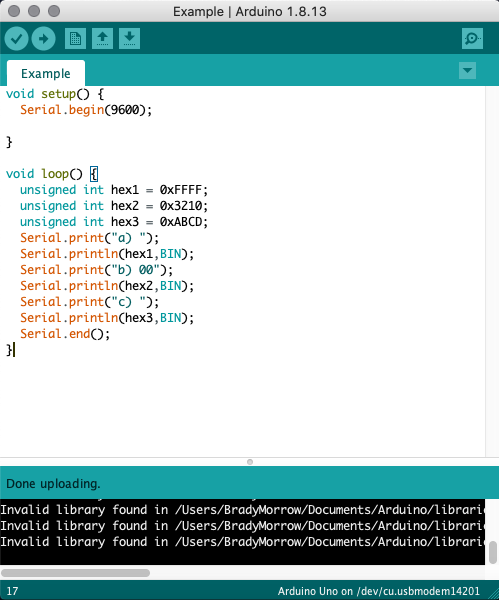
Figure 19. An example of binary formatting provided by the Serial Library.

Figure 20. The results for the binary formatting provided by the Serial Library example.
In
Figure 21 and Figure 22 we can see how bit masks can be utilized to
fetch a binary number and write it into an array one digit at a time.
This is done by defining a bit mask that has greater than or equal to
the number of digits the original binary number has. We set that bit
mask equal to one, then do a 'bit-wise and' operator and if the result
is true then we output one to our array. We output a zero if it is
false. We then left shift the bit-mask by one digit and repeat the
process. When using this method, we needed to remember that this
operation works from the back of the binary number to the front. So we
need to contain the digits in our array in reverse order to get the
actual binary number. As an added challenge we then displayed this
binary number on five LEDs in parallel, which can be seen in Figure 23.

Figure 21. An example of a bit mask in Arduino.
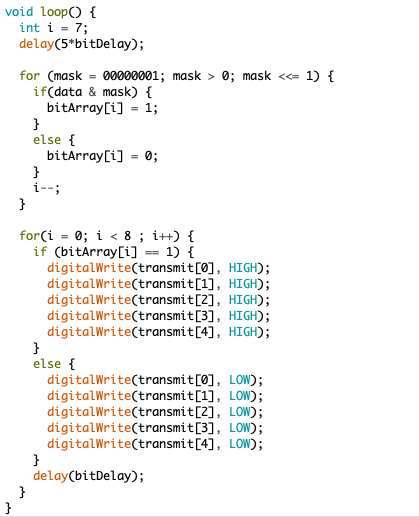
Figure 22. An example ofa bit mask in Arduino.
Figure 23. The results for the bit mask example.